---
title: Web Companion
description: Web Companion lets you inspect and validate that tags and extensions are loading on your web pages.
url: https://docs.tealium.com/iq-tag-management/tealium-tools/web-companion/
---
## Install Web Companion
Web Companion can be installed from your iQ Tag Management account or directly from the Tealium Tools browser plugin.
### From Tealium Tools
1. Install the [Tealium Tools browser plugin](https://docs.tealium.com/tealium-tools-browser-extension/).
1. In the **Home** tab, click **Web Companion**.
### Using iQ Tag Management
Use the following steps to install Web Companion:
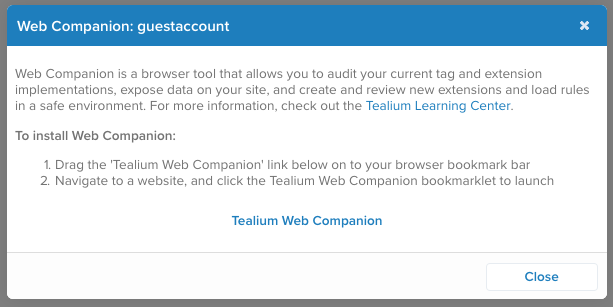
1. Click your name in the upper-right corner of TiQ console.
1. Under **Account Admin** settings, select **Web Companion** from the drop-down list.
A pop-up window containing instructions to install Web Companion displays.
1. Drag the **Tealium Web Companion** link from the message box on to your browser's bookmark bar.
### Bookmarklet
To install Web Companion as a bookmark, copy the following code into the URL of a new bookmark:
```js
javascript:(function()%7Bif(typeof%20__tealium_tagcompanion=='undefined')%7B__tealium_tagcompanion=document.createElement('SCRIPT');__tealium_tagcompanion.type='text/javascript';__tealium_tagcompanion.src='//tags.tiqcdn.com/utui//utui.tagcompanion.js?v='+Math.random();document.getElementsByTagName('head')[0].appendChild(__tealium_tagcompanion);}})();
```
## Launch Web Companion
To launch Web Companion, navigate to your site where the Universal Tag (`utag.js`) is installed, then either click the **Web Companion** link in your browser's bookmark bar or open it from the Tealium Tools browser plugin.
## Using Web Companion
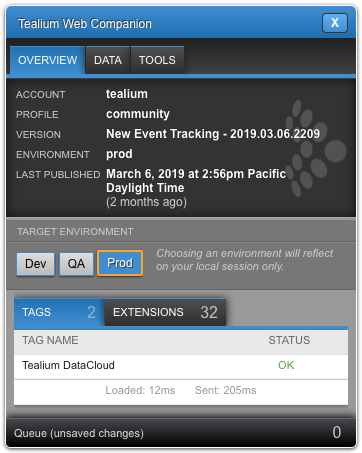
Web Companion is organized into three screens (or tabs): **Overview**, **Data**, and **Tools**. The following sections describe what is available on each tab.
### Overview tab
* **Account Information**
The current account, profile, version, and environment that the page is running appear under this tab.
* **Target Environment (Disabled by Default)**
The environment detected in the page code is outlined in orange. The currently viewed environment is highlighted in blue. To change the environment, click the target environment you want to load, then click **Refresh Page**. Learn about other [methods of switching environments]().
To enable this feature, turn on [the Web Companion setting in your publish settings]().
* **Tags & Extensions Tabs**
This tab will show which tags loaded and whether they successfully sent requests. The extensions that have successfully completed will also be displayed.
* **Timers**
The load and send times of the tag are displayed.
* **Loaded** - The time to load the `utag.js` file into the page.
* **Sent** - The time to trigger all the vendor tags on the page.
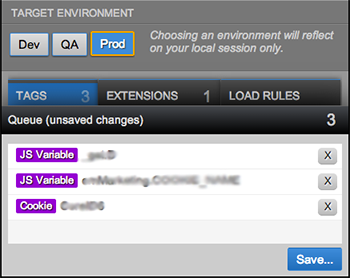
* **Queue (unsaved changes)**
Changes applied to the profile using Web Companion are queued and will not be committed until you click the **Save...** button. If you do not want to commit a change, you may also remove that change from the queue by clicking on the **X** next to the appropriate change.
### Data tab
The Data tab makes it easy to explore the available data variables on the page. These can be added to your account data layer using the **Add** buttons.
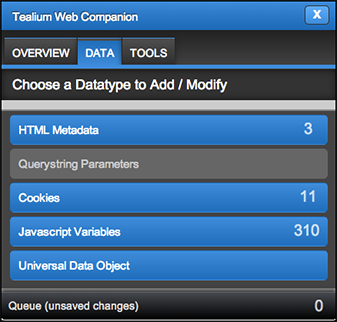
The following types of data can be viewed:
* **HTML Metadata**
Information about the web page, author, title, and other meta elements of the HTML document.
* **Querystring Parameters****
The name and value of a parameter located within the query string of the URL.
* **Cookies**
Small files that store visitor and session information.
* **JavaScript Variables**
JavaScript page variables other than `utag_data`.
* **[Universal Data Object](https://docs.tealium.com/universal-data-object/)**
#### Add a variable to your data layer
Use the following steps to add a variable to your data layer:
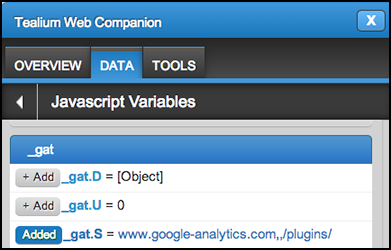
1. Click **Data tab** and select a data type.
A list of variables appears.
1. Locate the variable you want and click **+Add**.
#### Universal Data Object
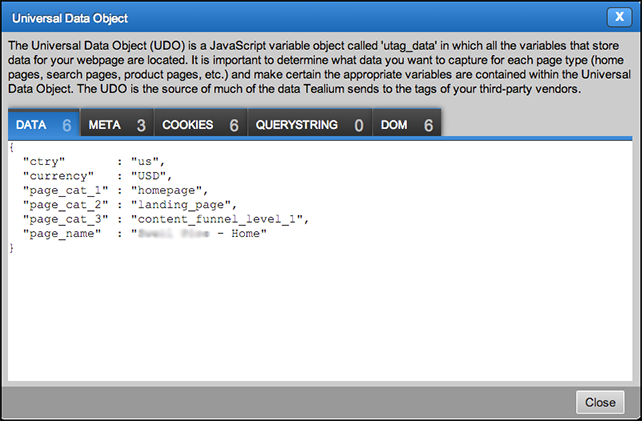
The Universal Data object (UDO), or `utag_data`, view shows the detected data object on the page. For more information, see the guide to [the data layer for websites.](https://docs.tealium.com/how-the-data-layer-works-for-websites/).
### Tools tab
The **Tools** tab offers convenience features to make it easier to add configuration to your account.
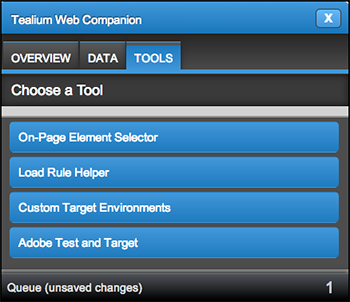
The following tools are available:
* **On-Page Element Selector**
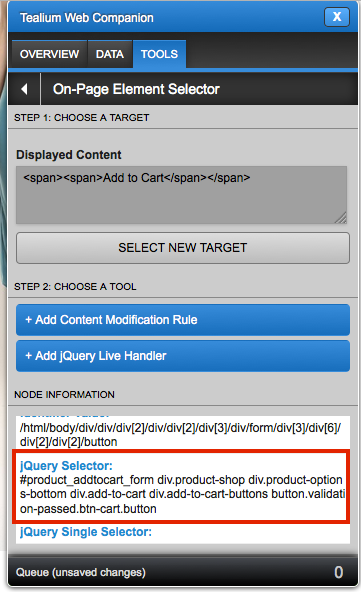
Use this simple point and click tool to select an element on the page to be used in event tracking or content modification.
* **Load Rule Helper**
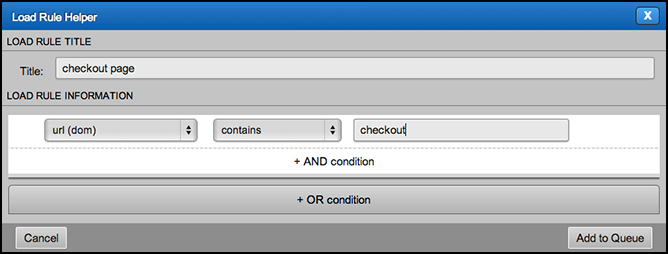
Create a load rule condition directly from the page that you want to target. Built-in page variable values will be pre-filled based on the current page.
* **Custom Target Environments**
Use this tool to switch to environments other than the default Dev, QA, and Prod.
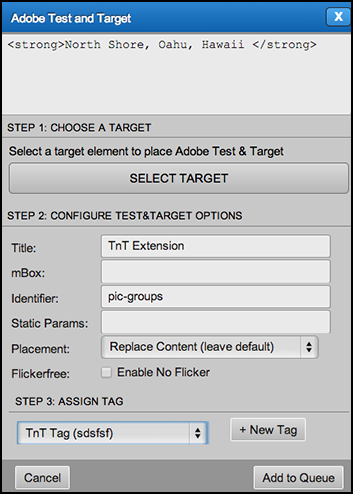
* **Adobe Test and Target**
Use this tool to assist in the configuration of the Adobe Target tag in your account.
An extension or load rule added to your account with Web Companion is not active until you return to iQ Tag Management to enable and publish them.
#### **On-Page Element Selector**
Select an element on the web page to preconfigure the Content Modification Extension or the jQuery Live Handler Extension for it. After you choose our target element, select the extension type to create and click **Queue** and save the extension to your profile.
The related DOM node information will also be displayed.
#### **Load Rule Helper**
Create a new load rule to determine the location and instant a tag should load. Click **Add to Queue** and save the load rule to your profile.
#### **Custom Target Environment**
Publish to a custom environment instead of the three default environments (Dev, QA, and Prod). Enter the name of the target environment in the text box and click **Set Environment**.

#### **Adobe Test and Target**
Add this extension to modify the content you want on the page. Configure the extension and click **Add to Queue** to save it to your profile. For more details, see [Adobe Test and Target Extension](https://docs.tealium.com/adobe-target-extension/).