---
title: イベントおよび訪問関数の例 (V3)
description: この記事では、V3イベントおよび訪問関数のサンプルコードを提供します。
url: https://docs.tealium.com/ja/server-side/functions/event-visitor-functions/v3-function-examples/
---
## HTTP GETを使用してイベントデータを送信
次の例は、クエリ文字列パラメータとしてイベントデータを含むエンドポイントにHTTP GETリクエストを行う方法を示しています。
```js
activate(({ event }) => {
console.log(JSON.stringify(event));
fetch(encodeURI(`https://webhook.site/87bb160f-475a-4258-b117-693bb2378a4d?param=${event.data}`))
.then(response => {
if (!response.ok) {
throw new Error(`Network response was not ok. Status code: ${response.status}.`);
}
return response.json();
})
.then(data => console.log('Response:', JSON.stringify(data)))
.catch(error => console.log('Error:', error.message));
})
```
## HTTP POSTを使用して訪問データを送信
次の例は、リクエストボディJSONに訪問プロファイルデータを含むエンドポイントにHTTP POSTリクエストを行う方法を示しています。
```js
activate(({ visitor }) => {
console.log(JSON.stringify(visitor));
fetch('https://webhook.site/87bb160f-475a-4258-b117-693bb2378a4d',
{
method: 'POST',
body: JSON.stringify(visitor),
headers: {
'Content-Type': 'application/json'
}
})
.then(response => {
if (!response.ok) {
throw new Error(`Network response was not ok. Status code: ${response.status}.`);
}
return response.json();
})
.then(data => console.log('Response:', JSON.stringify(data)))
.catch(error => console.log('Error:', error.message));
})
```
## HTTP GETを使用して訪問データを送信
次の例は、クエリ文字列パラメータとして訪問プロファイルデータを含むエンドポイントにHTTP GETリクエストを行う方法を示しています。
```js
activate(({ visit }) => {
console.log(JSON.stringify(visit)); // 別の訪問プロパティに注意
fetch(encodeURI(`https://webhook.site/87bb160f-475a-4258-b117-693bb2378a4d?param=${visit.creation_ts}`))
.then(response => {
if (!response.ok) {
throw new Error(`Network response was not ok. Status code: ${response.status}.`);
}
return response.json();
})
.then(data => console.log('Response:', JSON.stringify(data)))
.catch(error => console.log('Error:', error.message));
})
```
## Tealium Collect HTTP APIにイベントを送信
次の例は、データをフェッチしてTealium Collectにイベントを送信する方法を示しています。
```js
activate(async ({ event }) => {
const searchQuery = new URLSearchParams({ path: event.data.dom.pathname, query: event.data.dom.search_query });
const newEvent = await fetch(`https://getnew.event.com?${searchQuery}`)
.then(response => {
if (!response.ok) {
throw new Error(`Network response was not ok. Status code: ${response.status}.`);
}
return response.json();
});
track(newEvent, {
tealium_account: event.account,
tealium_profile: event.profile,
tealium_datasource: 'p9v81m'
})
.then(response => {
if(!response.ok){
throw new Error(`Network response was not ok. Status code: ${response.status}.`);
}
return response.text();
})
.then(data => console.log('Result : ', data))
.catch(error => console.error('Error:', error.message));
})
```
## サービスプロバイダーへの呼び出しに認証アクセストークンを使用
この例では、OAuth 2.0認証を使用してGoogle Firebase Cloud MessagingへのAPI呼び出しを行います。認証トークンは、関数にOAuth2.0認証を追加するときに作成され、`helper.getAuth()`のパラメータとして渡されます。次の図は、この例の関数のアクセストークンを示しています:
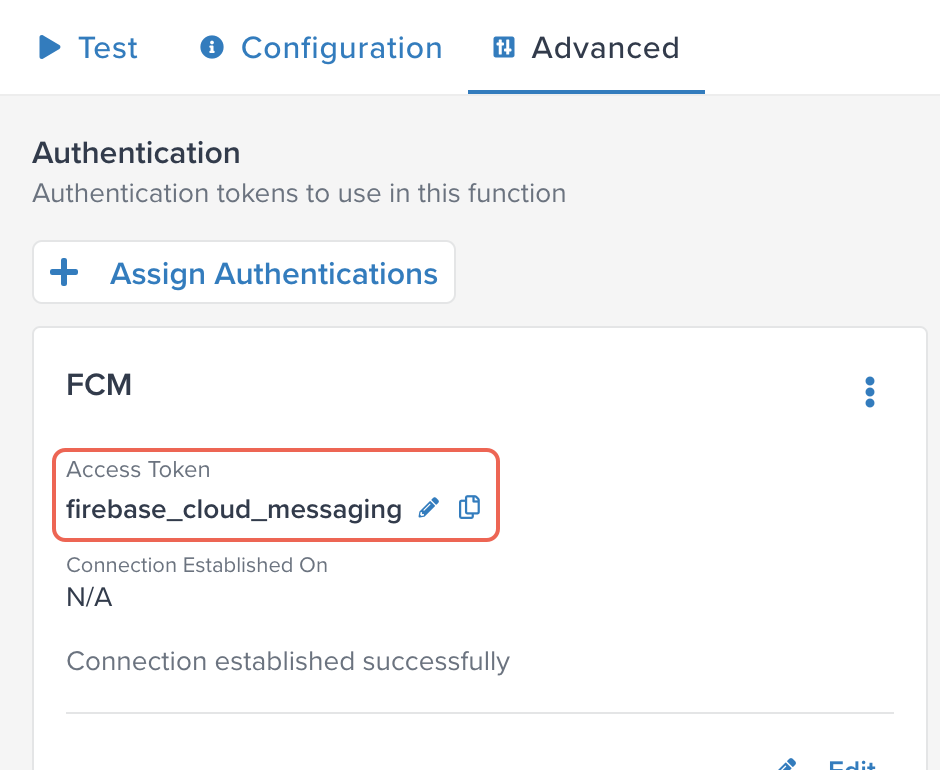
次のコード例は、firebase cloud messagingでメッセージを送信するAPI呼び出しを行う際に`helper.getAuth()`を呼び出して認証を取得する方法を示しています:
```js
activate(async ({ visitor, helper }) => {
const response = await fetch(
"https://fcm.googleapis.com/v1/projects/YOURPROJECT/messages:send",
{
method: "POST",
headers: {
'Authorization': 'Bearer '+helper.getAuth('firebase_cloud_messaging'),
'Content-Type': 'application/json'
},
body:body
}
);
});
```
```js
const response = await fetch(
"https://fcm.googleapis.com/v1/projects/YOURPROJECT/messages:send",
{
method: "POST",
headers: {
`Authorization': 'Bearer '+auth.get('firebase_cloud_messaging'),
'Content-Type': 'application/json'
},
body:body
}
);
```
認証トークンは、HTTPリクエスト内の関数でのみ参照できます。HTTPリクエストの外でトークンを参照しようとすると、トークンはUUIDプレースホルダーに置き換えられます。
## グローバル変数の値を取得
次のコード例は、`helper.getGlobalVariable()`を使用してグローバル変数`Cloud_function_URL`を取得し、このURLを使用してGoogleクラウド関数を呼び出す方法を示しています。
```js
const cfunction_url = helper.getGlobalVariable("Cloud_function_URL");
let headers = {
"content-type": "application/json",
"mute-http-exceptions": "true"
};
// ここにbodyパラメータを構成するコードを記述
const response = await fetch(cfunction_url, {
method: "POST",
headers: headers,
body: body
});
```
イベントまたは訪問関数用のグローバル変数を追加する方法については、[グローバル変数を追加する](https://docs.tealium.com/manage-global-variables/#add-a-global-variable-for-event-or-visitor-functions)を参照してください。
## 属性IDによる属性名または属性値の取得
属性名は変更されることがあり、コードが名前で属性を参照すると問題が発生することがあります。属性名が変更されても、属性IDは変更されません。属性名の変更による問題を避けるために、`event`、`visitor`、`visit`オブジェクトが提供する`getAttrNameById()`および`getAttrValueByID()`メソッドを使用して属性をIDで参照することができます。
`getAttrValueByID()`メソッドは控えめに使用することをお勧めします。この方法では、イベントまたは訪問オブジェクトのプロパティを再帰的に検索して値を見つけます。イベントまたは訪問オブジェクトが複雑な場合、この操作により関数呼び出しの計算時間が増加する可能性があります。
関数に`getAttrNameById()`または`getAttrValueByID()`を追加すると、コード補完機能が使用する属性IDを選択するのに役立ちます。たとえば、コードエディタに次のように入力すると、開き括弧を入力すると、コード補完機能が属性と関連するIDのリストを表示します: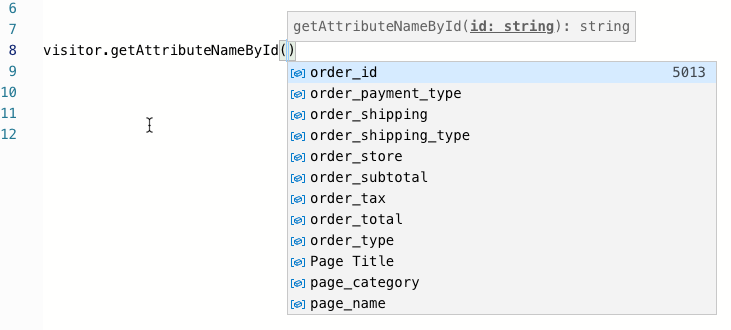
属性名の一部を入力してリストをフィルタリングすることができます。属性を選択すると、そのIDがコードの括弧の後に追加されます。