---
title: Install
description: This documents explains how to install the Tealium plugin on your WordPress site.
url: https://docs.tealium.com/platforms/wordpress/install/
---
## How it works
The Tealium WordPress plugin simplifies installation and configuration of the Tealium tag code on your site.
This plugin adds a data layer with the following parameters:
* Site name
* Site description
* Post ID
* Post date
* Post categories
* Post tags
* All post metadata, including custom fields
* Search terms
* Number of search results
* Current user role
For more information, see [Tealium WordPress Plugin page](https://wordpress.org/plugins/tealium/).
## Requirements
* Tealium iQ Tag Management account
* WordPress 3.0.1 or higher
## Install the plugin
To install the WordPress plugin, follow [the instructions for installing a WordPress plugin](https://wordpress.org/documentation/article/manage-plugins/#installing-plugins-1). The plugin name is `Tealium`.
If you upgrade this plugin from an earlier version, it will import all existing settings. We recommend that you check all settings after the upgrade to confirm that they imported correctly.
## Configure the plugin
To configure the plugin, navigate to **Settings > Tealium Settings**.
The plugin window contains 3 tabs:
### Basic Settings
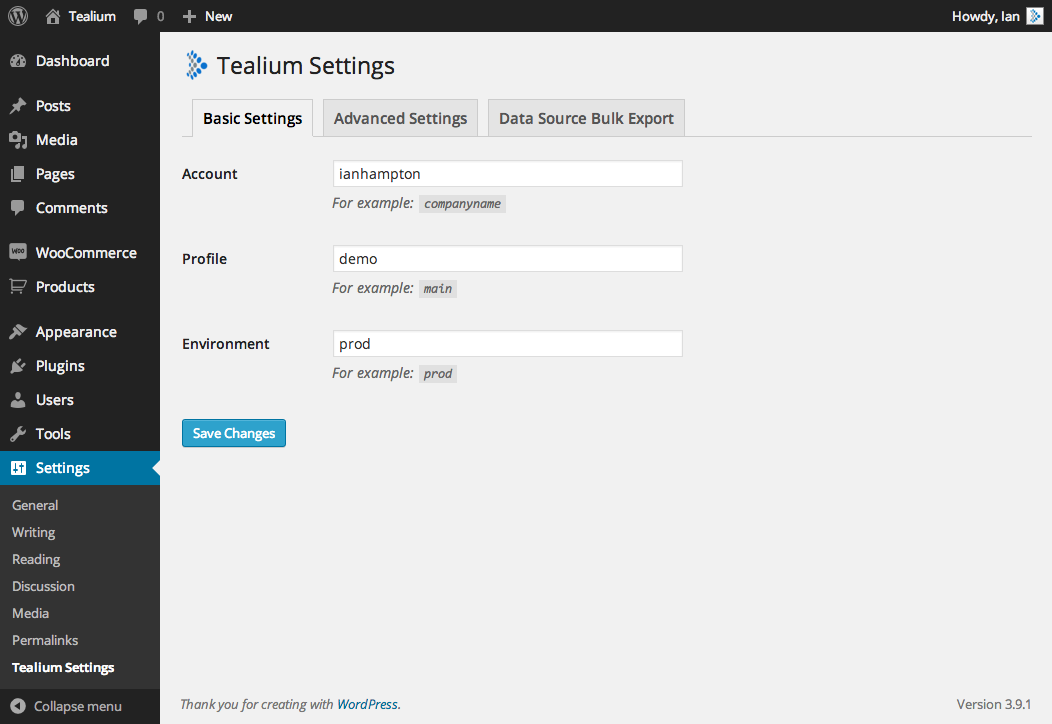
The **Basic Settings** tab lets you set the account, profile, and environment in the Tealium tag code:
* **Account**: Your account name.
* **Profile**: Your Tealium profile name.
* **Environment**: Your Tealium publishing environment (for example, `prod`, `qa`, `dev`, or the custom environment name).
When you are finished, click **Save Changes**.
### Advanced Settings
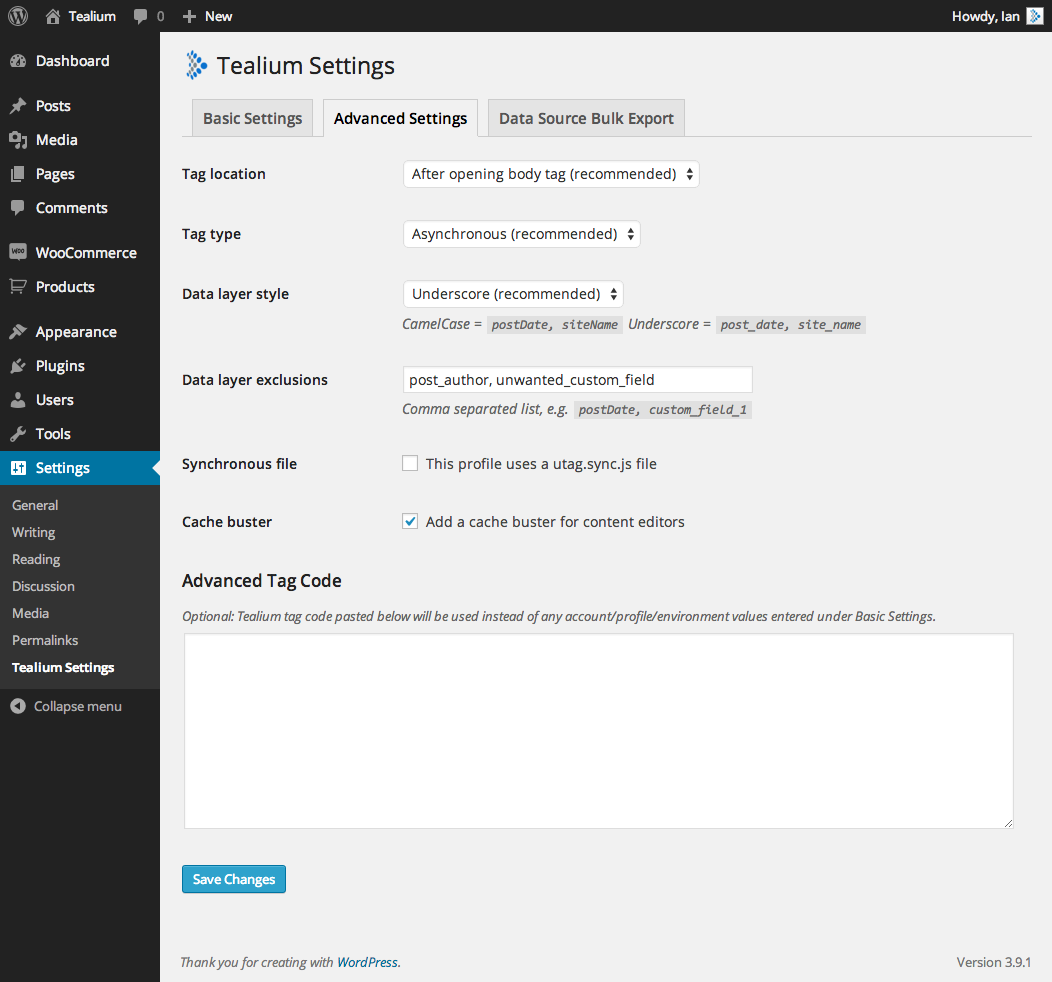
The **Advanced Settings** tab lets you configure the following settings:
* **Tag location**: Select where to insert the Tealium tag code:
* **After opening `` tag** (Recommended)
* **Header**: Before closing `` tag
* **Footer**: Before closing `` tag
* **Immediately after the opening `` tag**
* **Tag type**: Select whether to use an asynchronous or a synchronous tag.
* **Data layer style**: Select whether to use underscores (for example, `post_data`) or camelcase (for example, `postData`) for data layer variables.
* **Data layer exclusions**: Enter a comma-separated list of variable names to exclude from the data layer.
* **Exclude meta data**: Select the checkbox to remove all WordPress metadata from the data layer.
* **Synchronous file**: Select the checkbox to insert a `utag.sync.js` file into the WordPress site.
* **Cache buster**: Select the checkbox to add a cache buster for authenticated content editors.
Cache busters can cause debugging issues because break points are lost between page reloads.
* **DNS prefetching**: Select the checkbox to enable DNS prefetching. The browser attempts to resolve domain names of resources before the user clicks on any links.
* **EU only**: Select the checkbox to use only EU-based CDN nodes.
* **Custom namespace**: Enter a custom namespace to use for the data layer instead of the default `utag_data`.
If you want to use your own Tealium tag for the WordPress site, enter the custom code in the **Advanced Tag Code** text box and it will replace the tag that the plugin generated.
When you are finished, click **Save Changes**.
### Variable Bulk Export
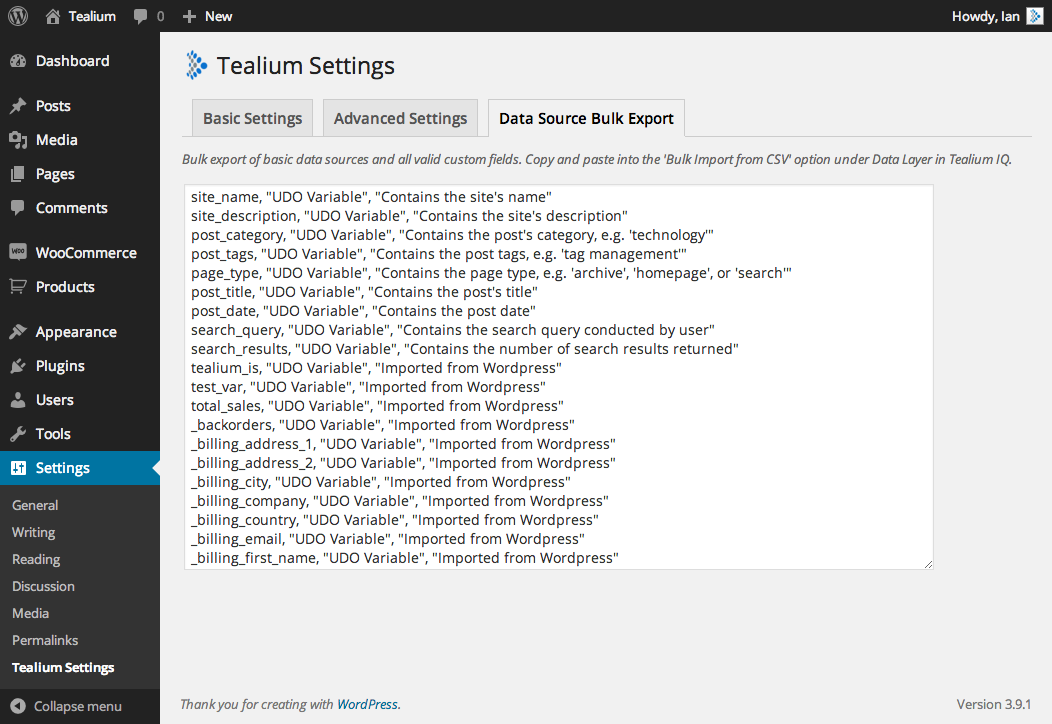
The **Variable Bulk Export** tab lists the basic WordPress data sources, defined custom fields, and post metadata in CSV format. Use this information to diagnose any issues you have with the plugin or your site.