---
title: Manage dashboards
description: This article provides information about generating dashboards and updating the templates for dashboards.
url: https://docs.tealium.com/server-side/insights/manage-dashboards/
---
To return to the **Dashboards** screen, click the Tealium logo.
## Generate a dashboard from a template
Use the following steps to generate a dashboard from a template:
1. Go to **Analyze > Insights > Templates**.
1. For the selected dashboard, click **View Details**.
1. Click **Generate Dashboard**.
1. When the dashboard has been generated, the following message is displayed:

1. To see the generated dashboard, go to the **Dashboards** page.
## View a generated dashboard
Use the following steps to view a dashboard:
1. Go to **Analyze > Insights > Dashboards**.
1. Click on a dashboard.
## Delete a dashboard
Use the following steps to delete a dashboard:
1. Go to **Analyze > Insights > Dashboards**.
1. Click the menu for the dashboard and select **Delete**.
1. In the confirmation dialog, click **Delete**.
When the dash board has been deleted, the following message is displayed:
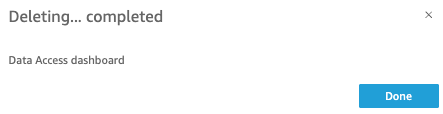
1. Click **Done**.
## Delete a predefined dashboard and its resources
To delete a predefined dashboard and the associated analysis and datasets, use the following steps:
1. Go to **Analyze > Insights > Templates**.
1. For the template of the dashboard you want to delete, click **View Details**.
1. If you are using the associated datasets in custom dashboards, deselect **Do you also want to delete datasets used for this dashboard?**.
1. Click **Delete**.
The template will not be deleted. You can regenerate the dashboard later, if needed. When the dashboard and its resources have been deleted, a success message is displayed.
## Schedule email for a dashboard
Use the following steps to email a PDF of a dashboard:
1. Go to **Analyze > Insights > Dashboards**.
1. Select a dashboard.
1. Click the **Scheduling** icon and select **Schedules**.
1. Enter a name for the schedule.
1. Click **Dates** and configure the frequency, start date and time, and time zone.
1. Click **Email** and enter email recipients.
Enter the email header and body text.
1. If you are sending a link to download the PDF, deselect **Include sheet in email body**.
1. Select **Download link** or **File attachment**.
1. Click **SAVE**.
## Share a custom dashboard
Sharing custom dashboards lets you grant users within your profile access to your custom dashboard. Only authors can share custom dashboards. Write access is available for authors, and read access is available to both authors and readers.
To give users in your profile access to your custom dashboard, choose one of the following options based on your sharing needs:
In these options, `{PROFILE}` represents your profile name. For example, if your profile name is `main-v2`, replace `{PROFILE}` with `main_v2`.
* `{PROFILE}__READER`: Share with all users in the profile (Read Only).
* `{PROFILE}`: Share with all users in the profile.
* `{PROFILE}__{EMAIL}`: Share with specific users in the profile.
### Initial steps
Follow these initial steps to share your custom dashboard:
1. Go to **Analyze > Insights > Dashboards**.
1. Select a dashboard.
1. Click the Share icon and click **Share dashboard**.
1. Continue with one of the options below.
### Share with all users in the profile (Read Only)
1. In the search bar, type `{PROFILE}__READER`. Replace `{PROFILE}` with your profile name. For example, if your profile name is `main-v2`, type `main_v2__READER`.
1. Click **Add** and select **Viewer**. The dashboard will be available to all users in the profile as read only.
### Share with all users in the profile
1. In the search bar, type `{PROFILE}`. Replace `{PROFILE}` with your profile name. For example, if your profile name is `main-v2`, type `main_v2`.
1. Click **Add** and select the permission:
1. **Co-owner**: All authors will have write access and readers will have read access.
1. **Viewer**. All users in the profile will have read only access to the dashboard.
### Share with specific users in the profile
1. In the search bar, type the user’s email to share with a specific user.
User emails are displayed in the format `{PROFILE}__{EMAIL}`, where `{PROFILE}` is your profile name and `{EMAIL}` is the user email you want to share the dashboard with.
1. Click **Add** and select the permission **Co-owner** or **Viewer**.
### Update sharing permissions (Author)
To update the permission for an Author:
1. Go to **Analyze > Insights > Dashboards**.
1. Select a dashboard.
1. Click the **Share** icon and click **Share dashboard**.
1. Go to the **Users & Groups** tab.
1. Find the specific author. If the user is not listed, you may need to share the dashboard with the user.
1. Click the **Permission** drop-down list and select the permission you want.
### Stop sharing a dashboard
To stop sharing a dashboard:
1. Go to **Analyze > Insights > Dashboards**.
1. Select a dashboard.
1. Click the **Share** icon and click **Share dashboard**.
1. Go to the **Users & Groups** tab.
1. Click the **Delete** icon beside the user you want to stop sharing the dashboard with.
## Export a custom dashboard
If you have created custom dashboards, you may want to make them available in multiple profiles. Instead of manually creating each dashboard in each profile, you can export a dashboard to a JSON file then import the JSON file into other profiles.
To export a custom dashboard, use the following steps:
1. Go to **Analyze > Insights > Dashboards**.
1. Click **Export**.
1. Click **Export** for the dashboard you want to export.
When the JSON file is ready, a success message is displayed.
## Import a custom dashboard
After you have exported a custom dashboard, you can import the JSON file into other profiles, as follows:
1. Switch to the profile in which you want to add the dashboard.
1. Go to **Analyze > Insights > Dashboards**.
1. Click **Import**.
1. Enter the **Dashboard Name**.
1. Click **Upload JSON File** and select the JSON file you want to upload, then click **Next**.
1. Map each dataset from the JSON file to a dataset in this profile, then click **Next**.
1. For each dataset, map each source attribute (from the JSON file) to an attribute in this profile.
1. Click **Generate**.
1. When the import is completed, the **Dashboard Imported** message is displayed.
## Set up threshold alerts
Threshold alerts send an email notification when a dashboard visual crosses a defined value. For setup instructions, examples, and filter behavior, see [Threshold alerts](https://docs.tealium.com/threshold-alerts/).