---
title: About testing
description: This article contains notes about the publication process on the server side of the Tealium platform.
url: https://docs.tealium.com/server-side/save-publish/test/
---
The server-side configuration does not have a **Dev** or **QA** environment, so testing your changes before releasing to the live environment requires an extra step. With the power of test flags, badges, and rules, you can easily restrict new functionality to a test user which can be configured in several ways.
## Test events
There are a number of ways that you can separate live events from your test events. The goal is to include this test identifier with all relevant test data events.
### Event attribute enrichment
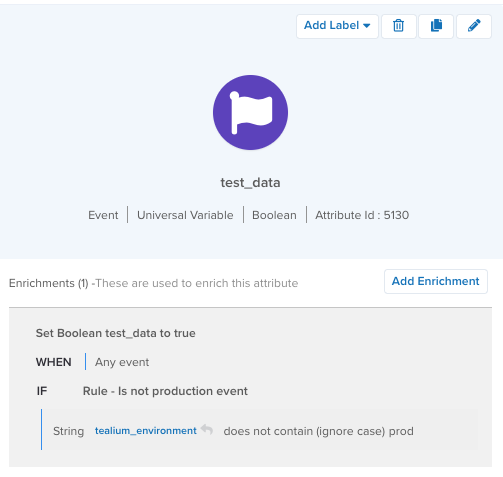
You can set up an event boolean attribute `test_data` with enrichments based on an existing event attribute.
### Extension
You can use an extension to set a test flag before the data is passed to the server-side.
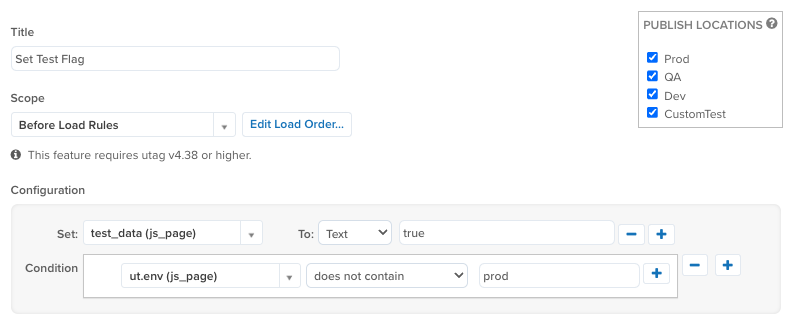
Use this value to leverage existing data or a cookie value you’ve set through a query string.
### Website test flag
You can set a test flag within the code of your **QA** or **Dev** site as part of the data layer:
```html
```
### File import
To test with file import, add a column for `test_data` where test rows have the value `true`. Map the `test_data` column to the `test_data` event attribute you created.
For live file import files, if you omit the column from the file, it still processes and nothing is flagged as test data.
### API call
If you are submitting events through the API, append `test_data=true` to your call and no additional enrichments are needed.
```
curl -i "https://collect.tealiumiq.com/event?tealium_account=YOURACCOUNT&tealium_profile-YOURPROFILE&tealium_datasource-ABCDEF&tealium_event=user_login&customer_email=user@example.com&test_data=true"
```
If you use the Collect API and the `POST` method, include a `test_data` attribute in the JSON payload with a value of `true`:
```json
{
"test_data" : true
}
```
### Test event feed
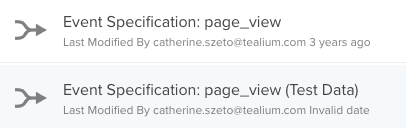
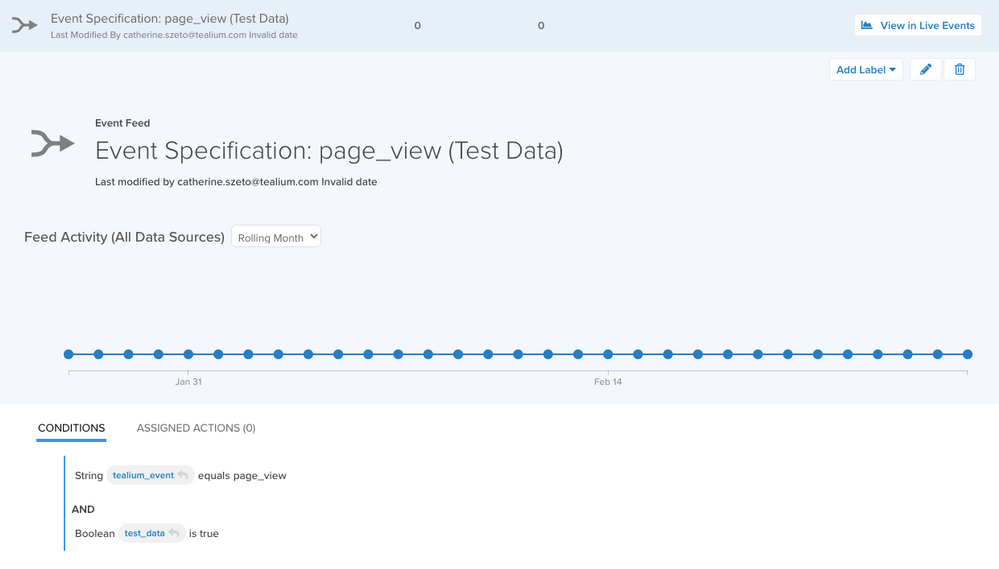
After you have a test attribute that identifies test events, create a duplicate of each event feed and the `test_data` flag:
### Test connectors
We recommend that you create separate connectors for test feeds.
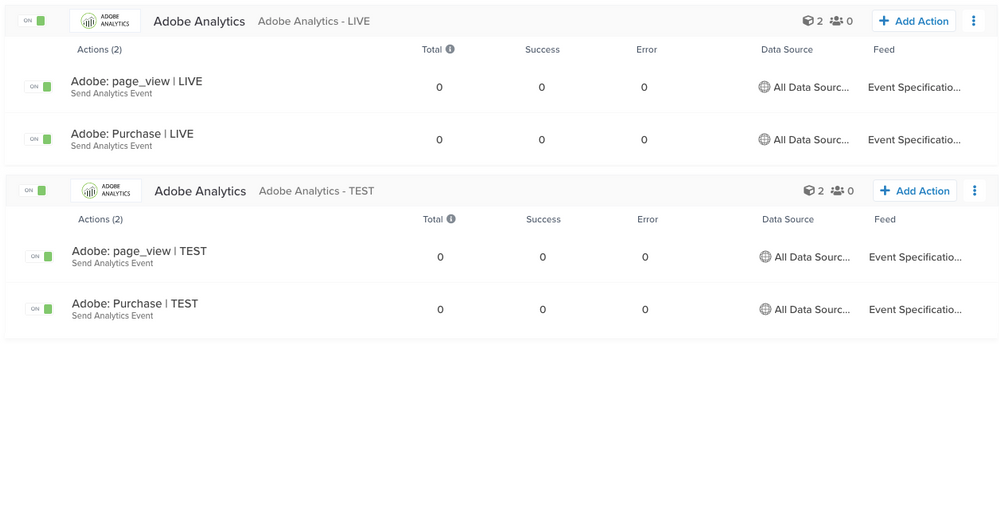
We also recommend that you set the title of a test connector with the following:
* Event type: The event feed used as the source of the action.
* Version: Use `Test` or `Live` to indicate the test status.
Example: `Test Cart Add Events`
If you use this method, ensure that all connector actions are updated when you are looking to do make changes.
### Update connector and actions
If you want to update a connector and its actions, use the following steps:
1. Duplicate the live connector you want to make changes to.
1. Edit the title from `Live` to `Test`.
1. For each of the connector actions, update the source to point to the matching `Test Data` event feed.
1. Save and publish.
From here, make your changes in this new test connector until it's working as expected.
### Publish updates
After testing is complete and you are ready to deploy your changes, follow these steps to promote your test connector to the live environment:
1. Delete the connector that's in the live environment.
1. Update the test connector:
* Rename it to the `Live version.
* Remove the test flag.
* Switch all connector action sources to use the non-test event feeds.
1. Save and publish.
### Use notes
We highly recommend using the **Notes** field for each connector to provide additional information, such as:
* Who’s making the changes.
* What is the purpose and reason for the change.
* What is being added or removed.
## Test visitors and audiences
### Configure a badge for testing
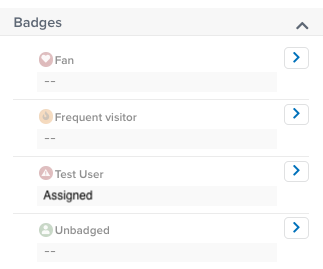
For this example, we use a badge attribute called `Test User`. This badge uses a rule that evaluates on any event when a query string parameter contains `tealiumtest=true`. This badge uses a second rule to unassign it from a visitor when the query string parameter contains `tealiumtest=false`.
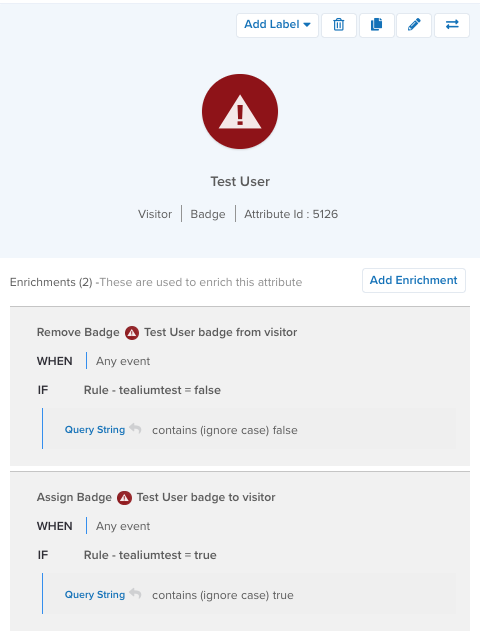
The badge and rule condition can be customized, but they should be unique so that regular site visitors do not get this badge applied to them.
### Configure an attribute for testing
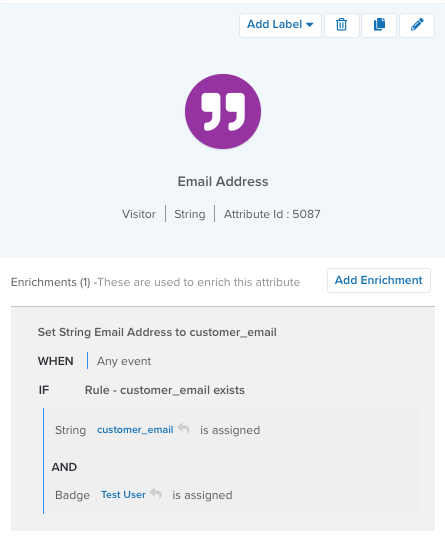
To test a specific attribute, for example a string, include a specific rule that the `Test User` badge is assigned.
### Configure an audience for testing
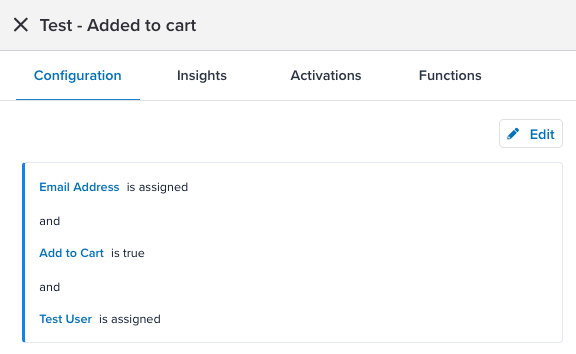
If you are testing a specific audience, add a condition that the `Test User` badge has to be assigned. This prevents all other users from joining that audience and lets you test any connector actions dependent on that specific audience.
### Test
When starting your trace session, you must satisfy the test condition used in your test configuration. In this example, navigate to your site and append the query string parameter and value used in the rule.
For example: `http://www.example.com/?tealium_test=true`
After your trace starts, you will see the **Test User** badge assigned.
Testing this way before publishing to the live environment helps you validate your configuration, reduces errors, and increases the accuracy of your strategy.