Manage CloudStream segments
This article provides information about how to manage CloudStream segments.
How it works
A CloudStream segment defines a set of records from a connected data cloud, such as Snowflake or Databricks, based on configurable conditions applied to attributes in that data source.
When activated, the segment queries the data cloud and retrieves only those records matching the defined criteria. Segment data is not persisted or stored in Tealium systems. After retrieving the data and sending it to configured connectors, Tealium discards it.
View segments
Go to CloudStream > Segments to view the Segments Overview page.
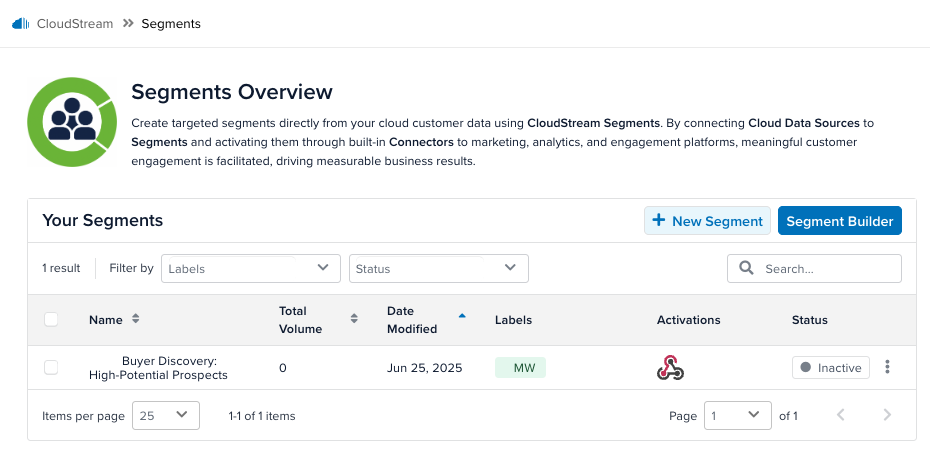
The Segments Overview table lists the following information about each segment:
- Name
- Total Processed: The total number of incoming data records that match the segment conditions, where at least one action is configured and enabled.
- Date Modified
- Labels
- Activations
- Status: An active segment requires at least one working chain, with an active data source and an active connector action.
The more actions button lets you add labels to each segment or delete the segment.
You can select checkboxes next to each action and perform bulk actions to edit the labels on the segments or delete them.
Add a segment
Use one of two methods to build a segment:
- Follow the steps in the Segment Builder.
- Manually build the segment.
If you see the error, Segment creation requires Cloud Stream Connectors to be enabled in Settings, use the following steps to enable connectors on your profile:
- Go to Admin menu > Server-Side Settings > CloudStream Connectors.
- Toggle on Activate CloudStream Connectors.
- Click Save.
Segment Builder
Click Segment Builder. The Data Source Configuration step appears.
Data source configuration
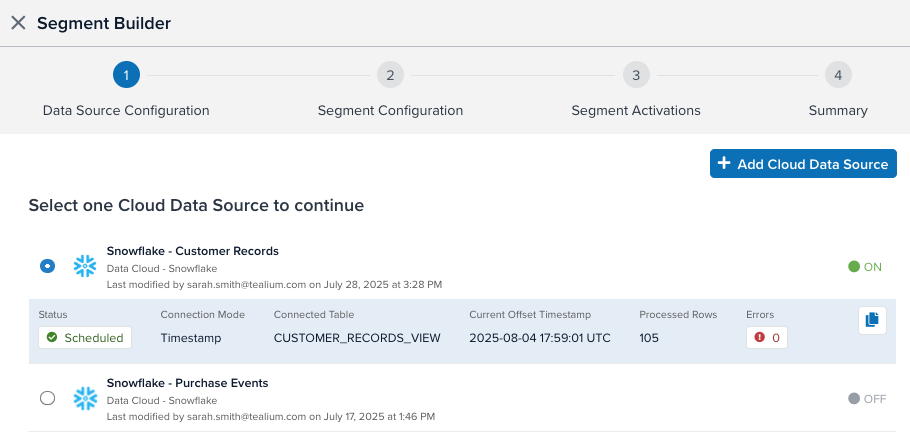
Select a cloud data source for the segment.
If you do not have any data sources configured, click + Add Cloud Data Source. For more information about configuring a cloud data source, see Manage CloudStream data sources.
To duplicate a data source, select the data source and click Duplicate. Then enter a name for the new copy of the data source.
Each data source can connect to a single view or table at a time.
- If you need to connect to multiple tables or views from a data cloud, configure a separate data source for each table or view.
- If you want to combine data from multiple tables into data records that CloudStream can read in a segment, you need to join the tables or views at the data cloud into a single table or view and then use that joined table as the segment data source.
When you have finished setting up your data sources, click Next.
Segment configuration
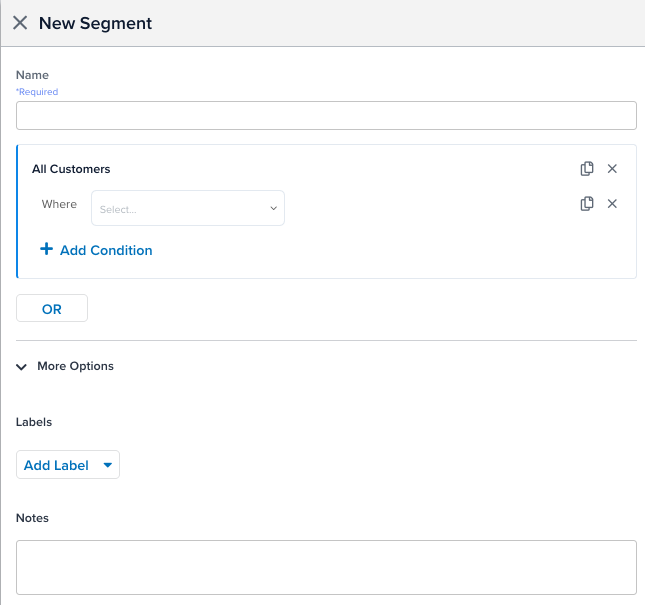
Use the following steps to configure the segment:
- Enter a Name for the segment.
- To add a condition, select an attribute, an operator, and a value.
For operators that specify a time frame, select a value and the time frame. - To add another condition, click + Add Condition.
- If you want to add labels or enter any notes about the segment, click More Options and make your changes.
Segment activations

To activate a segment, select and configure a connector, as follows:
-
Click + Add Activation. The Connector Marketplace is displayed.
If you do not see any connectors listed, go to Admin menu > Server-Side Settings > CloudStream Connectors, set Activate CloudStream Connectors to
On, and click Save. -
Select the connector and click Continue.
-
Select the Data Source and click Continue. The Segment automatically populates with the segment you are configuring.
Each configured connector action can only use data from one data source. If you want to activate data from additional data sources, configure a separate connector action for each data source.
-
Configure the connector as needed and click Continue.
-
Name and configure the action as needed and click Continue.
For more information, see Add a connector and refer to the setup guide for the selected connector.
The Segment Activations table lists the actions that you have configured.
Click Next.
Summary
The Summary page shows a diagram with the flow of data from the data sources to the segment you build and into the activations.
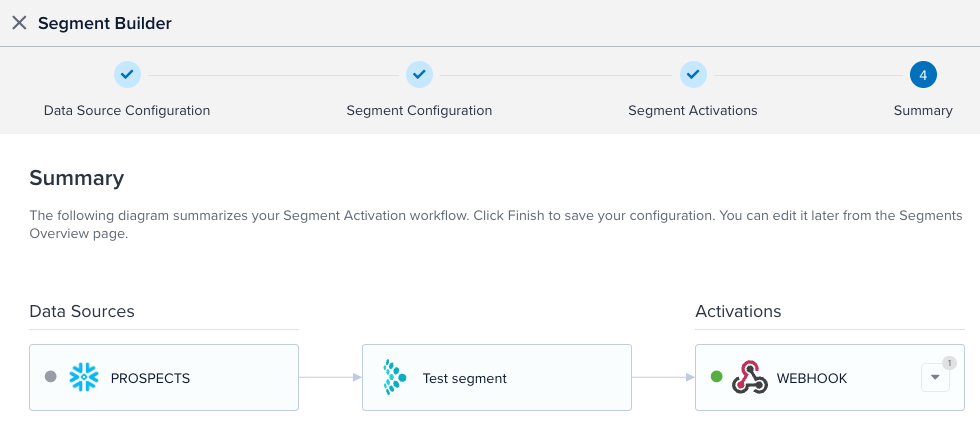
Click the more arrow to see the individual actions for each activation.
Click Save, and then save and publish your profile.
Manual builder
To build a segment manually:
- Click + New Segment to manually build a segment.
- Enter a Name for the segment.
- To add a condition, select an attribute, an operator, and a value.
For operators that specify a time frame, select a value and the time frame. - To add another condition, click + Add Condition.
- If you want to add labels or enter any notes about the segment, click More Options and make your changes.
- Click Done.
You will need to manually add a data source, configure it, add an activation, and configure the action.
Manage segments
Click a segment to manage it.
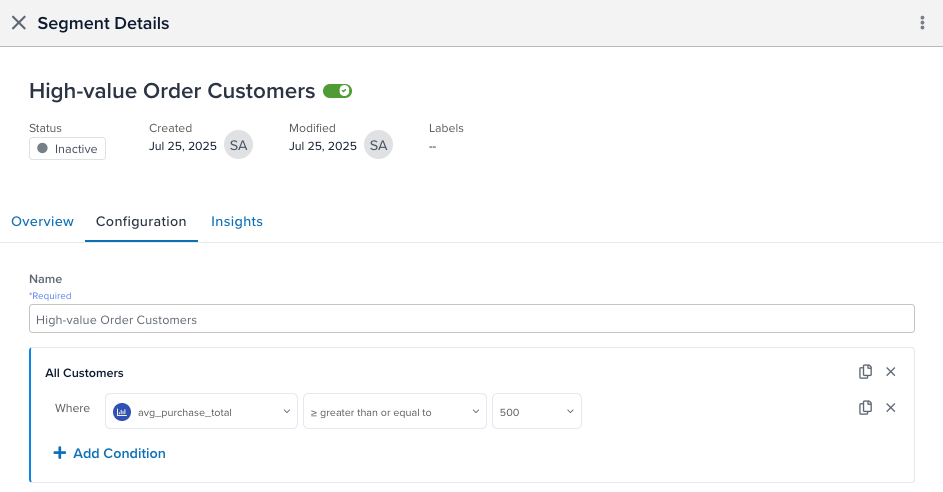
The Segment Details page lists the following information:
- Created: Who created the segment and when.
- Modified: Who last modified the segment and when.
- Labels: Any labels on the segment.
Click on any of the following three tabs:
Overview
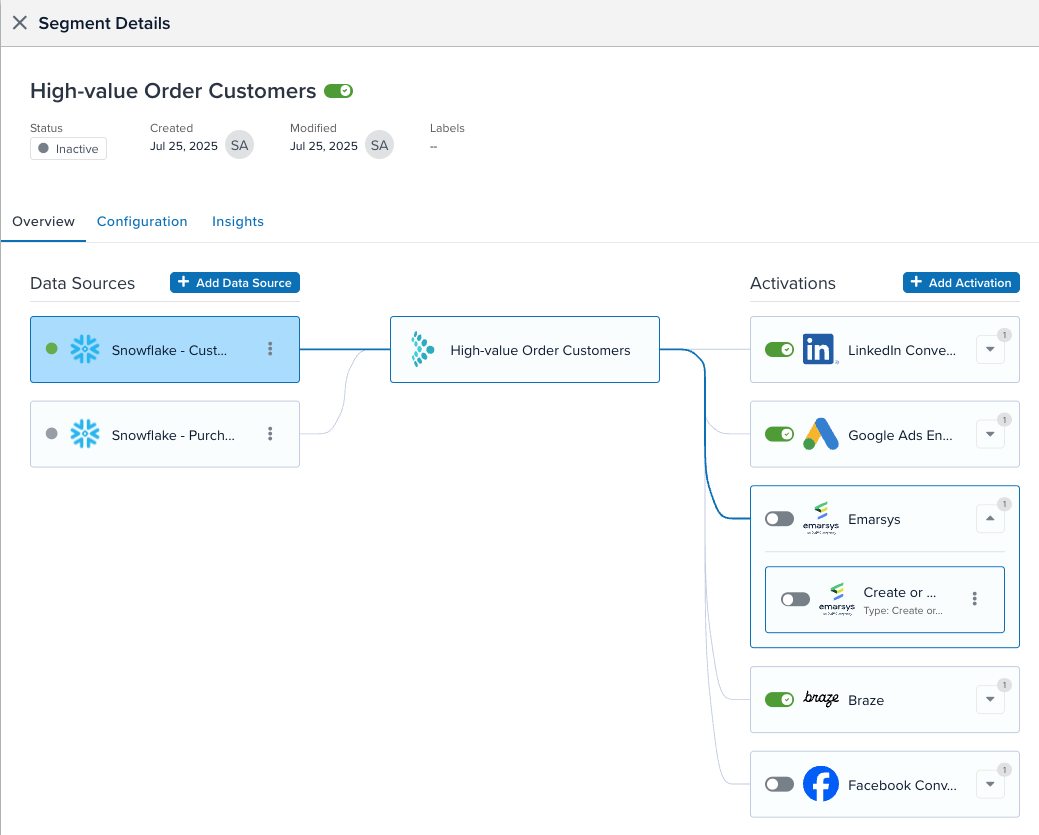
The Overview window displays a data flow diagram which lists the data sources, the segments, and the activations. Click a data source to view the path from that data source through the segment to its connected activations:
Manage data sources and activations
You can add or edit data sources for the segment, and you can add or edit activations on the segment.
- After you add and configure a new data source, it appears as an Unused Data Source.
- Click Configuration to add conditions to the segment to query the new data source attributes.
- Click Add Activation to add an activation for the connector.
- Select and configure the action.
- The data flow diagram updates to include the new data source and the actions.
Use the toggle in an activation to enable and disable it, or use the toggle next to the segment name to enable and disable all of its activations.
Configuration
The Configuration window lets you edit the configuration of the segment. Update the conditions for the segment and click Done.
Insights
The Insights window displays a summary and chart of the connector actions for the time range that you select:
- Matched: The number of imported records from any data source meeting the segment conditions, regardless of segment activity.
- Processed: The number of imported records from any data source meeting the active segment conditions and triggering an enabled action.
This page was last updated: October 22, 2025