SSO configuration with Azure IdP
This article describes how to configure Azure to access and download a metadata file for creating a new Tealium SSO connection.
After you download the Tealium metadata file in Set up your SSO: Step 1, complete the following steps to configure Azure for use with Tealium SSO:
- Log in to your Azure account and go to Identity > Applications > Enterprise applications > All applications.
- Click + New Application.
- Click + Create your own application.
- Enter an application name. We recommend giving your application a name that lets others know what it was created for. For example,
tealium,tealium-iq-user-federation, etc.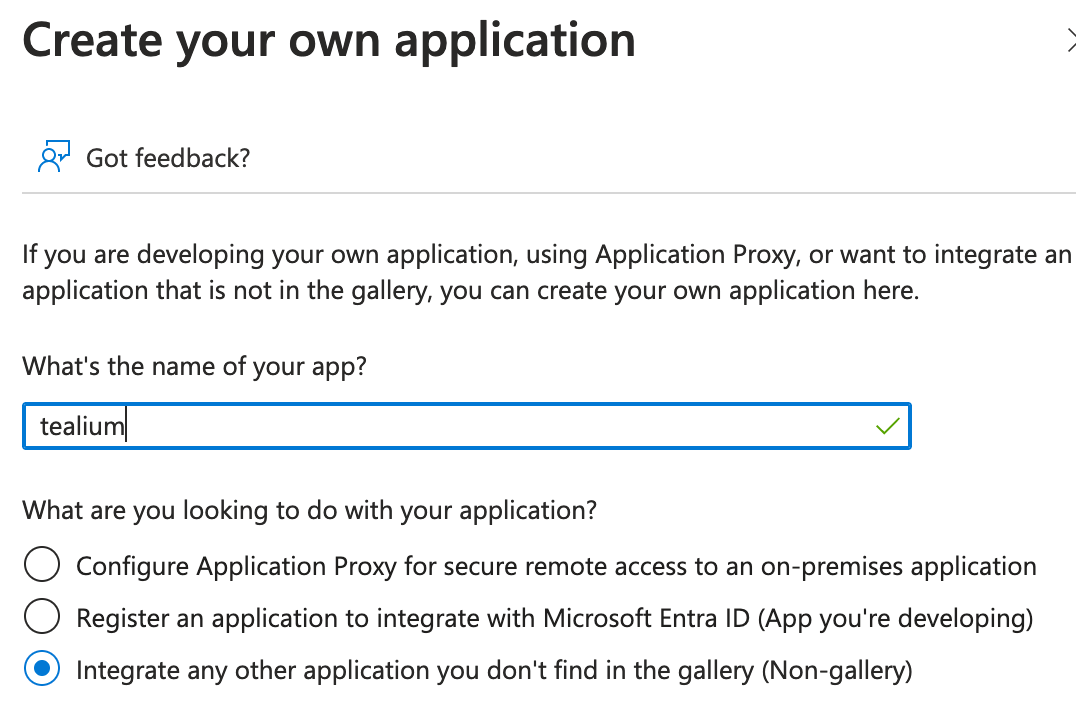
- Ensure that Integrate any other application you don’t find in the gallery (Non-gallery) is selected.
- Click Create.
- Go to Manage > Single sign-on.
- Select the SAML sign-on method.
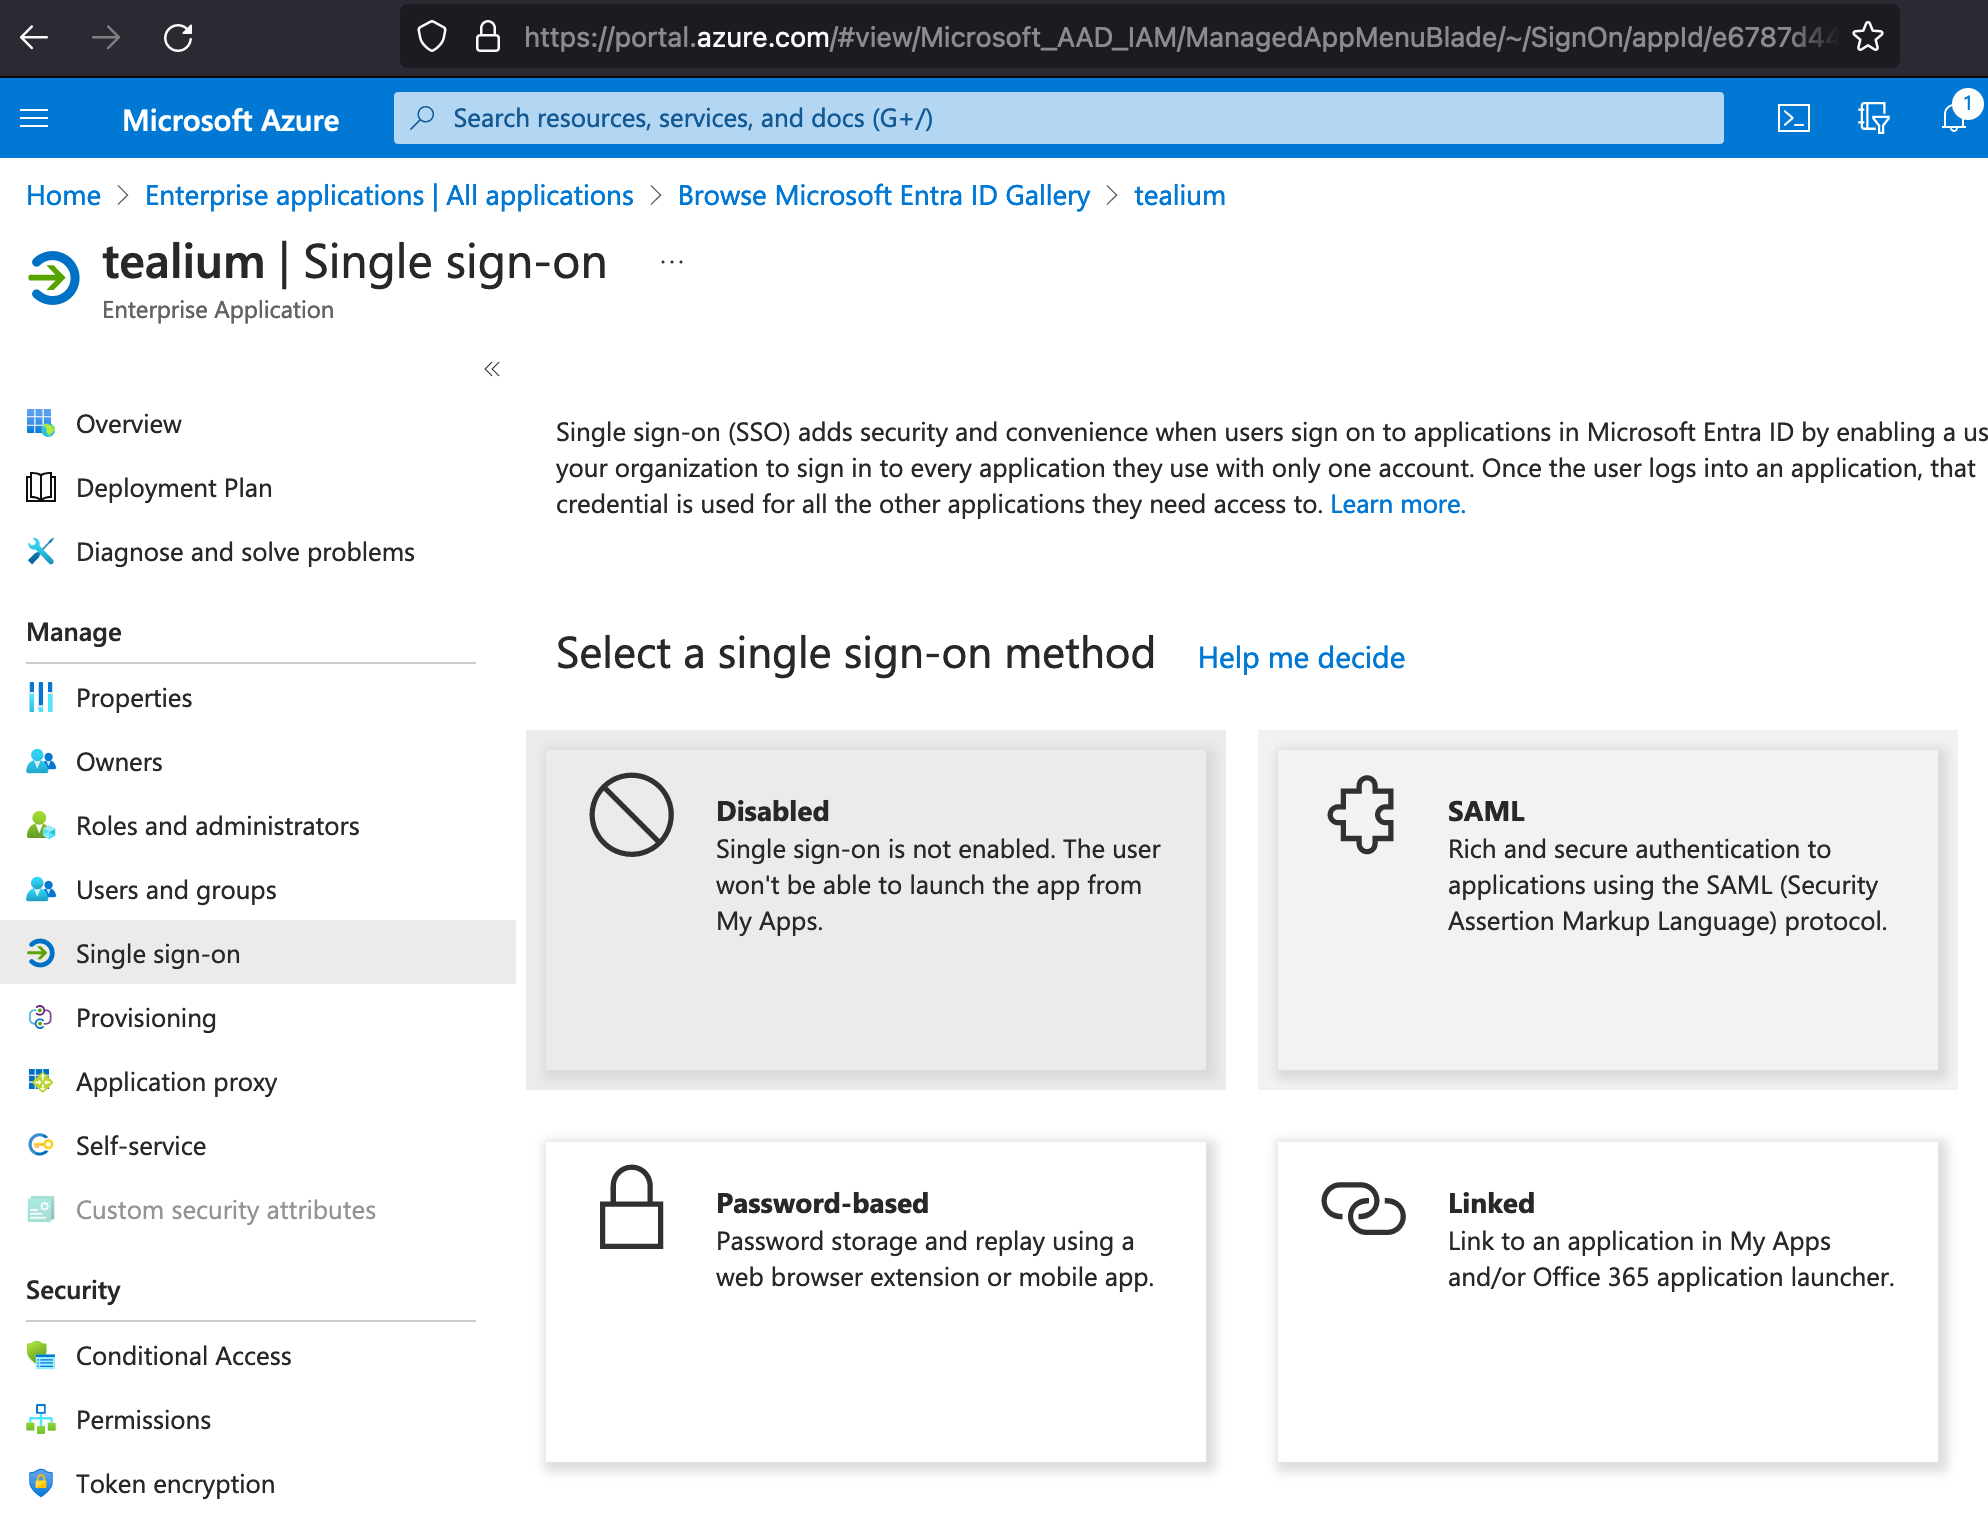
- In the Set up Single Sign-On with SAML screen, click Upload metadata file. Upload the metadata file that you downloaded in Set up your SSO: Step 1.
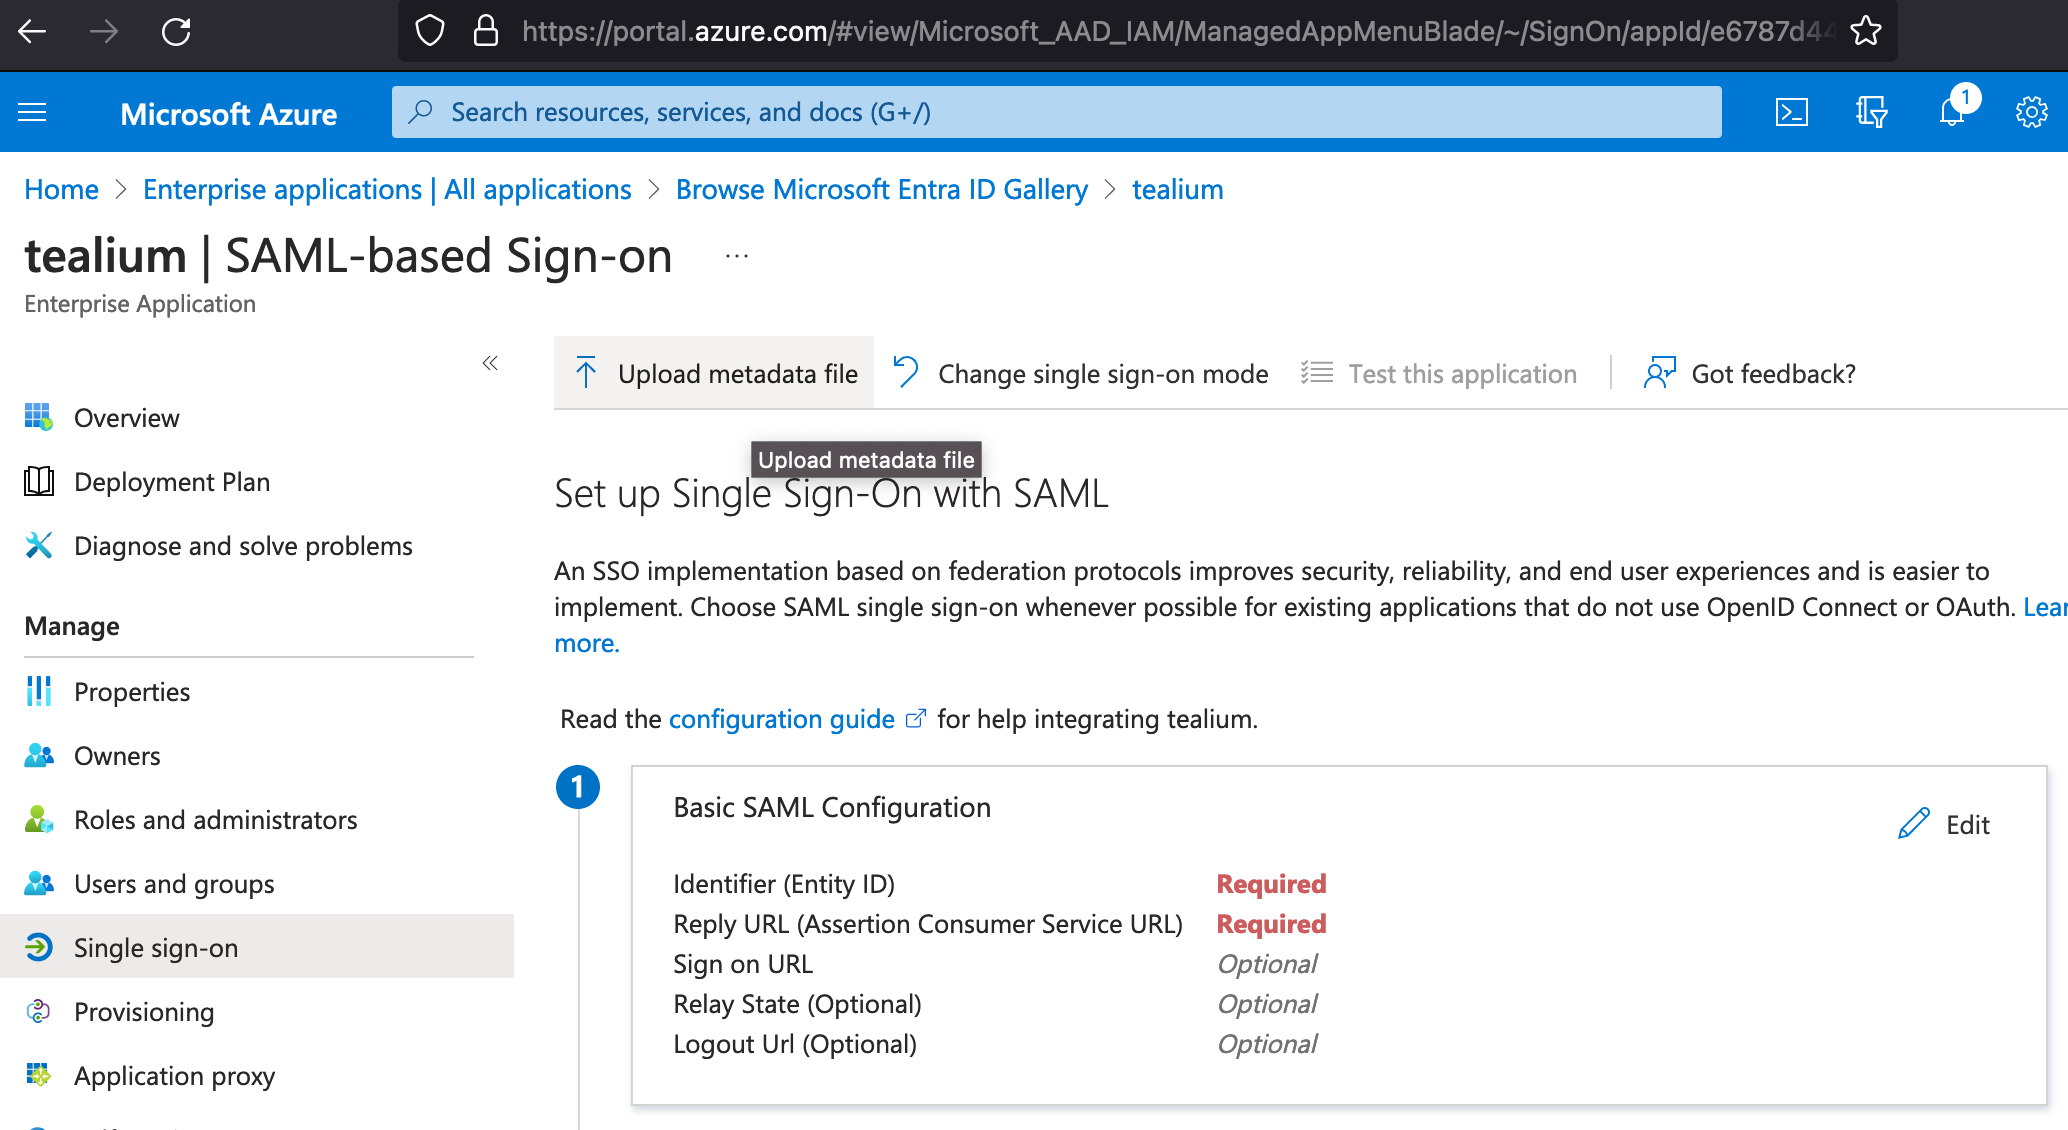
- After you upload the Tealium metadata file, the basic SAML configuration information from the uploaded file is displayed. You do not need to change these settings.
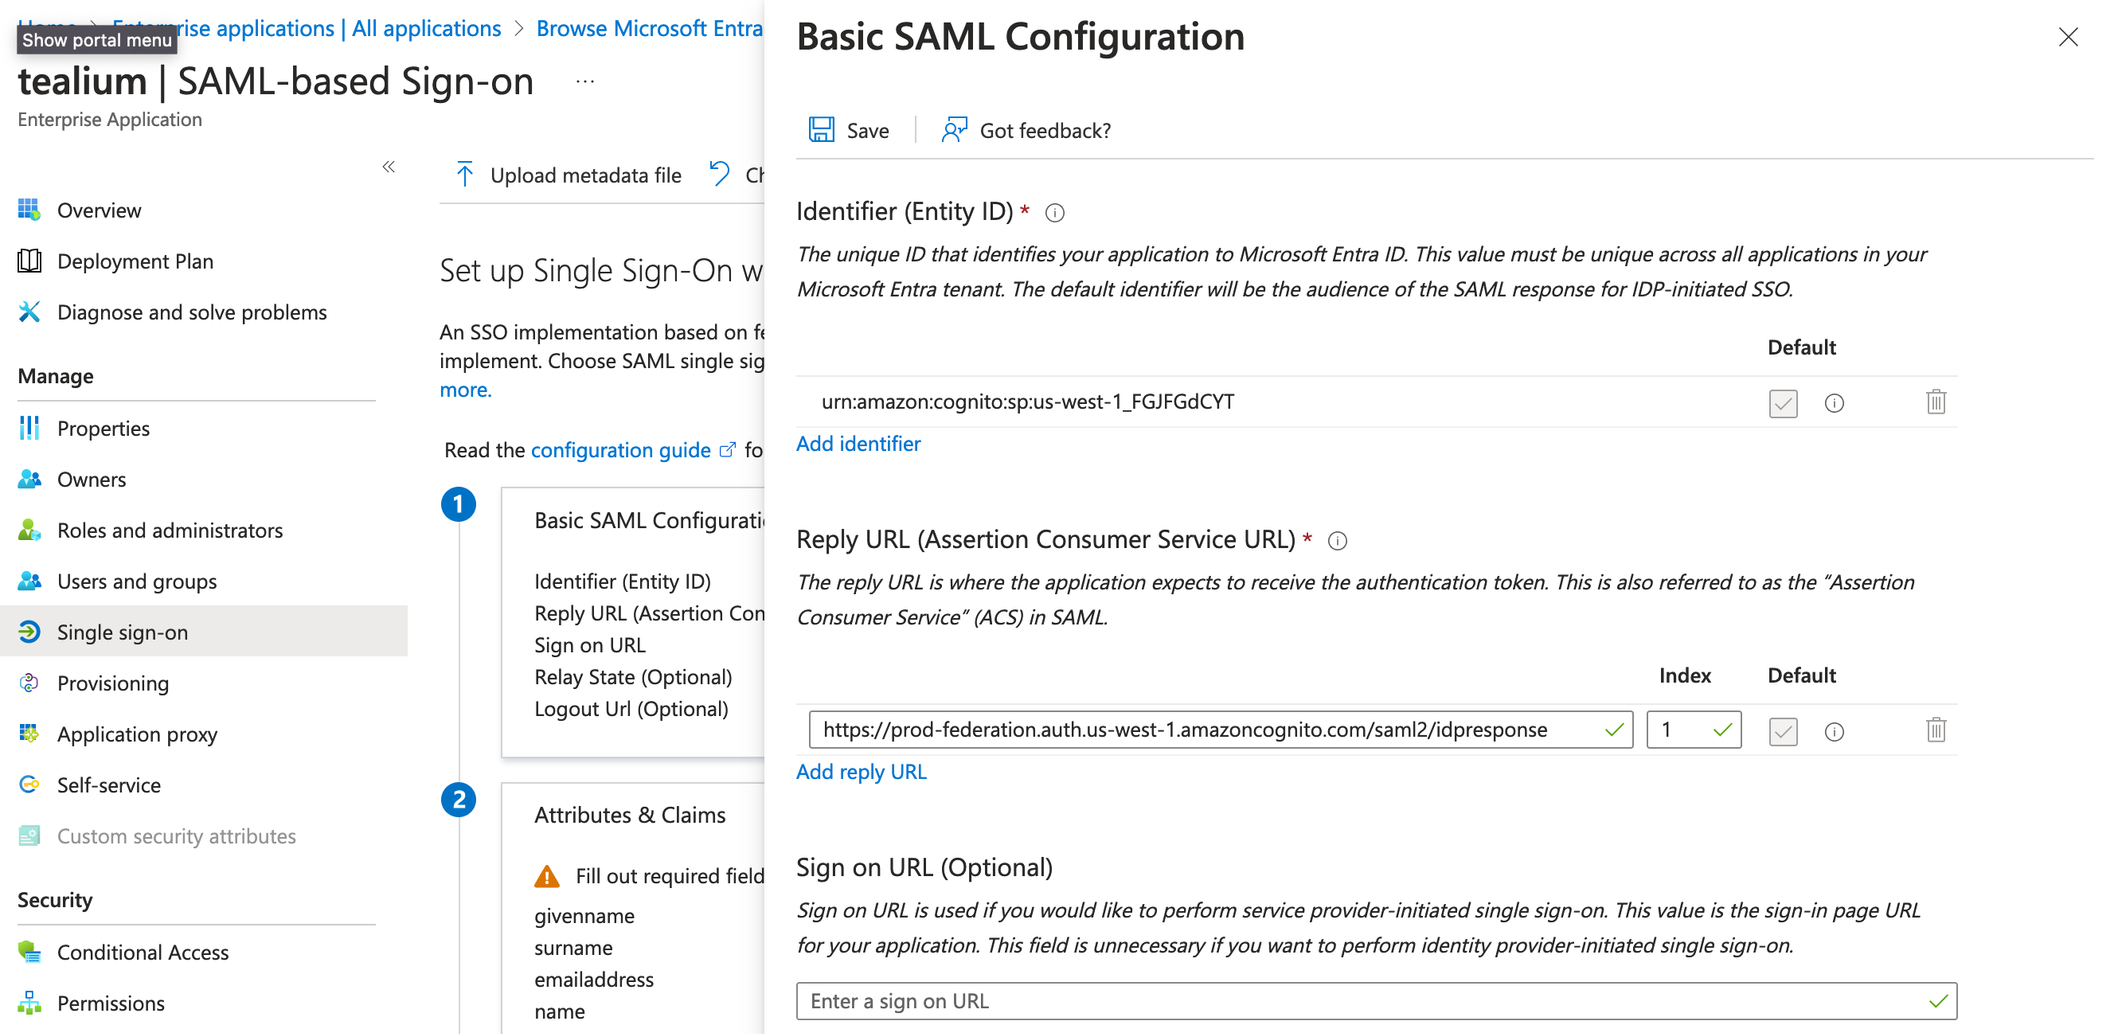
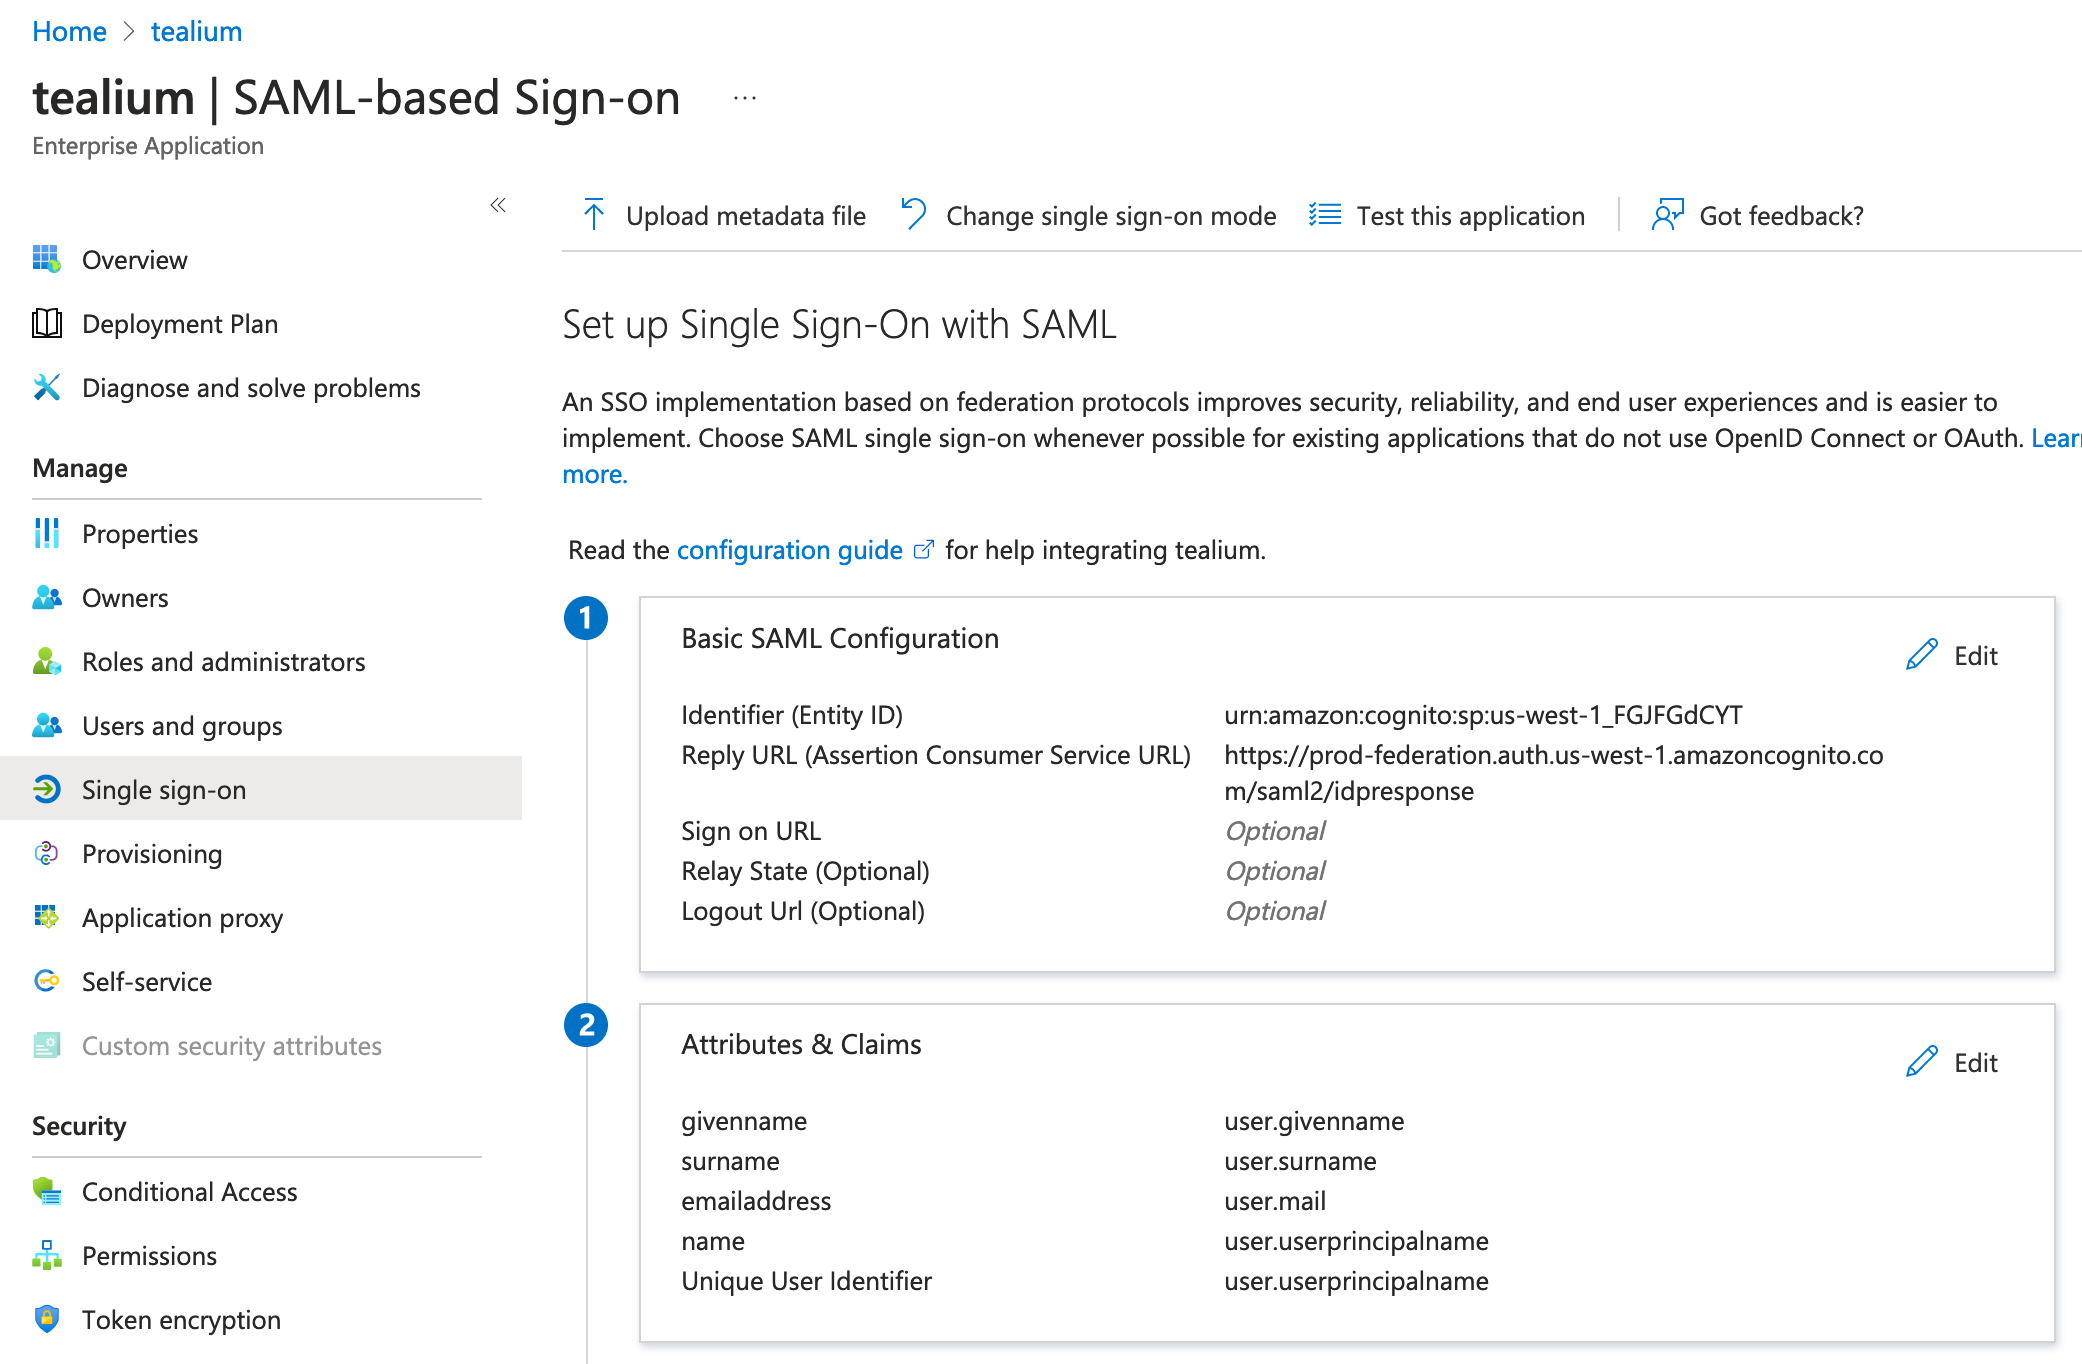
- Click Save.
- In the Test single sign-on window, click No, I’ll test later.
- In the Set up Single Sign-On with SAML screen, go to the Attributes & Claims section and click the edit icon.
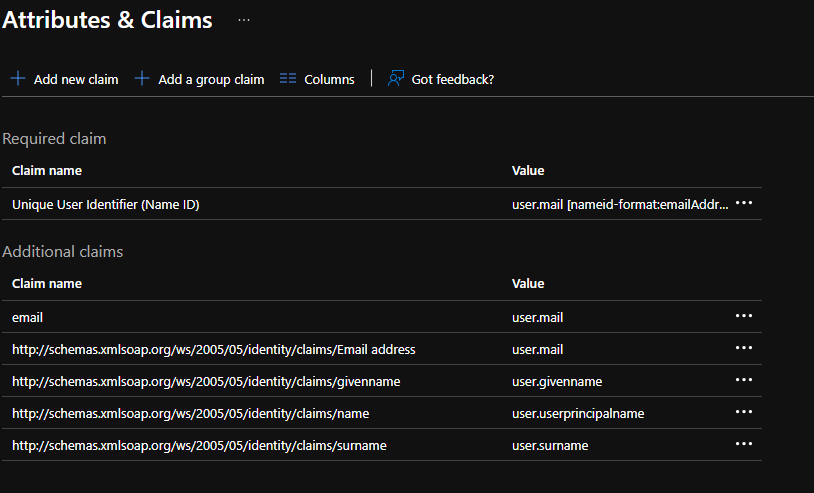
- Click + Add new claim and add a new claim with the following settings:
- Claim name:
email - Type:
SAML - Value:
user.mail
- Claim name:
- In the Set up Single Sign-On with SAML screen, go to the SAML Certificates section and download the Federation Metadata XML file.
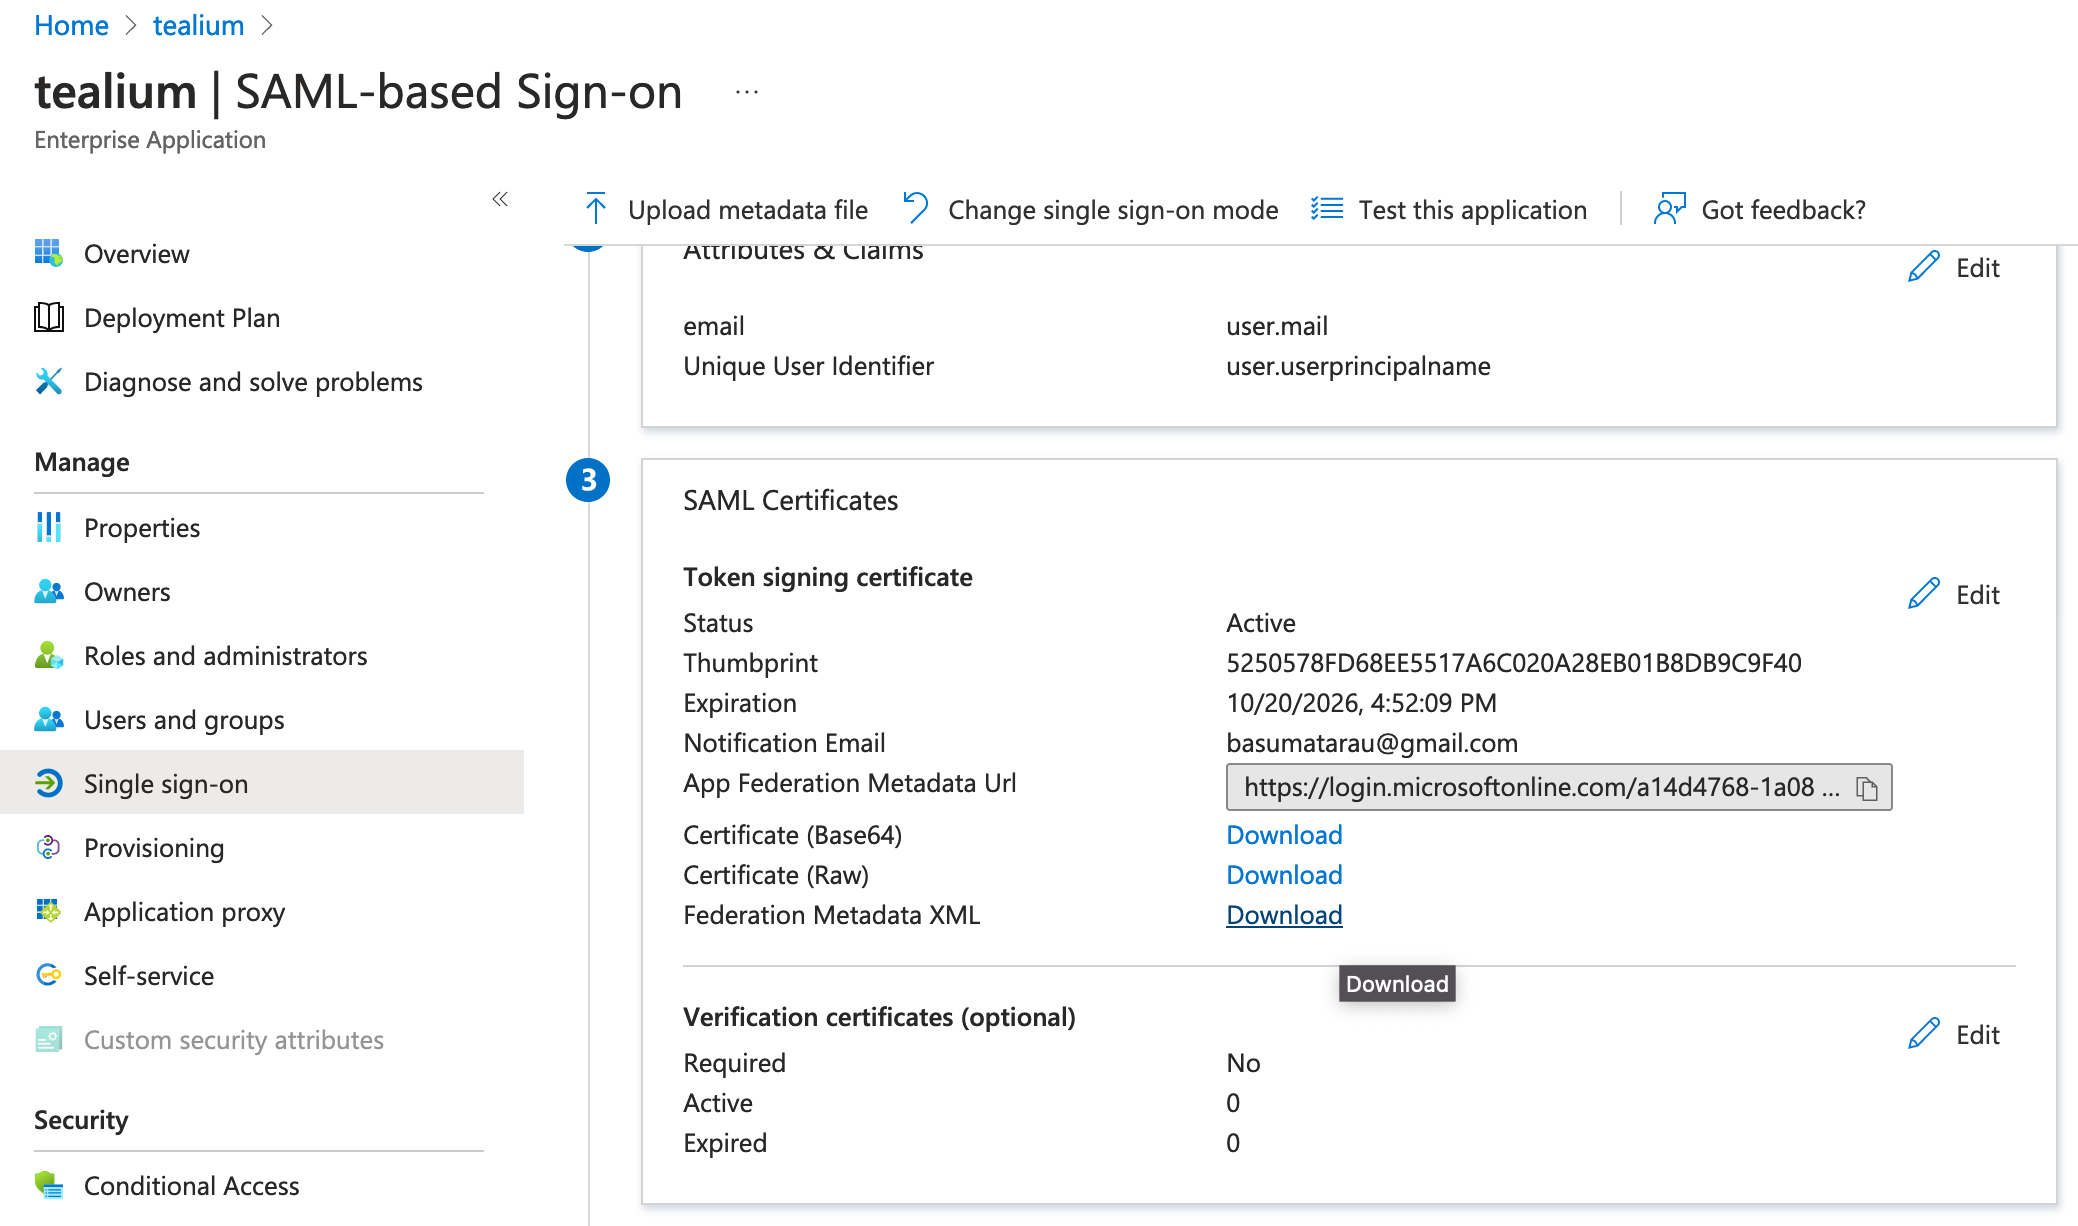
- Save this file to your computer. Use this file to complete the Tealium SSO configuration.
The following example shows a working configuration:
This page was last updated: March 19, 2025