Exclude offline purchasers from remarketing
This guide explains how to remove offline purchasers from online remarketing efforts to improve marketing efficiency and customer experience.
Why remove offline shoppers from retargeting?
There are several reasons why you might want to exclude offline shoppers from online marketing campaigns:
- Avoid Redundant Ads: Shoppers browse an item online, but complete the purchase in-store don’t need to be remarketed for that item.
- More Relevant Offers: Shoppers who prefer buying in-store may not be interested in online-only promotions, such as free shipping.
This approach not only reduces advertising costs, but it also helps prevent customer frustration from receiving ads for items they’ve already purchased.
You do not want to permanently exclude customers from remarketing efforts. It’s important to remove customers from the exclusion list once they re-engage with your site by browsing or searching for items. This ensures that marketing efforts are reactivated when they show renewed interest, allowing you to deliver relevant messages and avoid missed opportunities.
How to track offline purchasers
To track offline purchasers, import offline transaction data into Tealium, whether through File Import, Data Connect, or API. Then you you can tag those visitors with an “Offline shopper” badge. This badge can then be used to build an exclusion audience that you send to your remarketing vendor, excluding these customers from unnecessary retargeting.
Requirements
Required EventStream attributes
| Attribute Name | Type | Example |
|---|---|---|
customer_email |
UDO Variable | user@example.com |
Required AudienceStream attributes
| Attribute Name | Type | Scope | Description |
|---|---|---|---|
| Email Address | String | Visitor | The customer’s email address. |
| Offline shopper | Badge | Visitor | A visitor who completed an offline purchase. |
| User Actions | Boolean | Visit | A visitor who performed a search or viewed a product to re-engage with the site. |
In the following example, we identify offline customers and their purchases with an Offline Shoppers badge and then create an audience with visitors who own that badge. Then we activate the audience through a remarketing vendor to update an exclusion list.
Step 1 - Create attributes
Create a string visitor attribute named Email Address with the following enrichment:
- Set to
customer_emailon ANY EVENT.
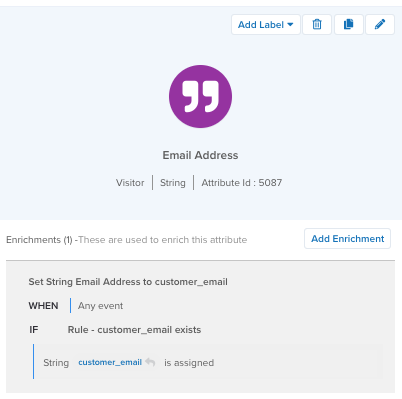
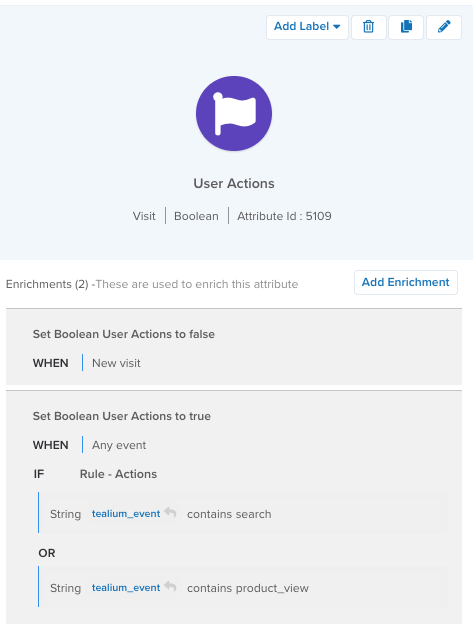
To track whether the visitor is re-engaging with the site by browsing products or performing a search, create a boolean visit attribute named User Actions with the following enrichments:
- Set to
falseon NEW VISIT. - Set to
trueon ANY EVENT whentealium_eventcontainssearchortealium_eventcontainsproduct_view.
Adjust this attribute to include any other events to watch for.
For more information about adding attributes, see Manage AudienceStream attributes.
Step 2 - Data source configuration
In this step, you will configure a connection to your store purchase data. There are several ways you can collect and process that data:
- Data Connect lets you automate, schedule, and enhance your data workflow to import data from your SaaS applications, CRMs, and data warehouses to Tealium in real time.
- HTTP-API Advanced data source lets you conditionally parse incoming request bodies. This data source offers an HTTP endpoint that lets you collect real-time event data in a single HTTP call with support for complex objects flattening and batched events.
- File Import lets you import CSV files into Tealium, where each row represents an event.
The following example demonstrates how to use file import to process offline data to use for the exclusion lists:
- Create a sample file: The CSV sample file should contain the transaction details that you need to identify the customer, such as customer ID and email address. Column names in row 1 are automatically detected and used to preconfigure entries in the Column Mappings screen.

- Upload and verify the file: Scroll through the sample file to verify that the columns and data look correct.
- Map the columns to event attributes: Each row of the CSV file is processed as an event. Unmapped columns are ignored. Mapped columns not present in the CSV file will be skipped.
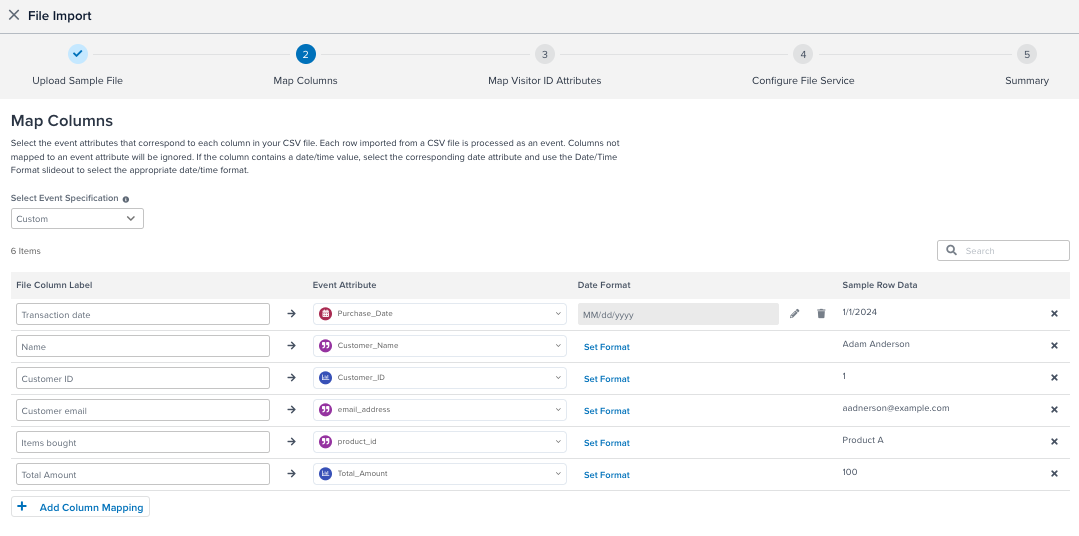
- Select an event specification: Make sure it matches the data in the file or create a custom set of event attributes.
- Identify and map the visitor ID attribute: Map an appropriate event attribute, such as email address, to your visitor ID attribute.

Be sure to copy the Data Source Key for use later.
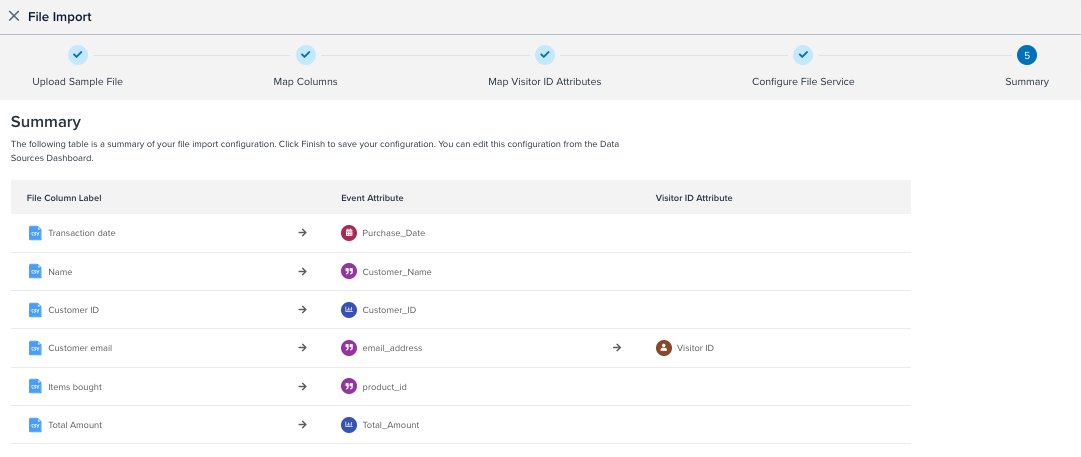
Save/Publish your changes.
For more information about how to configure a file import, see File Import.
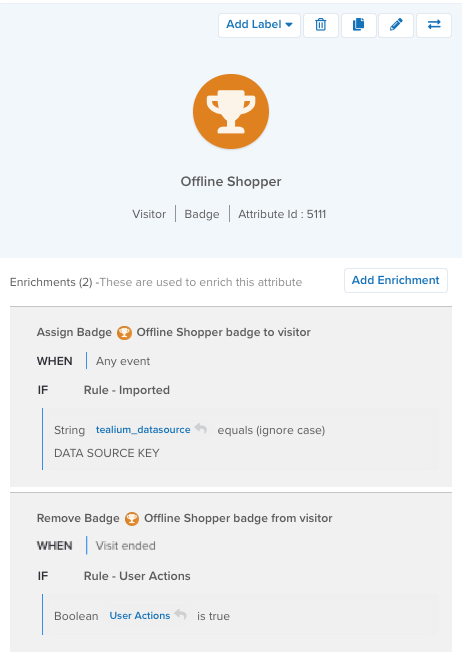
Step 3 - Create the Offline Shopper badge
Now that we can identify offline shoppers by their email address, we can create the Offline Shopper badge based on that attribute.
Add a “Offline Shopper” visitor attribute as a badge type with the following enrichments. Use the data source key you saved earlier.
- Assign this badge to visitor on ANY EVENT when
tealium_datasourceis equal to (ignore case) the data source key from the import profile - Remove this badge from visitor on VISIT ENDED when
User Actionsistrue.
Step 4 - Create the Offline Shoppers audience
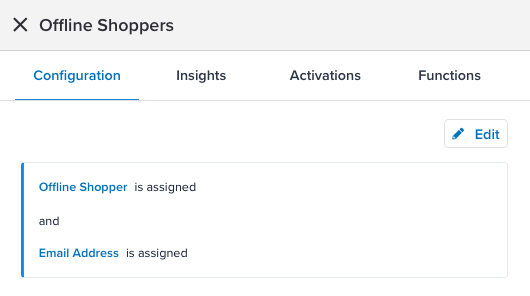
Now you can create a Offline Shoppers audience with the following conditions:
Offline Shopperbadge is assigned.Email Addressstring is assigned.
For more information, see Create an audience.
Step 5 - Configure a connector
Activate the audience through your remarketing vendors to update campaign settings and exclusions.
Some common connectors and actions for targeting discount shoppers include:
- Adobe Campaign Classic
- Iterable: Subscribe User to a List, Upsert User action
- Marketo: Add Lead to List action
- SendGrid: Upsert Contact action
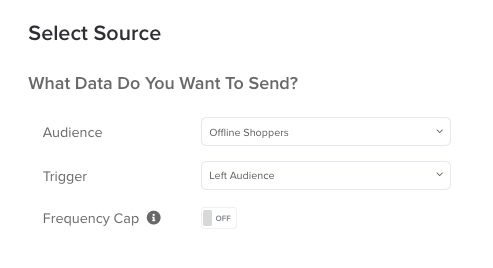
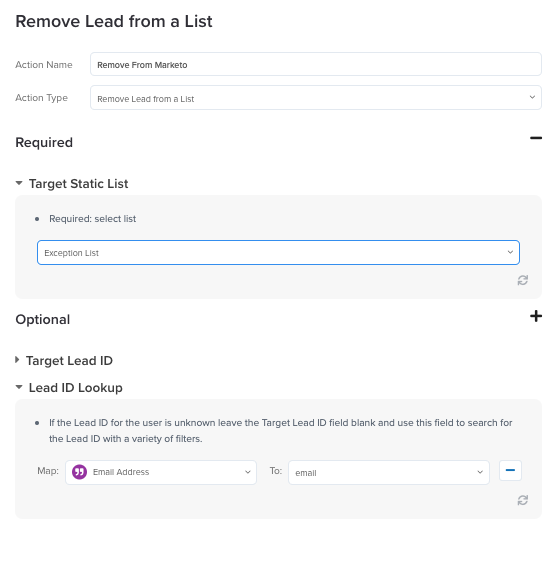
For example, you could set up the Marketo connector to add a visitor’s email address to the exclusion list for remarketing. Customize your connector actions to trigger only for when a visitor joins the Offline Shoppers audience.
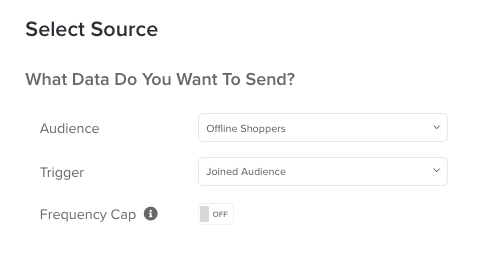
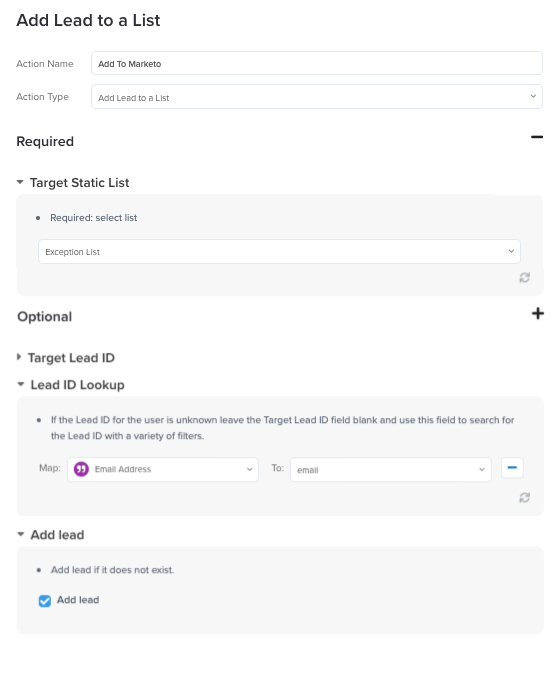
Then you would need to configure another instance of the Marketo connector to remove the visitor from the exclusion list when they return to the site. Customize your connector actions to trigger only for when a visitor leaves the Offline Shoppers audience.
For more information, see Add a connector.
Step 6 - Import the data
Now that you have configured the attributes, badges, and audience, use Tealium’s File Import feature to upload the data. AudienceStream will stitch this data to your visitor profiles, update audiences, and send updates to your remarketing connectors.
For more information about the upload process, see About File Import.
This page was last updated: December 18, 2025