Marketo Connector Setup Guide
This article describes how to set up the Marketo connector.
Connector Actions
| Action Name | AudienceStream | EventStream |
|---|---|---|
| Add Lead to a List | ✓ | ✓ |
| Add Lead to a List (Batched) | ✓ | ✓ |
| Remove Lead from a List | ✓ | ✓ |
| Remove Lead from a List (Batched) | ✓ | ✓ |
| Send Transactional Email | ✓ | ✓ |
| Create or Update a Lead | ✓ | ✓ |
| Create or Update a Lead (Batched) | ✓ | ✓ |
| Merge a Lead | ✓ | ✓ |
Configure Settings
Navigate to the Connector Marketplace and add a new connector. For general instructions on how to add a connector, see About Connectors.
After adding the connector, configure the following settings:
- REST API Client ID: (Required) Provide the client ID found in Marketo > Admin > LaunchPoint. The API user must have permissions for ‘Read-Write Lead’, ‘Read/Execute Campaigns’ and ‘Read Lists’. (Learn more about How to Create a Custom Service.)
- REST API Client Secret: (Required) Provide client secret found in Marketo > Admin > LaunchPoint.
- REST API Endpoint URL: (Required) REST API Endpoint can be found in Marketo > Admin > Web Service, example:
https://123-ABC-123.mktorest.com/rest - REST API Identity URL: (Required) REST API Identity can be found in Marketo > Admin > Web Service, example:
https://123-ABC-123.mktorest.com/identity
Action Settings - Parameters and Options
Click Next or go to the Actions tab. This is where you configure connector actions.
This section describes how to set up parameters and options for each action.
Action - Add Lead to a List
Parameters
| Parameter | Description |
|---|---|
| Target Static List | (Required) Select list. The platform loads a maximum of 300 lists. If the list you want does not appear, enter the list ID manually. |
| Target Lead ID | If the Lead ID for the user is known, leave the Lead ID Lookup field blank and use this field. |
id |
|
cookies |
|
email |
|
twitterId |
|
facebookId |
|
linkedInId |
|
sfdcAccountId |
|
sfdcContactId |
|
sfdcLeadId |
|
sfdcLeadOwnerId |
|
sfdcOpptyId |
|
| Add lead | Add lead if it does not exist. |
Action - Add Lead to a List (Batched)
Batch Limits
This action uses batched requests to support high-volume data transfers to the vendor. For more information, see Batched Actions. Requests are queued until one of the following thresholds is met or the profile is published:
- Max number of requests: 300
- Max time since oldest request: 30 minutes
- Max size of requests: 1 MB
Parameters
| Parameter | Description |
|---|---|
| Target Static List | (Required) Select list. The platform loads a maximum of 300 lists. If the list you want does not appear, enter the list ID manually. |
| Target Lead ID | If the Lead ID for the user is known, leave the Lead ID Lookup field blank and use this field. |
id |
|
cookies |
|
email |
|
twitterId |
|
facebookId |
|
linkedInId |
|
sfdcAccountId |
|
sfdcContactId |
|
sfdcLeadId |
|
sfdcLeadOwnerId |
|
sfdcOpptyId |
|
| Add lead | Add lead if it does not exist. |
Action - Remove Lead from a List
Parameters
| Parameter | Description |
|---|---|
| Target Static List | (Required) Select list. The platform loads a maximum of 300 lists. If the list you want does not appear, enter the list ID manually. |
| Target Lead ID | If the Lead ID for the user is known, leave the Lead ID Lookup field blank and use this field. |
id |
|
cookies |
|
email |
|
twitterId |
|
facebookId |
|
linkedInId |
|
sfdcAccountId |
|
sfdcContactId |
|
sfdcLeadId |
|
sfdcLeadOwnerId |
|
sfdcOpptyId |
Action - Remove Lead from a List (Batched)
Batch Limits
This action uses batched requests to support high-volume data transfers to the vendor. For more information, see Batched Actions. Requests are queued until one of the following thresholds is met or the profile is published:
- Max number of requests: 300
- Max time since oldest request: 30 minutes
- Max size of requests: 1 MB
Parameters
| Parameter | Description |
|---|---|
| Target Static List | (Required) Select list. The platform loads a maximum of 300 lists. If the list you want does not appear, enter the list ID manually. |
| Target Lead ID | If the Lead ID for the user is known, leave the Lead ID Lookup field blank and use this field. |
id |
|
cookies |
|
email |
|
twitterId |
|
facebookId |
|
linkedInId |
|
sfdcAccountId |
|
sfdcContactId |
|
sfdcLeadId |
|
sfdcLeadOwnerId |
|
sfdcOpptyId |
Action - Send Transactional Email
Parameters
| Parameter | Description |
|---|---|
| Target Email Campaign | Select the Target Smart Campaign that was created according to: Sending a transactional email from Marketo using the API |
| Target Lead ID | (Required) Provide a target lead ID. |
| Token Data to Set | (Optional) Map token value to token name. Use the full token format as in the Marketo UI. For example, { { my.message } } |
Action - Create or Update a Lead
Parameters
| Parameter | Description |
|---|---|
| Update Strategy | (Required) Select update strategy |
| Lead Lookup Filter |
|
Create or Update a Lead (Batched)
Batch Limits
This action uses batched requests to support high-volume data transfers to the vendor. For more information, see Batched Actions. Requests are queued until one of the following thresholds is met or the profile is published:
- Max number of requests: 300
- Max time since oldest request: 30 minutes
- Max size of requests: 1 MB
Parameters
| Parameter | Description |
|---|---|
| Update Strategy | (Required) Select update strategy. |
| Lead Lookup Filter |
|
Action - Merge a Lead
Parameters
| Parameter | Description |
|---|---|
| Winning Lead ID | (Required) |
| Losing Lead ID | (Required) |
| Merge in CRM |
Use Case Example
In this example, you will use the Marketo connector to create and push a new lead into our lead database. More specifically, you will make those who join the Shoe Fans audience into leads.
Step 1: Define Attributes and Audience conditions.
Create a new Visitor ID attribute to store the user’s email address. It is the unique value associated with the lead.
Although it is possible to create a lead solely from an email address, we recommend that you capture more information to associate with the lead. In step 6, you will pass this Visitor Email visitor ID attribute along with three trait attributes for First name, Last name and Company.
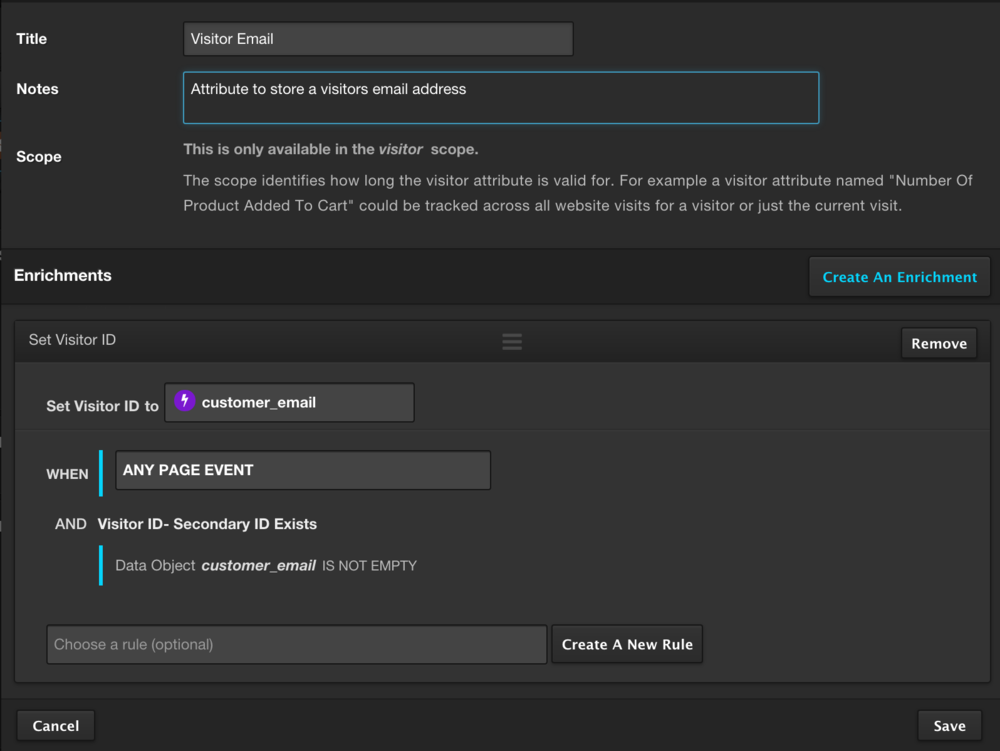
Then create a new audience titled Shoe Fans and set up logic so that all visitors with the Shoe Fan badge and a true Known User boolean attribute will be added to the audience.
The Known user boolean was created to determine whether or not the user is known. If there is an email address associated with user, it is set to true. If no email address, it is set to false. It is a necessary condition because you cannot convert a site user into a lead if you do not know who they are.

Step 2: Create a Custom Service in Marketo
Log in to your Marketo account: https://login.marketo.com/
A custom service allows users to describe and define what data their client application can access. Before the application can be used, a Marketo Admin must associate it with a single API-only user with the ability to read, write, and merge leads, as well as being able to read, and execute campaigns.
You need to obtain the following information:
- REST API, Client ID
- REST API, Client Secret
- REST API, Complete REST endpoint URL
- REST API, Complete Identity endpoint URL
Follow steps 1-7 on Marketo Custom Service to learn how to create a Custom Service in Marketo.
Step 3: Add the Marketo Connector
To add the Marketo connector, perform the following steps:
- Navigate to AudienceStream > Connectors.
- Click + Add Connector.
- Click Marketo.
- Click + Add Connector.
Configure REST API Fields
You should now have all the information needed to properly set up your connector:
- Navigate to the Configure tab of your connector window.
- Copy and paste the values obtained from step 3, along with your title and any relevant notes.
- Click Next.
Configure Actions
In this window, give the connector instructions on what to do.
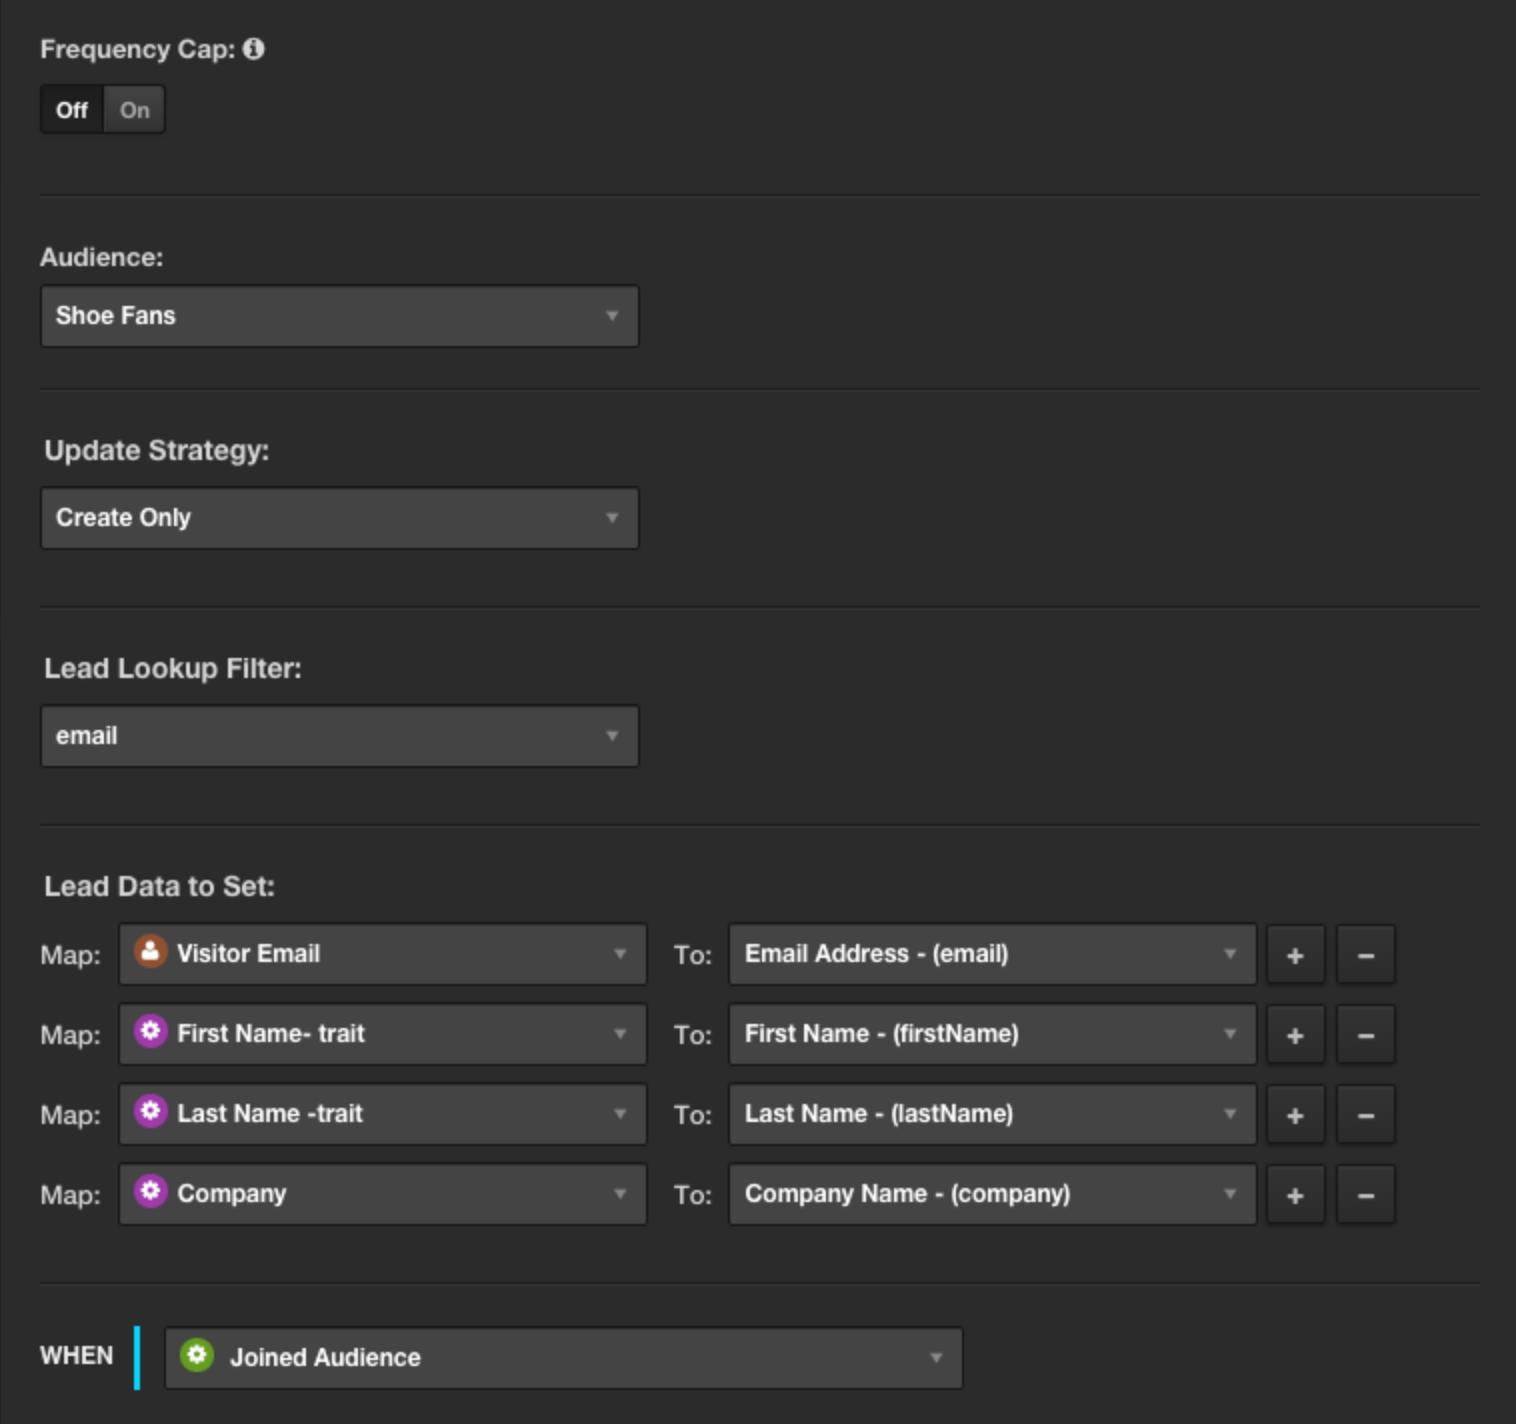
- In the Actions drop-down, select Create or Update a lead.
- Select the Shoe Fans audience.
- For the Update Strategy, select Create only.
- For the Lead Lookup Filter, select Update Strategy.
Since a lead is only as good as the information associated with it, map the appropriate data and values. Under Lead Data to Set, select the attribute created in step 1 along with any others, and map them to their corresponding values.
Step 4: Test / Trace Configuration
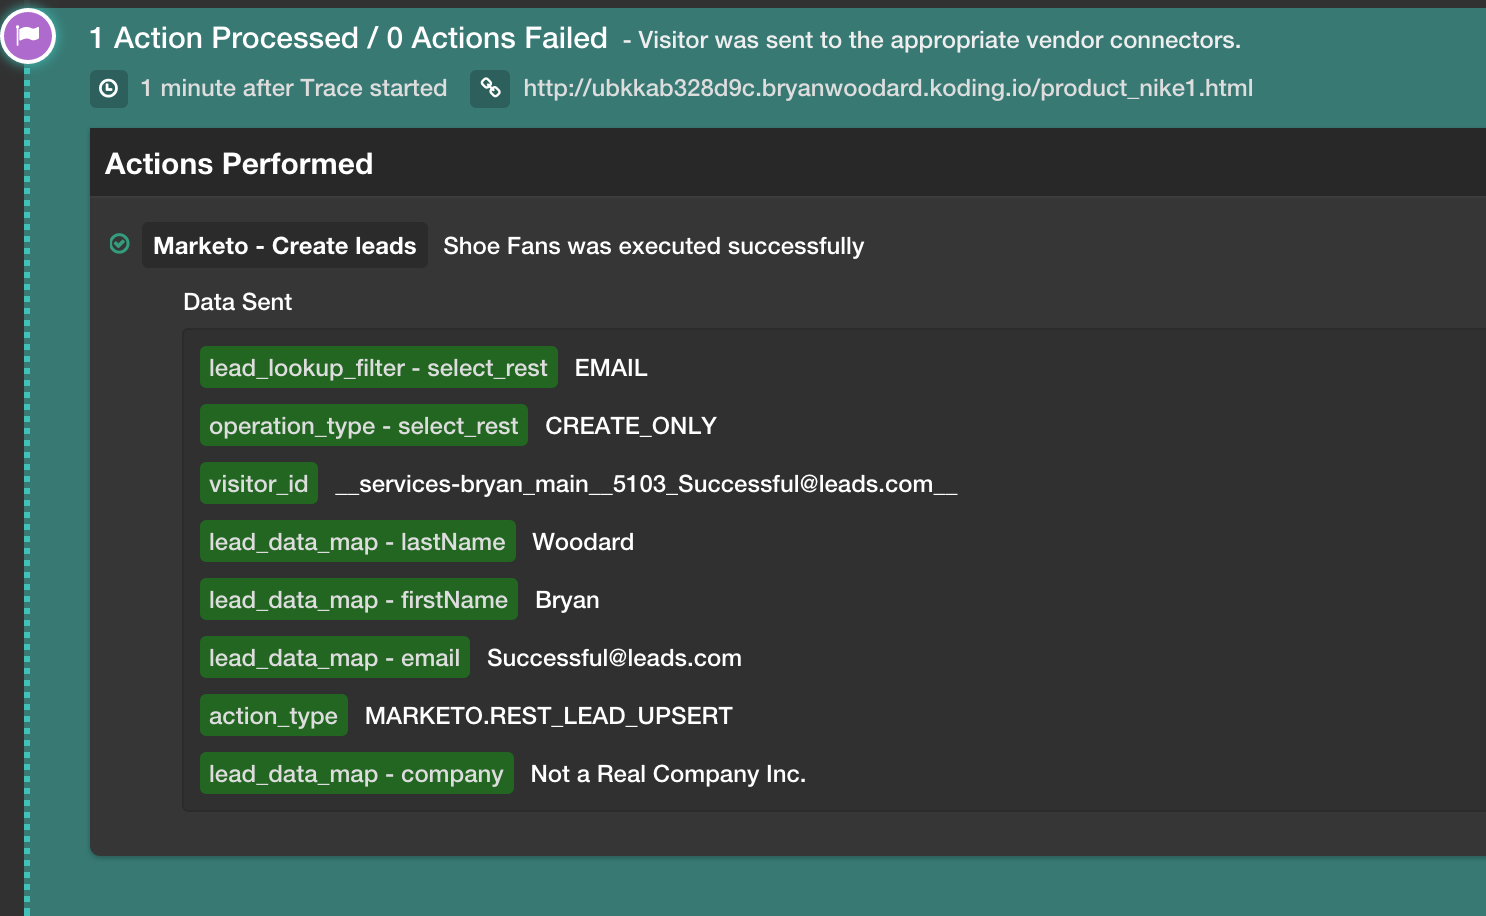
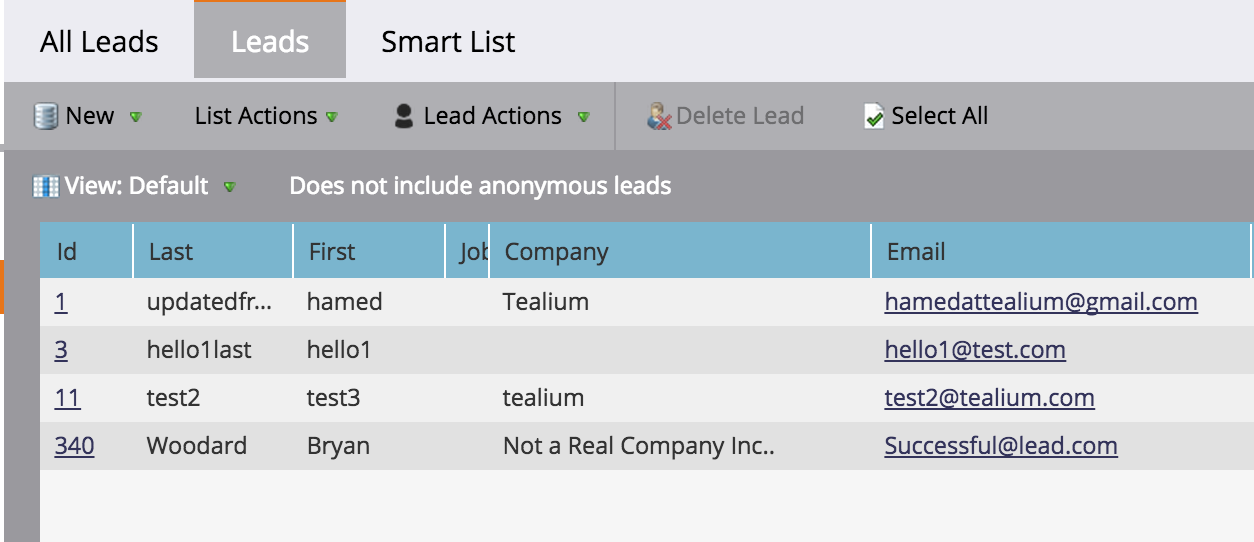
After you finish setting up your configuration you need to test it. The best way to test your configuration is to run a Trace to make sure that your events are handled properly and to check your Marketo dashboard to make sure your lead was created with the proper information.
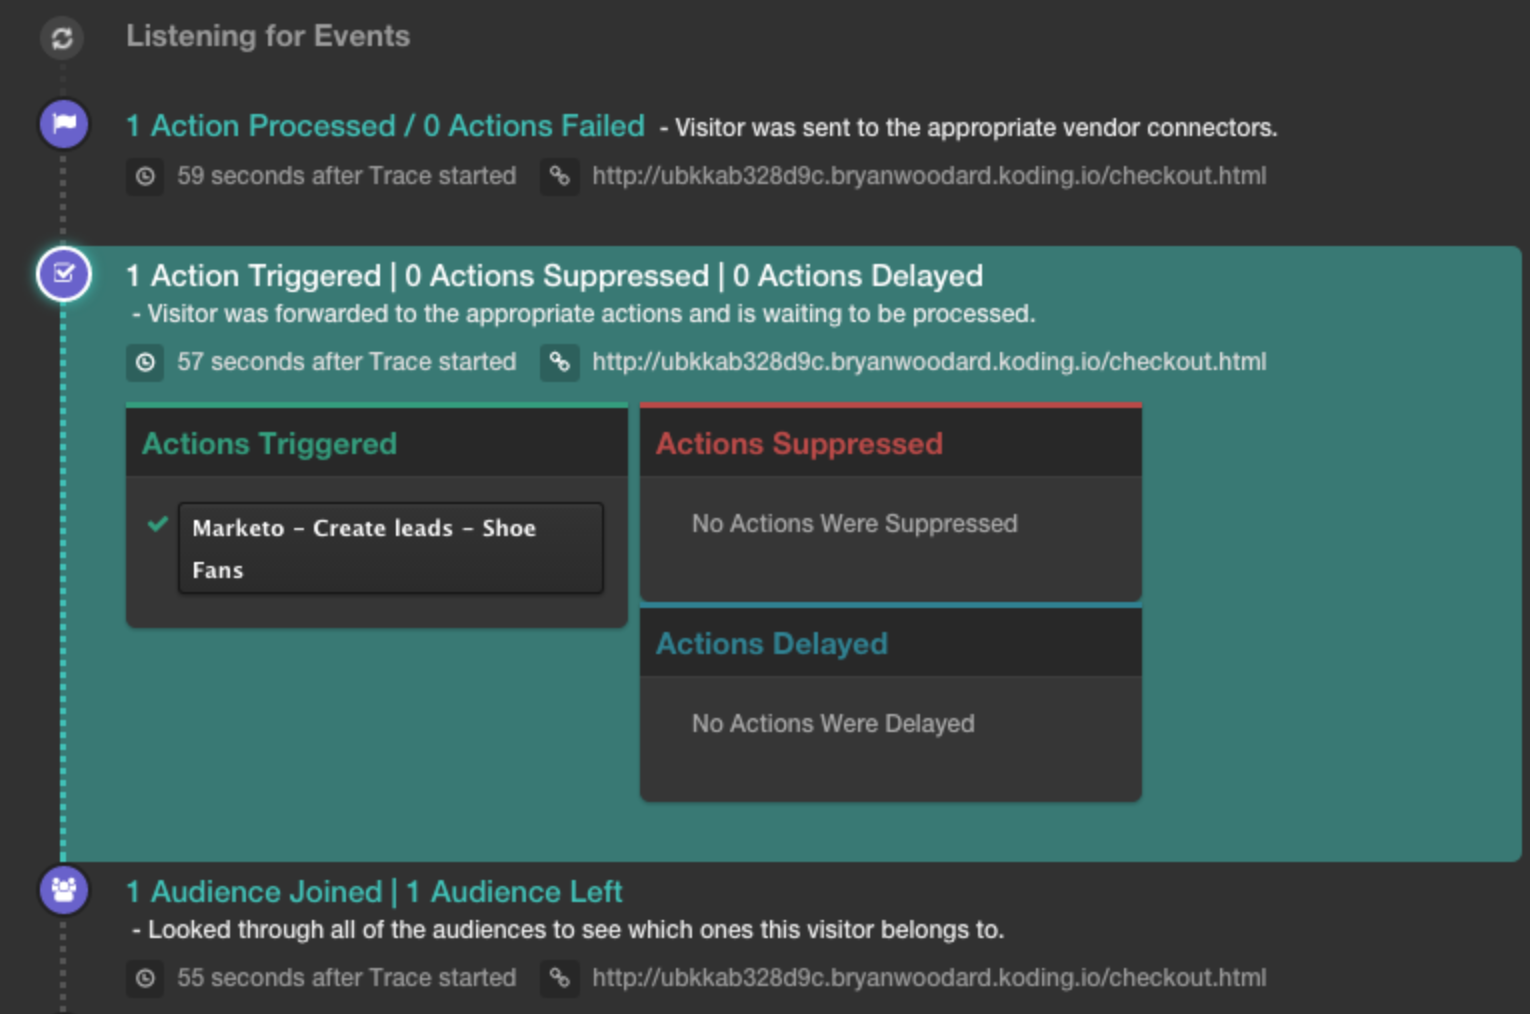
The image above shows 3 main things:
- My audience was joined (
Shoe Fans) - My action was triggered (
Marketo- Create leads) - My action was processed successfully. (
1 action processed/ 0 actions failed)
Step 5: Verify in Marketo
This page was last updated: June 13, 2025