If you need more than the three default environments, you can create custom environments to give you more options.
How it works
Custom environments are useful for the following scenarios:
- Creating a sandbox or local environment for developers to make long-term changes without impacting the regular workflow.
- Creating a staging environment to match your organization’s internal testing environments.
- Creating an alternative production environment so that changes can be released in phases to smaller subsets of customers to minimize any potential negative impacts.
The environments to which you publish a profile correspond to the URL of the Universal Tag (utag.js) that you load on your site. The default environments correspond to the following URL paths:
- Dev -
/utag/account/profile/dev/utag.js - QA -
/utag/account/profile/qa/utag.js - Prod -
/utag/account/profile/prod/utag.js
Custom environment names are case-sensitive in the URL for utag.js. For example, if you create a custom environment named Preview, the URL path to the utag.js file in that environment would be: /utag/ACCOUNT/PROFILE/Preview/utag.js
To test custom publish environments, you can use Web Companion or the Environment Switcher Tealium Tool.
For more information about creating and managing custom environments:
- Platform Permissions: Manage Environments.
- Legacy Permissions: Code Center.
Publish to a custom environment
To publish to a custom environment:
- Click Save/Publish.
- In the Publish Location section, select the Custom checkbox. A drop-down list appears:
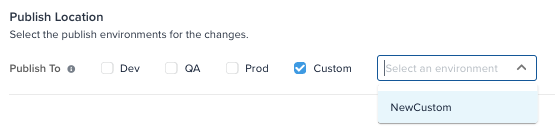
- Select the environment you want to publish to from the drop-down list.
- You can publish to only one custom environment at a time. To publish to multiple environments, repeat the publishing process for each one.
- Click Publish.
This page was last updated: April 16, 2025