Manage CloudStream data sources
This article describes how to manage CloudStream data sources.
How it works
Data sources are defined connections to your data cloud, such as Snowflake or Databricks. CloudStream connects to these data sources to retrieve and activate segments without storing the data in Tealium. This lets you work with large datasets directly from the cloud, leveraging the power of your existing data infrastructure.
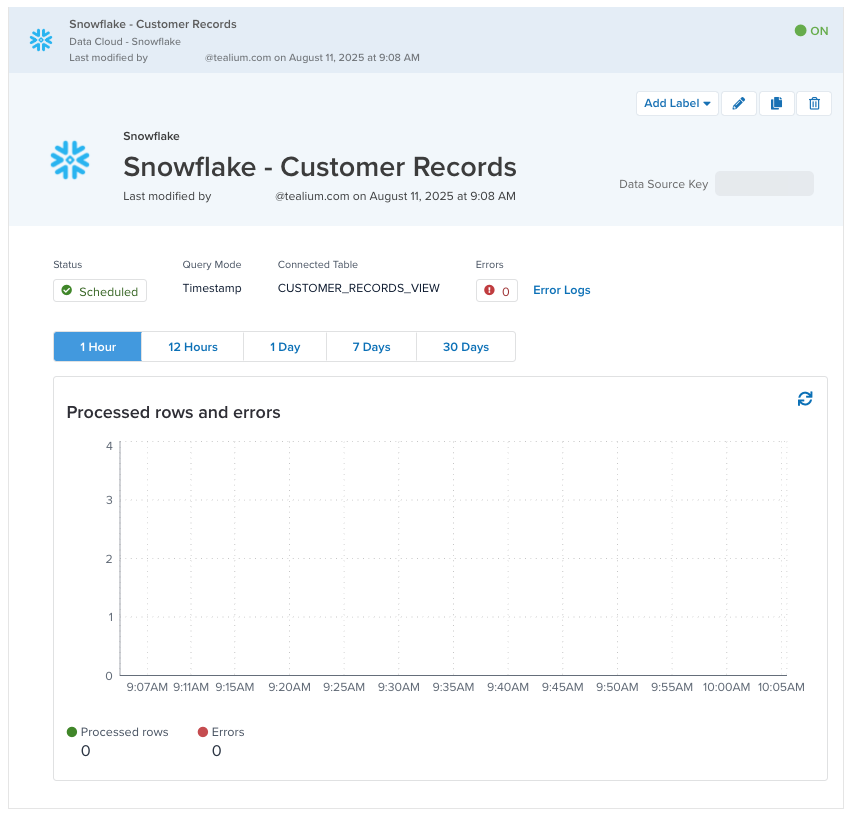
You can connect to up to 10 data sources in a profile.
CloudStream data sources are designed to work directly with data stored in a data cloud. Data remains in the data cloud and is only temporarily imported for activation through connectors, without being stored in Tealium.
Each data source can connect to a single view or table at a time. If you need to connect to multiple tables or views from a data cloud, configure a separate data source for each table or view.
CloudStream only supports cloud data sources.
For more information about cloud data sources, see About cloud data sources.
Test configuration
We recommend that you test the data source and query before enabling data sources, segments, or activations. However, running a test may activate segments, trigger enabled actions, or affect downstream systems. To prevent unintended results, disable connectors and functions, limit test records, and coordinate with recipients.
To test your data source configuration, use the following steps:
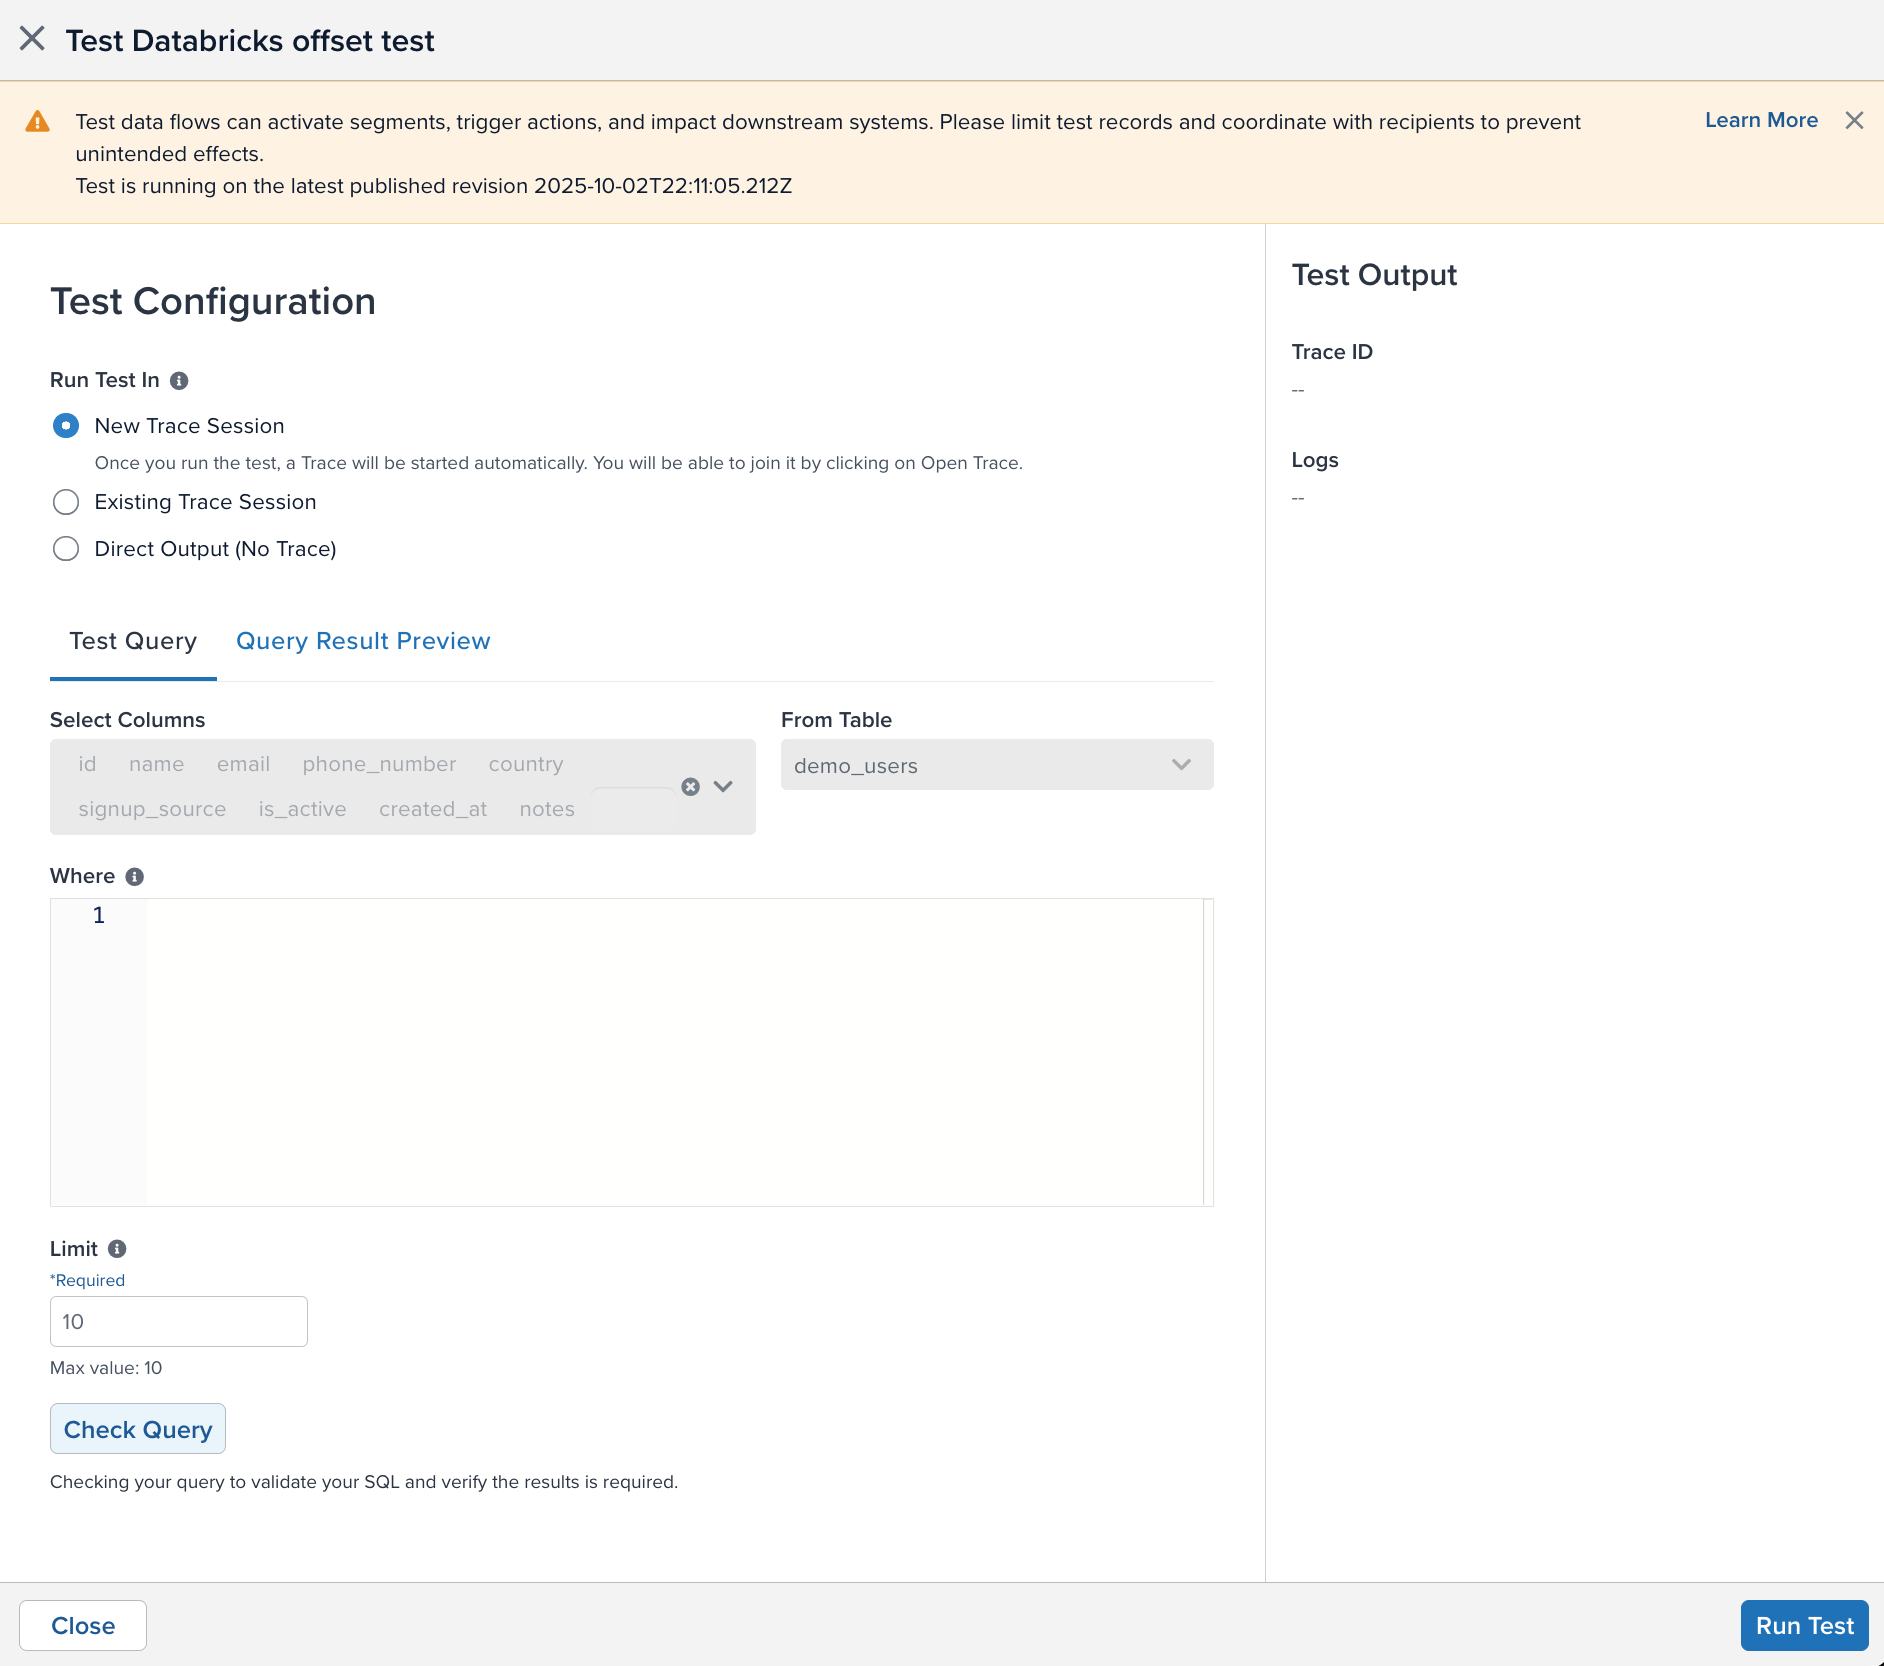
- Click the action button in the upper-right corner of a data source window, and then click End-to-end Testing.
- Select how you want to receive the output
- New Trace Session: The output is displayed in a new trace session with up to 10 records. This option is best for confirming end-to-end verification and log details.
- Existing Trace Session: The output is displayed in a trace session you have already started. Enter the Trace ID and click Join Trace.
- Direct Output: The raw results from the output is displayed on the screen. No trace ID will be added to the data records and trace will not be available. This option is best for quickly confirming the query and attribute mapping.
- Select the number of rows to process for the test. The maximum number of rows is 10.
- Under Test Query, select the columns from the table to include in the test. Click the X in a column to remove it from the list. You must select at least one column.
- Under From Table, select the table you want to query. The Select Columns box will update with the table’s columns.
- Under Where, enter the SQL query to perform on the table.
- Click Check Query to validate the SQL and verify that required fields are set.
- The results will appear in a table under the Query Result Preview tab:
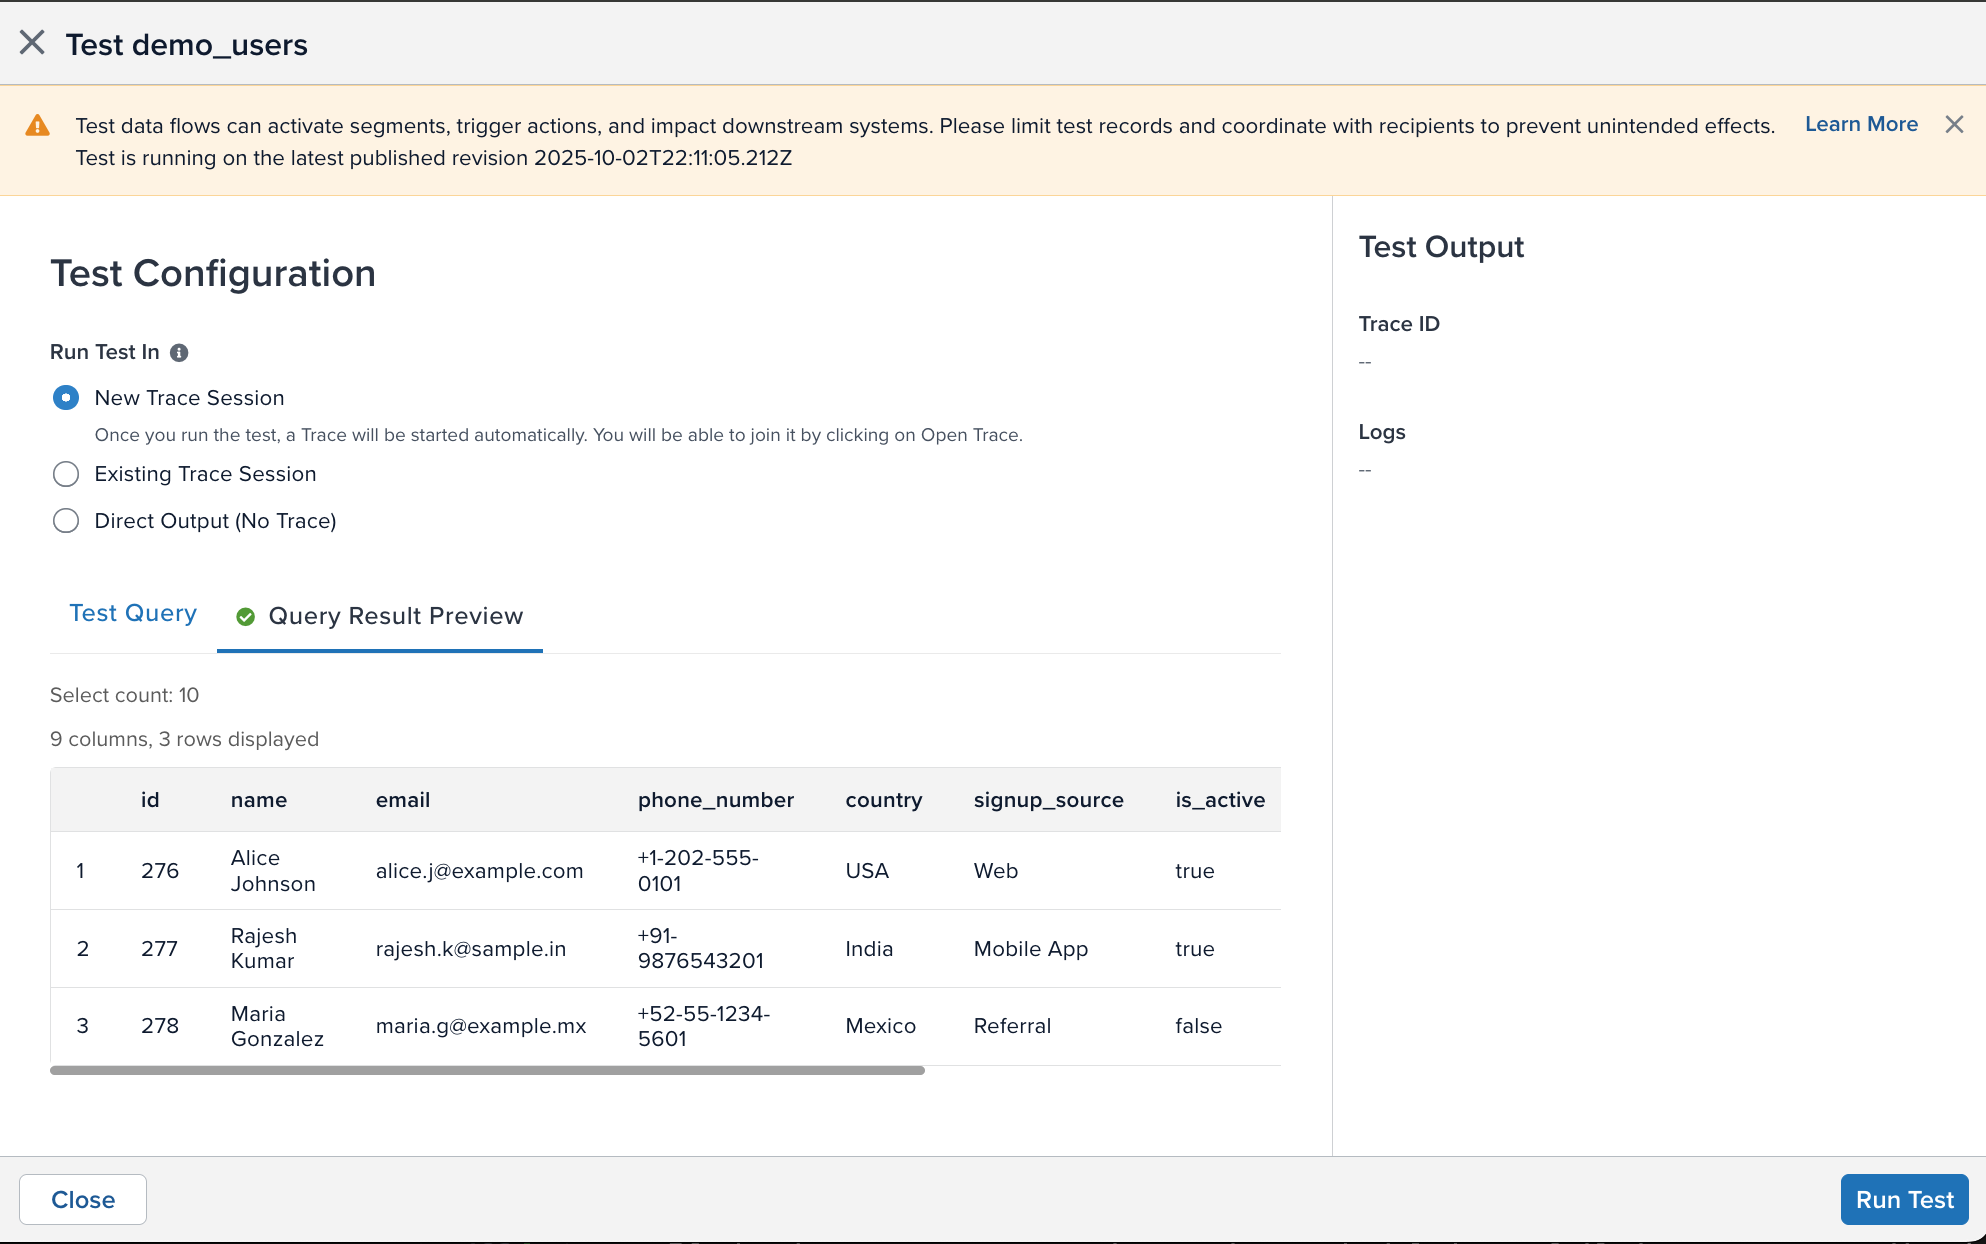
- Click Start Test to start the configuration test.
The right sidebar will display a progress bar that estimates the amount of time to finish the test and status messages to let you know if the test has encountered any errors.
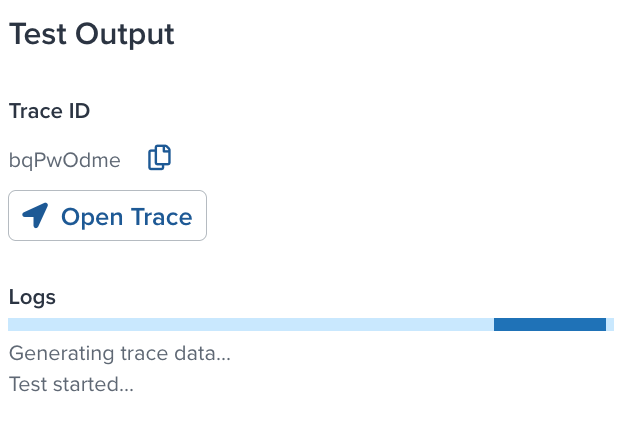
When the test is complete, the results are displayed:
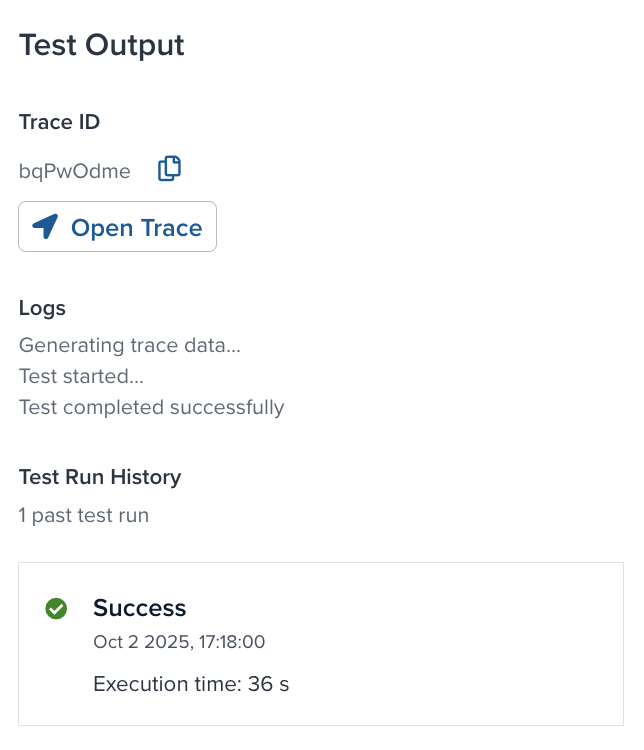
- If you want to watch the test run in a trace, click Join Trace.
- If the test fails, you can do the following:
- Click Edit Test Configuration to change the configuration settings.
- Click Retry Test to run the current configuration again.
Manage offset
Data sources track the date or incrementing value position where querying begins in your cloud data view or table. An offset lets you reset or manually set that position to control where in the view or table to start querying.
For example, suppose a recent mailing list activation contained an error and processed 100 records, and now the current incrementing offset is 342. To reprocess those records after correcting the email activation, set the offset to 242. When you restart the data source, it queries records starting from that position and sends the corrected email.
You can only manage the offset if the following conditions are true:
- The current profile is published.
- The query mode is Timestamp + Incrementing (Recommended), Timestamp, or Incrementing. You cannot manage the offset for Full Resync query mode.
- The data source is stopped.
- If the data source status is running, scheduled, or failed, you cannot edit the offset. Only information about the current offset is available.
- If the status is initializing, inactive, or there is a connection error, the offset is not available.
To manage the offset for the data source, use the following steps:
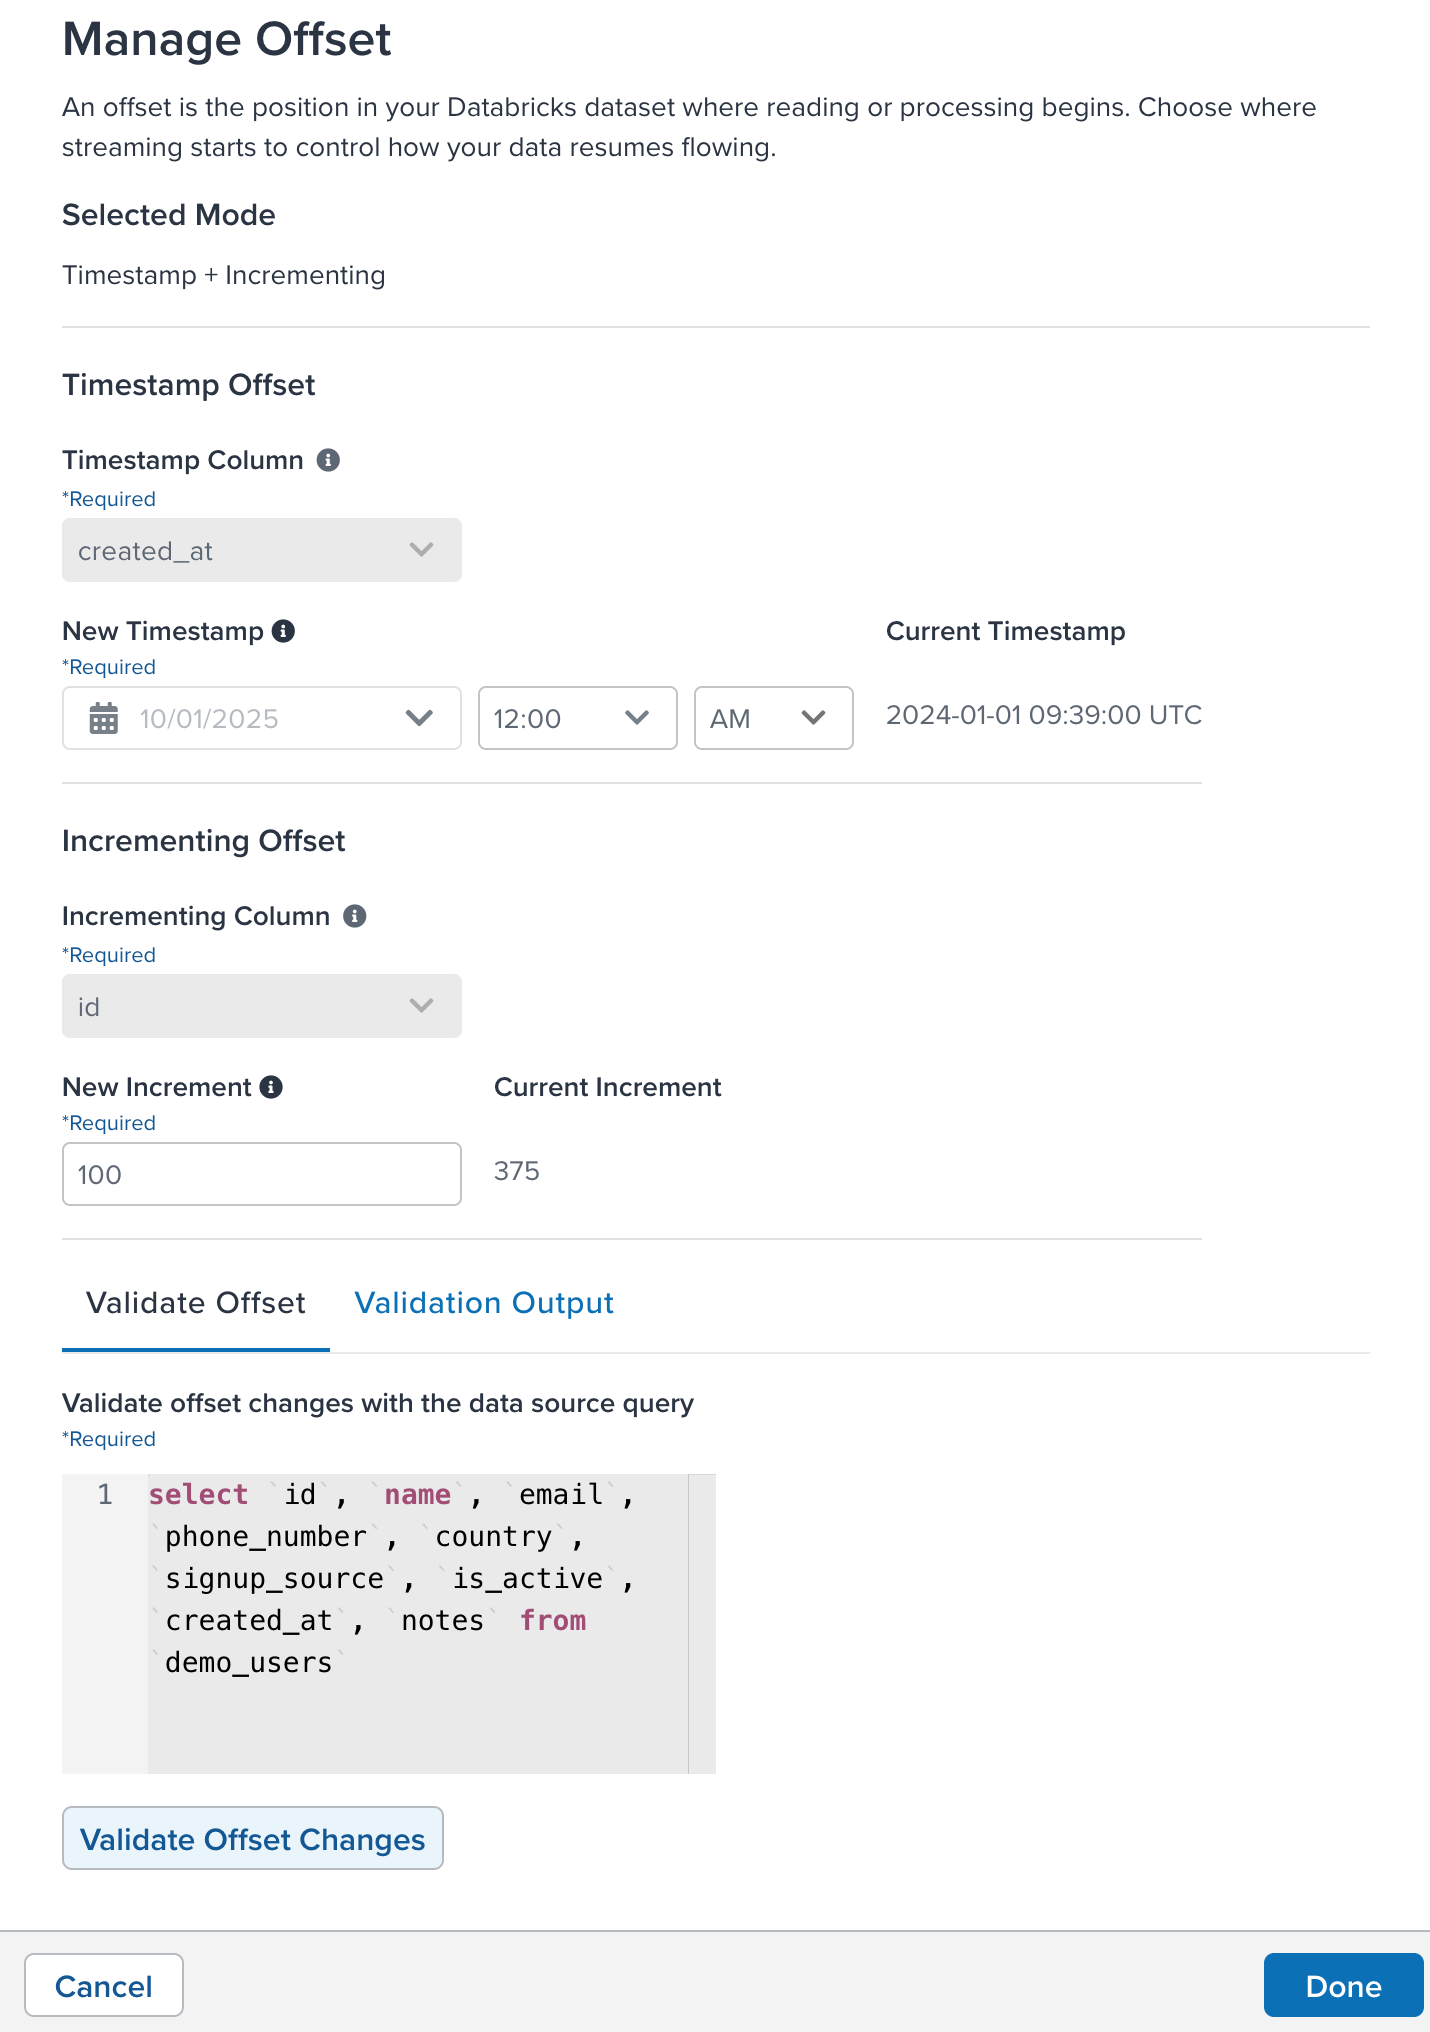
- Click the action button in the upper-right corner of the data source details window and then click Manage Offset.
- The offset methods available are Timestamp and Incrementing Column. Your query mode determines which offsets are available.
- Under Timestamp Column, select the column in the table that represents the timestamp.
- Under New Timestamp, select a date and time to offset the timestamp from when importing the data.
- The new timestamp must be a past time and date. It cannot be a future date and time.
- The current timestamp field displays the currently used offset.
- Under Incrementing column, select the column that represents the incrementing value for each row added to the table.
- Under New Increment, enter a number to use to offset the ID from when importing the data.
- The new offset ID must be a positive integer.
- The current offset ID field displays the currently used number to use as an offset.
Click Validate Offset Changes to preview the data that will be imported from the new offset position. The table shows sample rows. It also provides an estimate of how many rows will be processed after you adjust the offset.
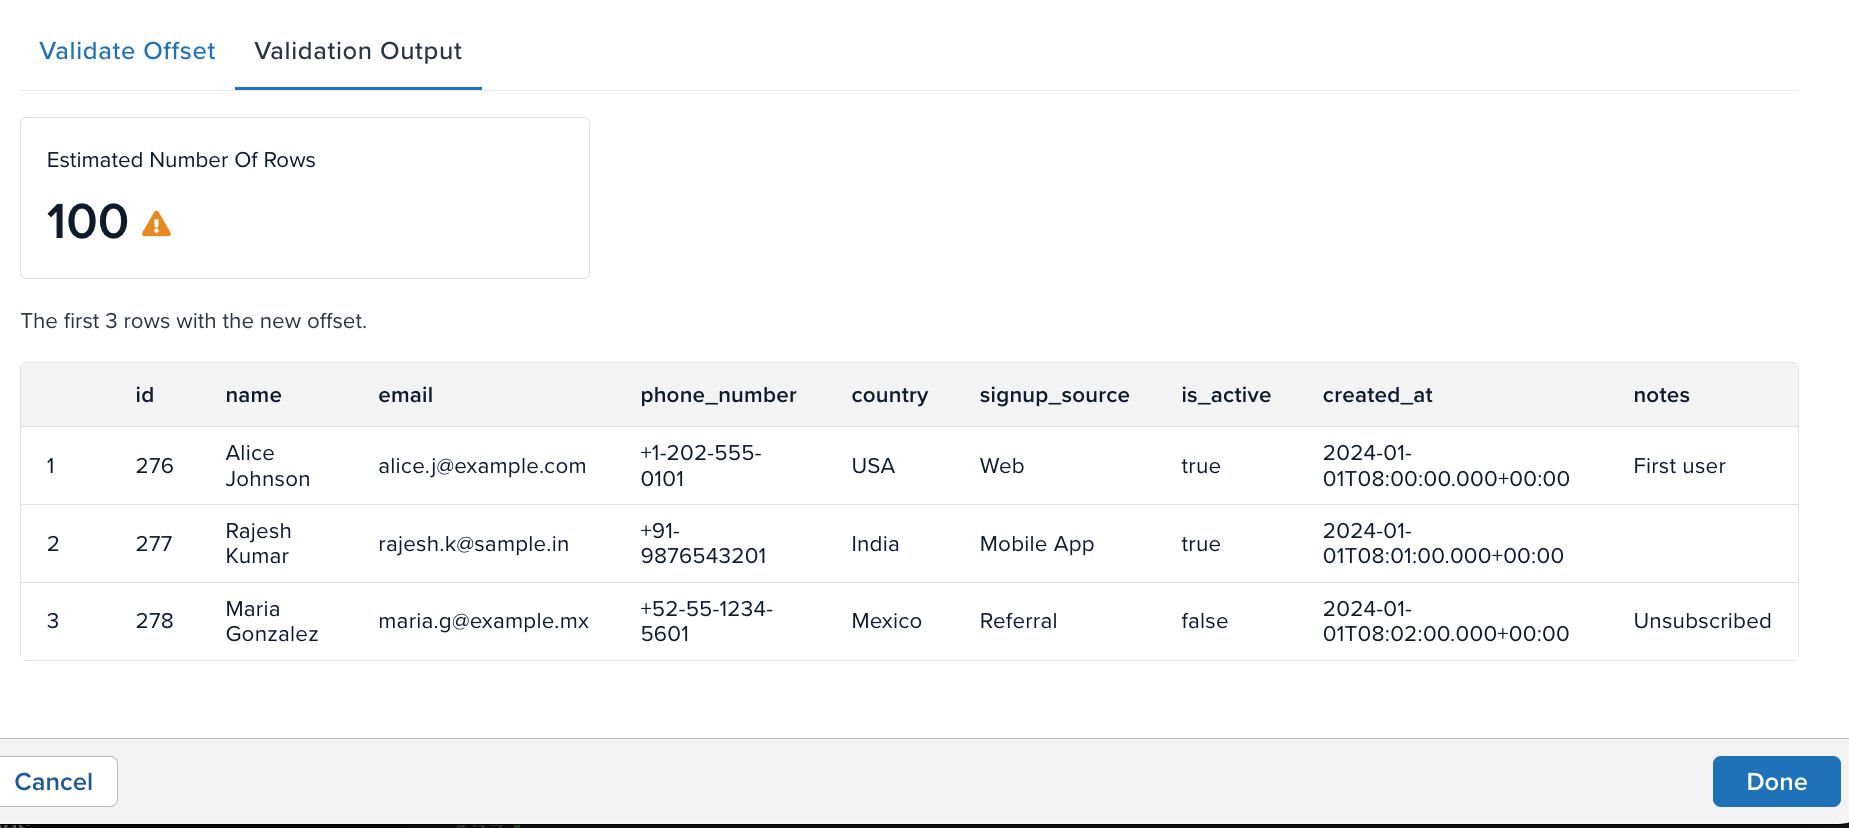
Click Done to confirm the new offset settings. Click Cancel to discard your changes.
Restart the data source after changing the offset.
This page was last updated: November 24, 2025