Authenticom DealerVault Data Connect Integration Setup Guide
This article describes how to set up an integration between Tealium Data Connect and Authenticom DealerVault.
The Authenticom integration with Tealium Data Connect lets you import the following vendor data feeds:
- Inventory
- Part Inventory
- Sales
- Open Repair Orders
- Special Order Parts
- Service
- Service Appointment
Requirements
- Tealium EventStream or AudienceStream
- Tealium Data Connect
- Tealium DataAccess (for EventStore or EventDB)
- Authenticom API access
Create an Authenticom integration
Use the following steps to create an Authenticom integration with Tealium Data Connect:
- Set up a Tealium Connect data source.
- Contact your Implementation Engineer or Customer Success Manager to get the recipes imported into your Data Connect environment.
- Establish a connection to the Authenticom API.
- Select a data type and vendor.
- Send events to Tealium.
- Set up an event feed for leads.
- Test with trace and activate the recipe.
Step 1: Set up a Tealium Connect data source
Set up a Tealium Connect data source. For more information, see Set up a Tealium Connect data source.
Step 2: Contact Tealium
Contact your Implementation Engineer or Customer Success Manager, and they will import the integration into your environment.
Step 3: Establish a connection to the Authenticom API
To establish a connection to the Authenticom API, perform the following steps:
- Go to Data Connect > Integrations.
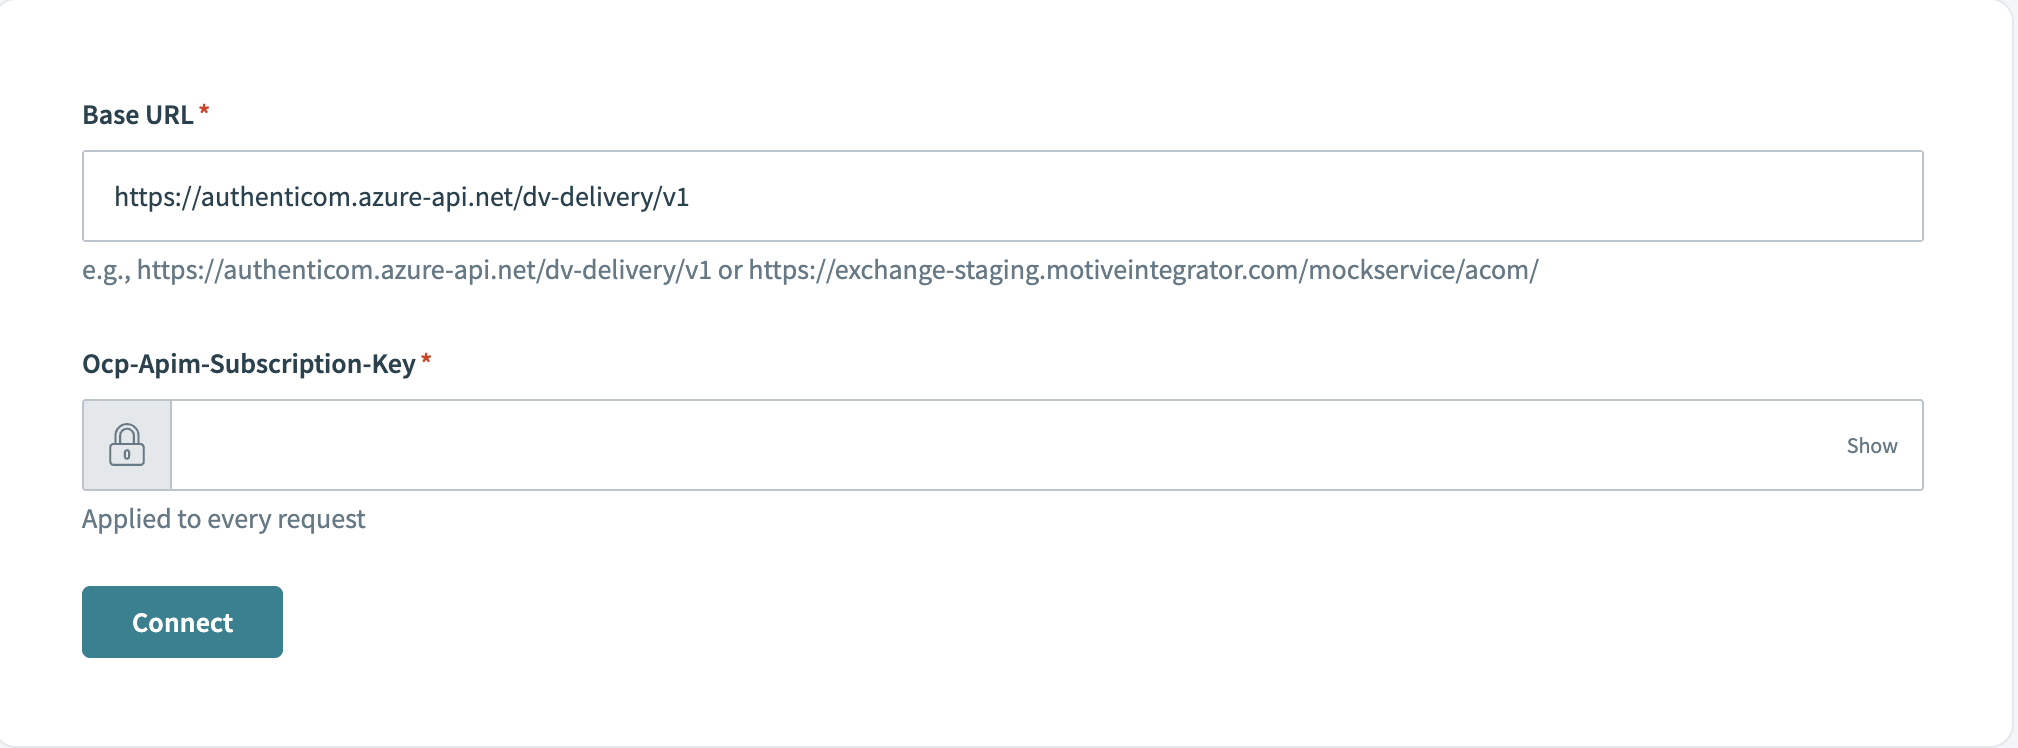
- Select the Authenticom connection.
- Do not change Base URL.
- Enter the Subscription Key, which is in the Authenticom Developers API portal in production.

Step 4: Select a data type and vendor
To select the data type and vendor, perform the following steps:
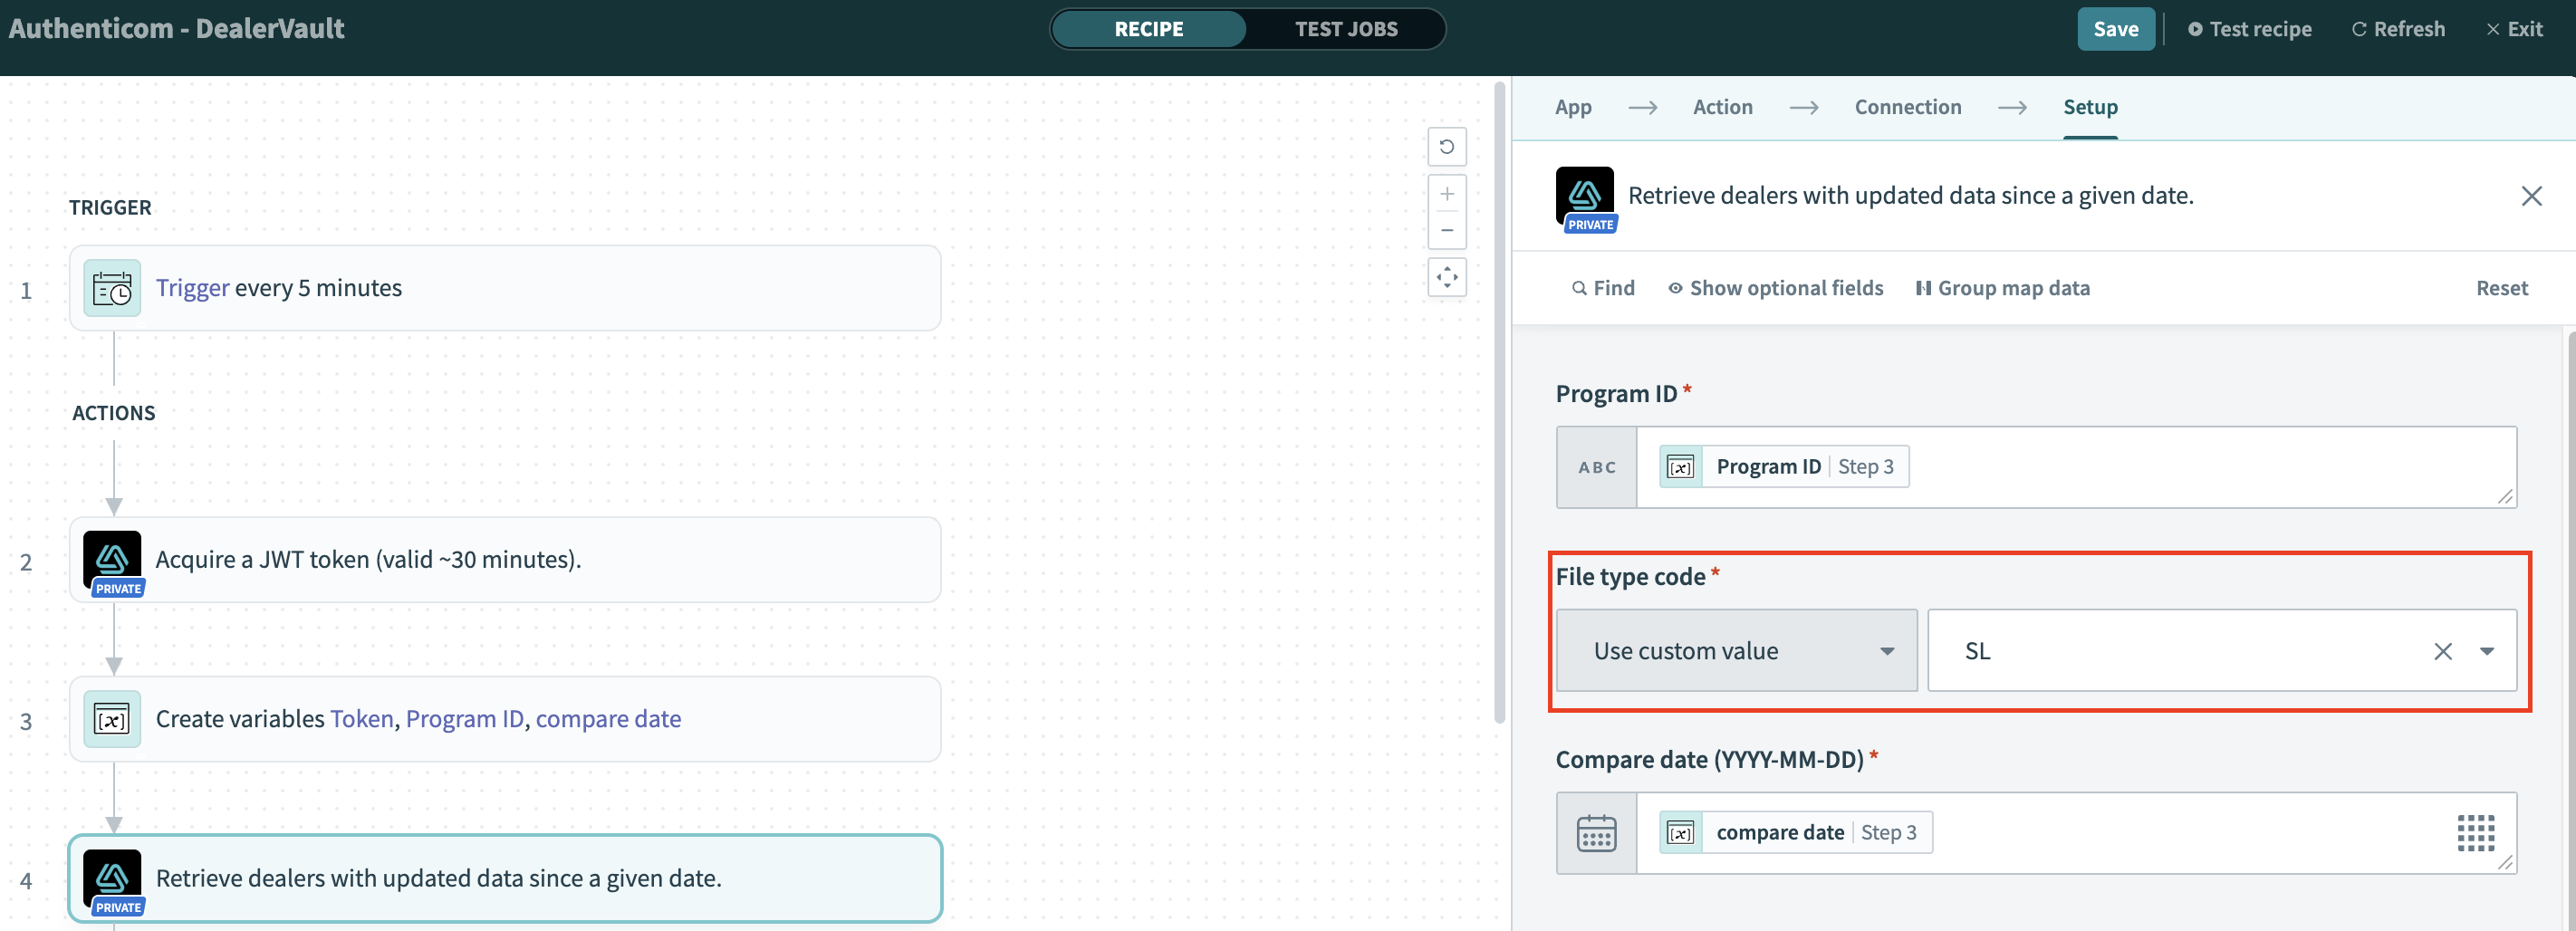
- Go to the recipe named Authenticom - DealerVault.
- Select step 4 of the recipe Retrieve dealers with updated data since a given date.
- Select the data type that you want to import into Tealium. The following data types are available:
INV: Inventory.PTINV: Part Inventory.SL: Sales.OPENRO: Open Repair Orders.SOP: Special Order Parts.SV: Service.SV_APPT: Service Appointment.
- In the top-right of the window, click Save.

Step 5: Send events to Tealium
To send events to Tealium, perform the following steps:
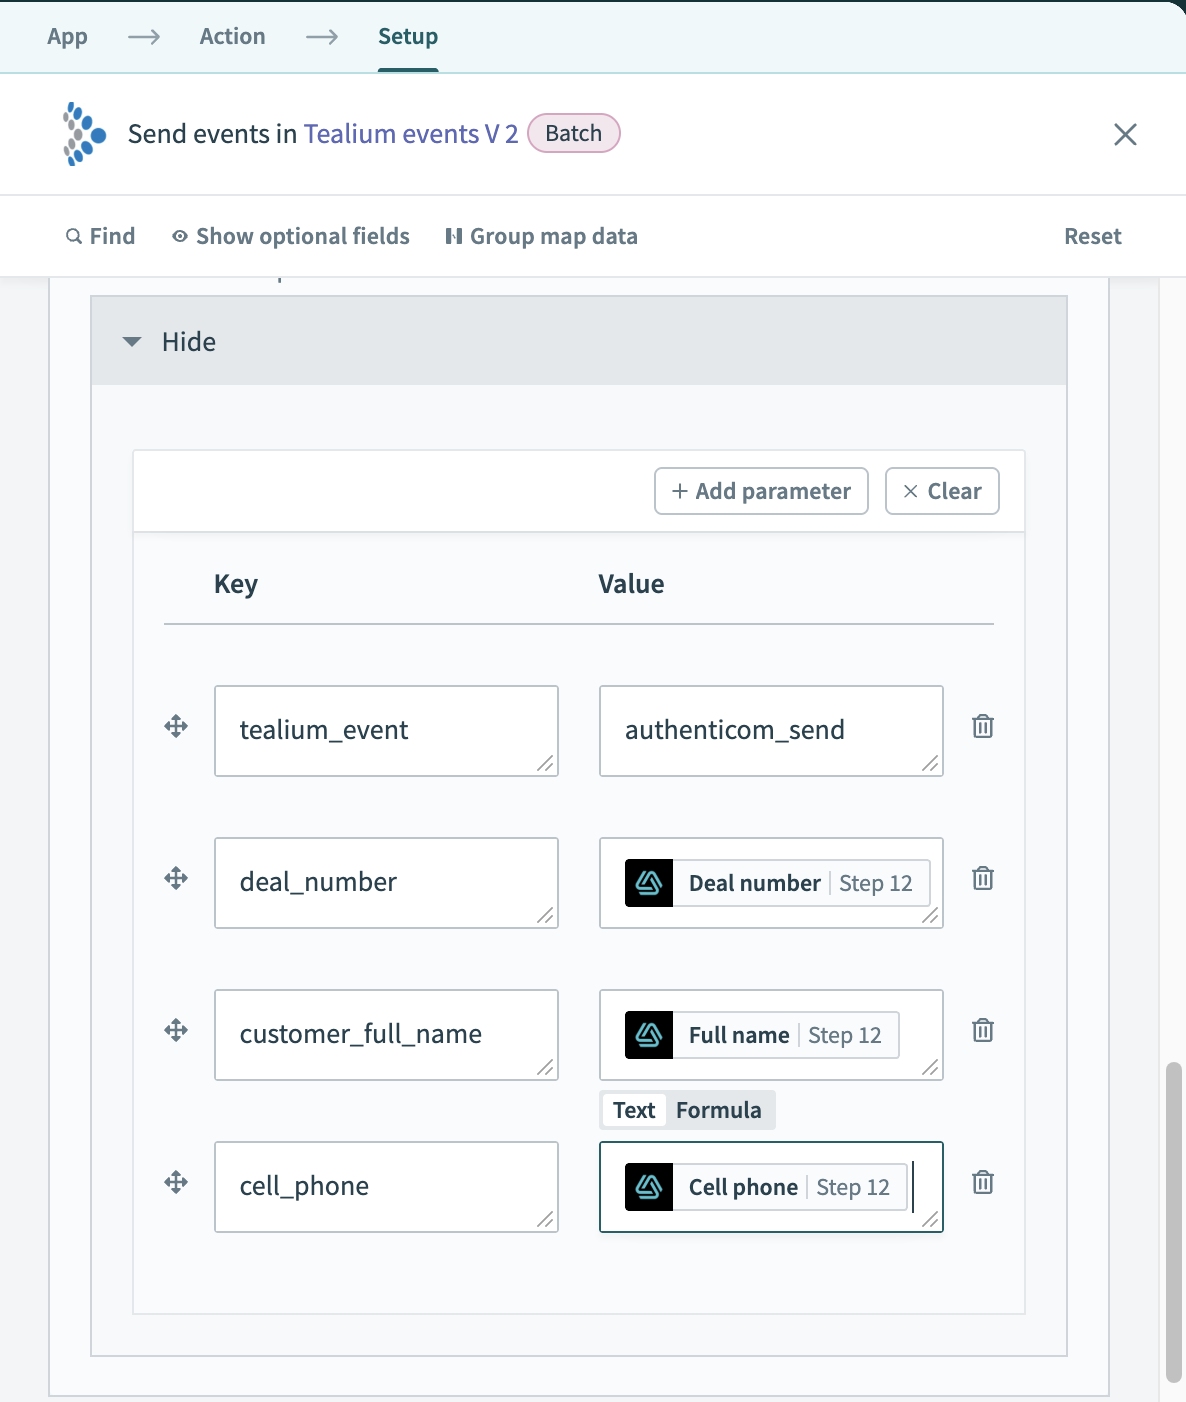
- Go to Send events in Tealium events V2.
- Configure the data that you want to send to Tealium.

For additional information, see Create a recipe: Configure an Action.
Step 6: Set up an event feed for leads

Use the following steps to create an event feed:
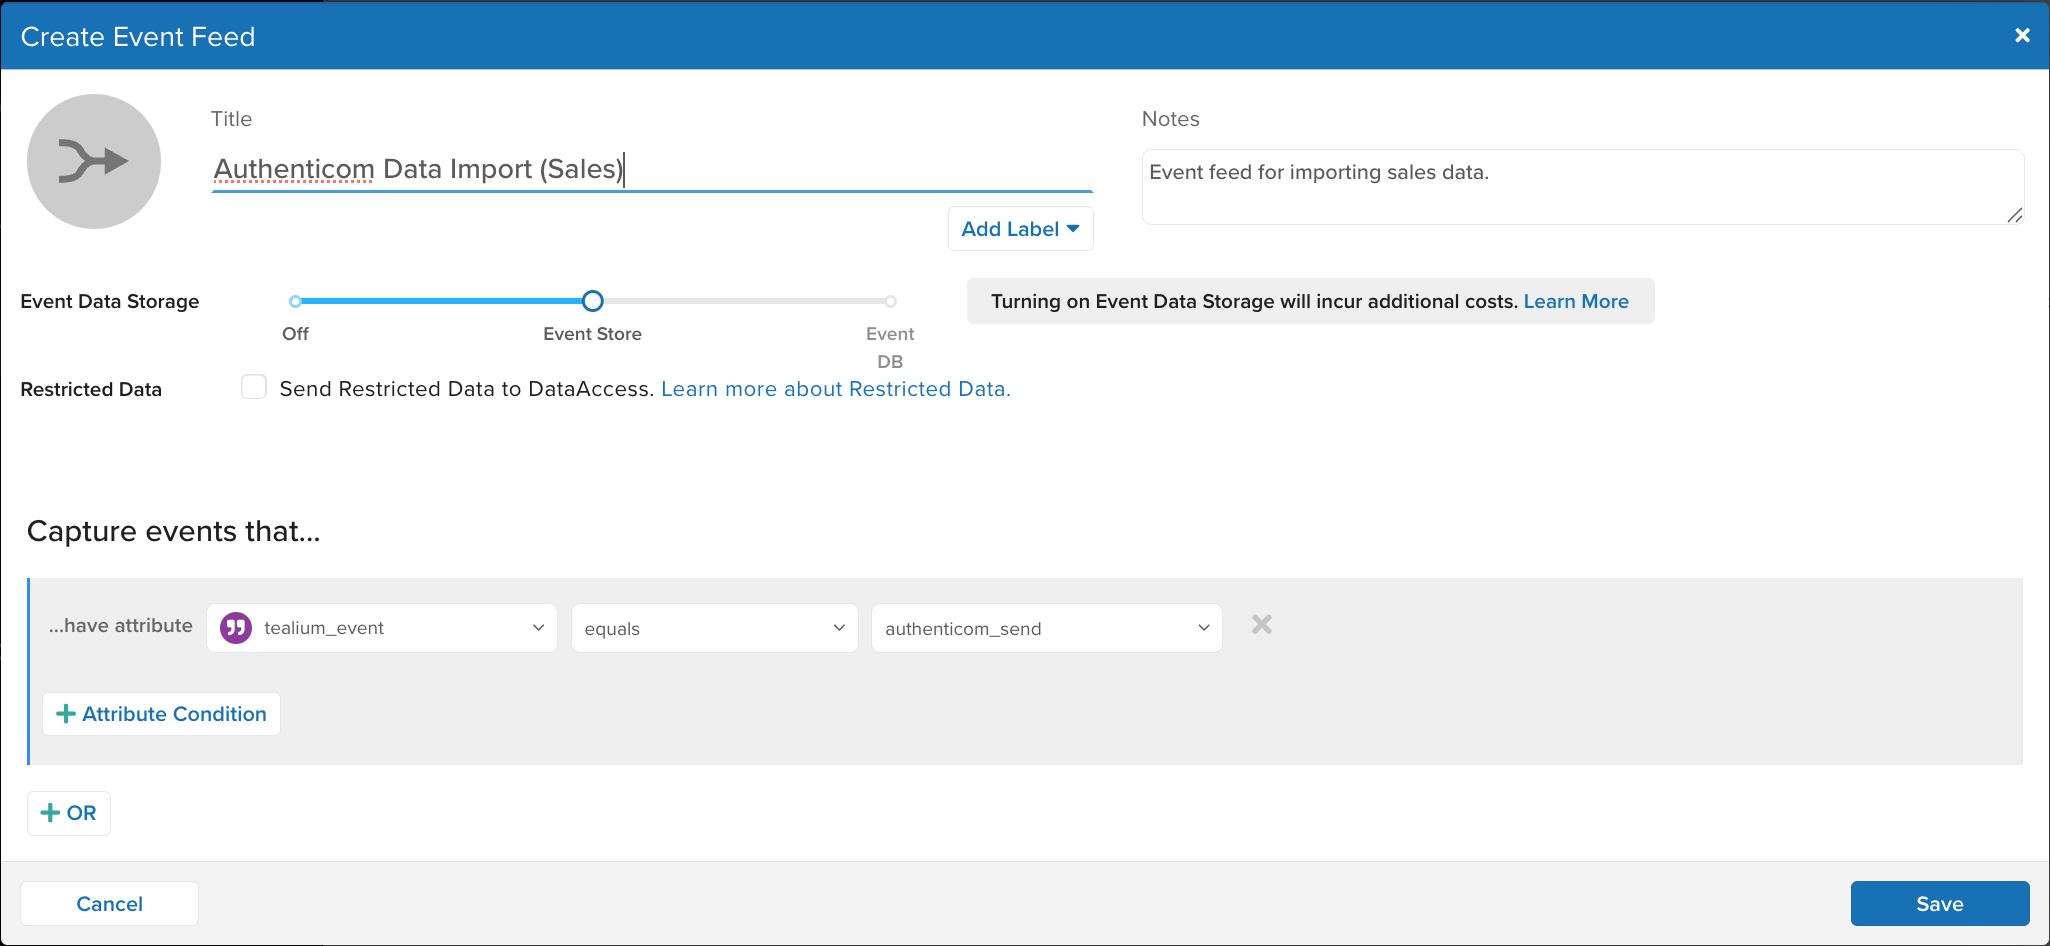
- Go to EventStream > Live Events and click + Add Event Feed.
- In the Create Event Feed dialog, enter a Title and any Notes.
- (Optional) Click Add Label to select labels to apply to this event feed.
- Under Event Data Storage, enable the feed for EventStore or EventDB.
- Set an Attribute Condition for the feed to capture events that match new lead events.
- Click Save.
- Save and publish your profile.
Step 7: Test with trace and activate the recipe
Before activating the recipe, perform thorough testing. Once testing is successful, activate the recipe to start the automated data integration process.
Use the following steps to test with trace and activate the recipe:
- Go to Trace.
- Under New Trace, click Start. A dialog with a trace ID appears.
- Copy the trace ID and click Continue.
- Go to Data Connect > Integrations.
- In the Integrations screen, perform the following steps for recipes that send new leads from Authenticom to Tealium:
- Select your recipe.
- Select the Tealium Events V2 action to edit it.
- Under Attributes to add, add a
tealium_trace_idkey and paste the trace ID in the Value. - Click Save.
- From the Start recipe list, click Test recipe.
- Return to the Trace interface to inspect the log details.
- After you are done testing, click Stop test.
- To activate the recipe, click Start recipe.
This page was last updated: September 24, 2025