Funnel attribute
This article describes the funnel data type and how to use it.
The funnel attribute is available in the following scopes: Visit and Visitor.

In most use cases, we recommend that you set up the funnel attribute as a visit-scoped attribute. This means the funnel resets at the end of each site visit and evaluates customer actions as new for every session.
This approach is beneficial because it tracks customer behavior on a visit-by-visit basis, which can then be used to dynamically inform audience segmentation.
For example, on a customer’s first visit, they complete up to step two, placing them in an audience segment for users who reached that stage. On a subsequent visit, the same customer progresses to step four of the funnel. As a result, they are removed from the step two audience and added to a new audience representing users who reached step four.
How it works
The funnel attribute tracks a sequence of actions taken by the user as steps. These steps measure the visitor’s progress from start to finish. A step is recorded when the configured rule occurs. When a step is recorded, attribute values can also be captured as a snapshot of information about the step. Funnel steps can be required or optional, except for the last step, which is always required.
Example funnels include: Checkout Funnel, Purchase Funnel, or a Lead-Generator Funnel.
Size limits
There are no storage capacity limits for funnel attributes, but these attributes are still limited by the maximum size of the profile after encryption and compression (400 KB).
Required and optional steps
When setting up a funnel, you define all the steps (both required and optional) in the expected sequence.
Required steps
Steps marked as required are recorded as they occur in the sequence that is defined in the funnel configuration. If a visitor performs a required step out of sequence, it is not recorded in the funnel. In other words, required steps are only recorded when they occur in sequence.
Example funnel behavior with three required steps: Step #1, Step #2, Step #3:
| Steps performed by visitor | Steps recorded by funnel |
|---|---|
| Step #1 | Step #1 |
| Step #3 (out of sequence) | Step #1 |
| Step #2 | Step #1, Step #2 |
| Step #3 | Step #1, Step #2, Step #3 |
Optional steps
Steps not marked as required are considered optional. Optional steps are only recorded if they occur in the exact sequence that is defined in the funnel. Optional steps can be skipped by the visitor and the funnel continues recording subsequent steps. However, when an optional step is skipped, and then performed later, it is not recorded or back-filled in the funnel. In other words, if an optional step is performed out of sequence, it is not recorded in the funnel.
Example funnel behavior with one optional step: Step #1, Step #2 (Optional), Step #3, and Step #4:
| Steps performed by visitor | Steps recorded by funnel |
|---|---|
| Step #1 | Step #1 |
| Step #3 (option Step #2 skipped) | Step #1, Step #3 |
| Step #2 | Step #1, Step #3 (Step #2 not back-filled) |
| Step #3 | Step #1, Step #3 |
In funnel tracking, especially when using visit-level attributes to determine a user’s progression, itʼs important to account for real-world behaviors, such as users leaving and re-entering the funnel at different stages.
For example:
- Step #1: User visits the homepage
example.com. - Step #2: User navigates to
example.com/subpage.
At this point, the user’s funnel attribute is marked as “Step #2”, reflecting their last completed step. - The user leaves the site (exits the funnel).
- On a later visit, the user lands directly on
example.com/subpage, skipping the homepage.
In a funnel where step #1 is required, the system expects the user to re-complete it before advancing. Since they didn’t re-enter through the homepage, the funnel logic halts and prevents them from being recognized as progressing through step #2 or beyond.
Why marking Step #1 as optional helps
By marking step #1 as optional, the funnel logic does not require it to be re-triggered. This means the user can:
- Start their session directly on step #2 (the subpage).
- Be properly attributed with funnel progression.
- Continue to be tracked through subsequent steps.
This configuration is particularly useful for the following scenarios:
- Users may enter the funnel at various points (not always at the beginning).
- Multiple sessions or devices are involved.
- You want to reduce friction in funnel tracking and improve attribution accuracy.
Capture attribute data
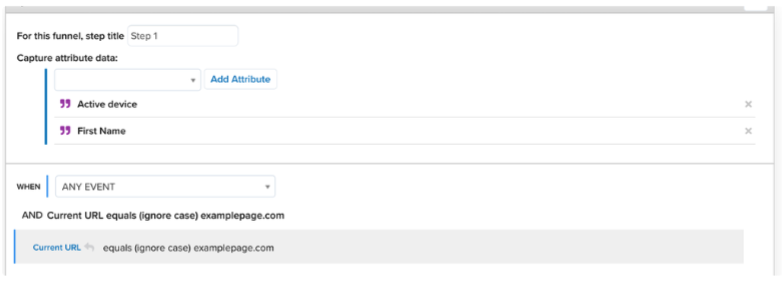
In addition to recording each step of a funnel, you can also capture the value of one or more attributes when a step occurs. Captured data provides more information about the state of the visitor when the step occurred.
Funnel attributes are accessible in AudienceStore, but not in AudienceDB or in data layer enrichment.
Enrichments
Create a step
Use this enrichment to create a step in the funnel. As you add funnel steps, the step listed at the top of the list is the first step in the funnel and the step listed at the bottom is the last required step. New steps are added to the top of the list.
To create a funnel step:
- Click Create a Step.
- Enter a step title.
- (Optional) To capture attribute values, select an attribute and click Add Attribute.
- For optional steps, clear the Is Required checkbox.
- Select a timing option and a rule.
Repeat these steps for each step in the funnel.
After entering all the steps, drag them into the proper sequence.
Examples
Example - Purchase
The following example demonstrates a basic purchase funnel with a path from a product page through the cart page and checkout page to the purchase page.
Step 1 - View Product
Capture data: product_name
Step 2 - View Cart
Capture Data: none
Step 3 - Checkout
Capture Data: none
Step 4 - Purchase Complete
Capture Data: order_id and order_total
Each of the steps are required, and when a step is complete, it is immediately funneled out while the visitor advances in the purchase funnel. This pattern of tracking and funneling continues until the visitor has successfully purchased the product. On the other hand, the purchase is considered incomplete if the visitor fails to complete any step in the funnel.
Example - Conversion funnel
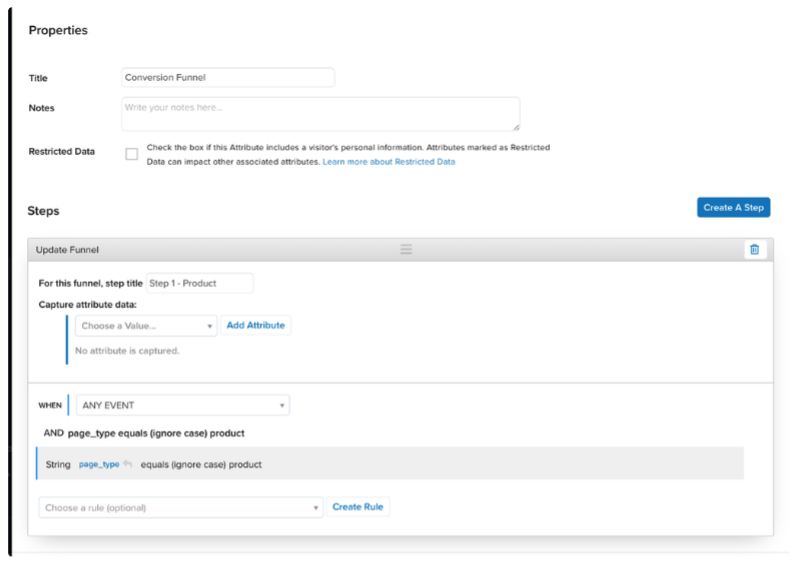
Create a funnel attribute named Conversion Funnel. Then, click Create a Step for each step of the funnel.
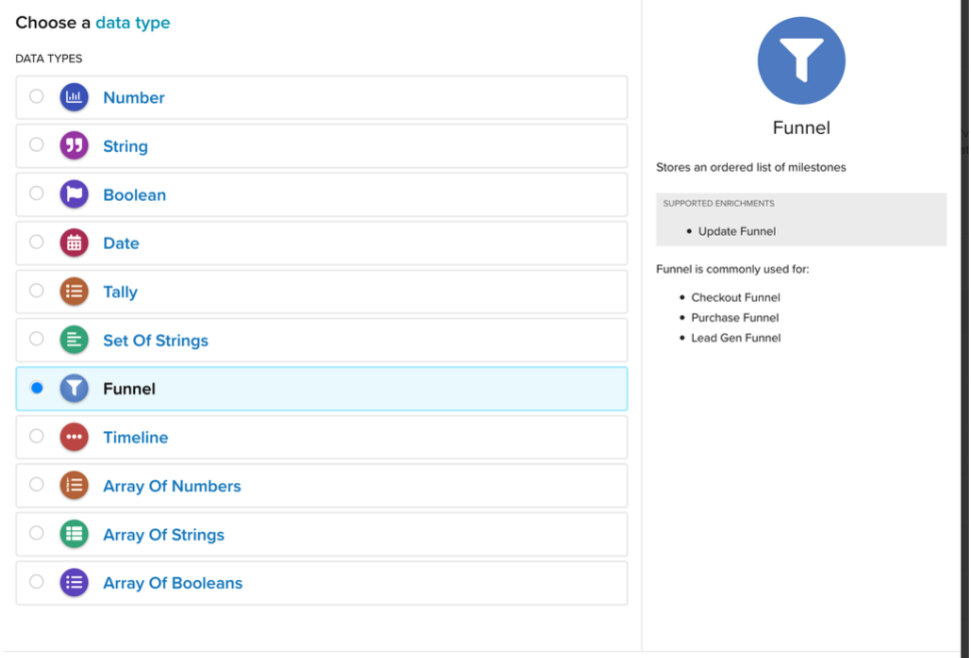
Step 1 - Viewed a Product
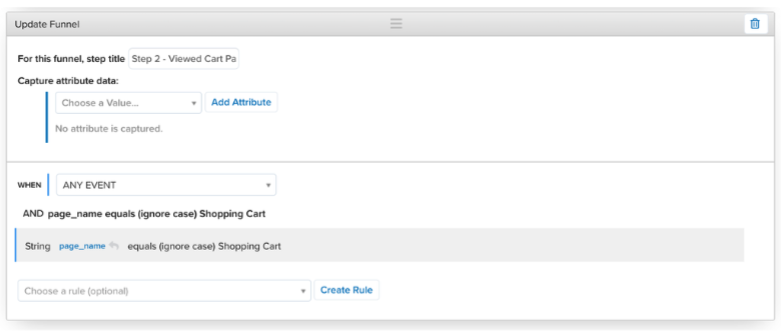
Step 2 - Viewed Cart Page
You must reorder this step and drag the UI container below the previous step. The attribute will follow the steps in order as they appear in the UI.
Step 3 - Viewed Checkout Page
This step is optional because the user may already be logged in.
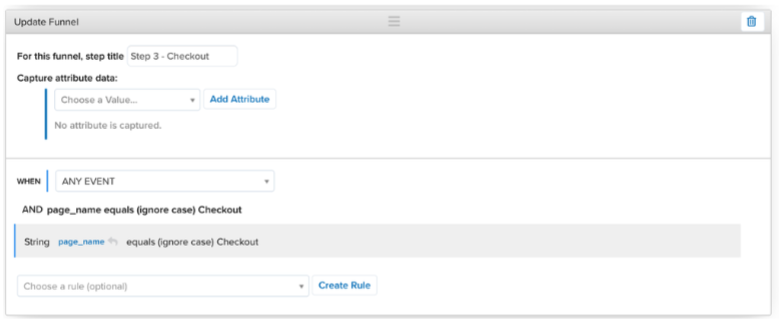
The following steps are all required and use the same logic as step 2.
Step 4 - Viewed Billing Page
Step 5 - Viewed Shipping Page
Step 6 - Viewed Payment Page
Step 7 - Viewed Order Review Page
Step 8 - Viewed Order Success Page
Funnel fallout
Knowing where a user dropped from the funnel is an important piece to many marketing campaigns, and AudienceStream can tell you the last step completed.
First, several rules must be created for each step of the funnel. For example the rule Conversion Funnel - Step 1 Complete checks if Step 1 - Product has been completed.
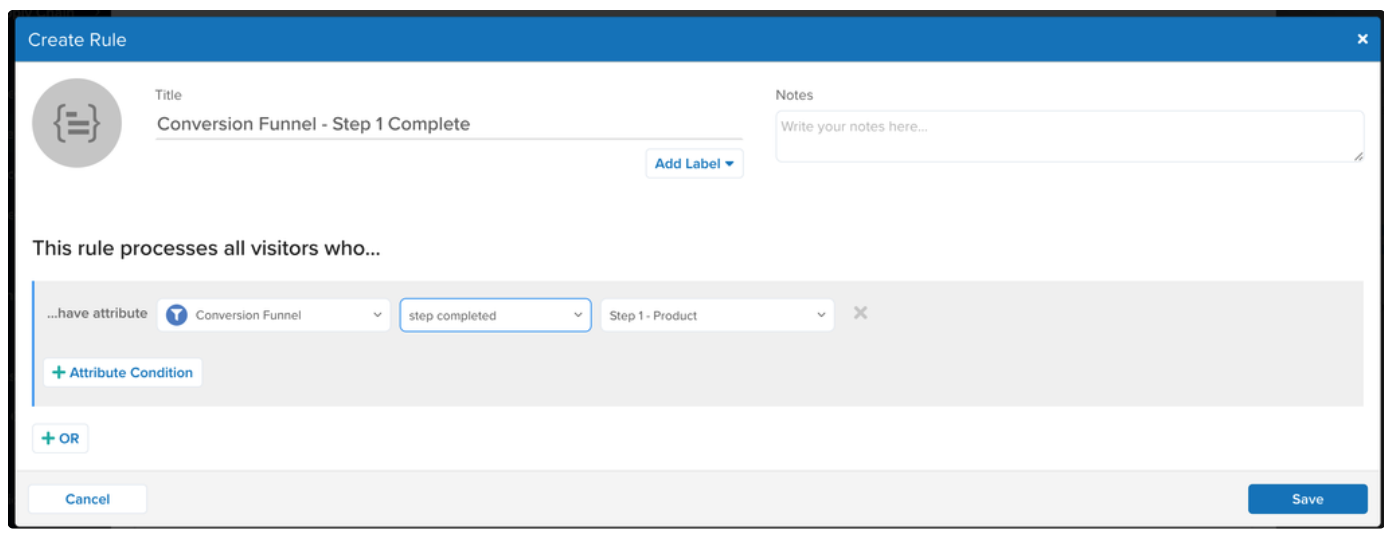
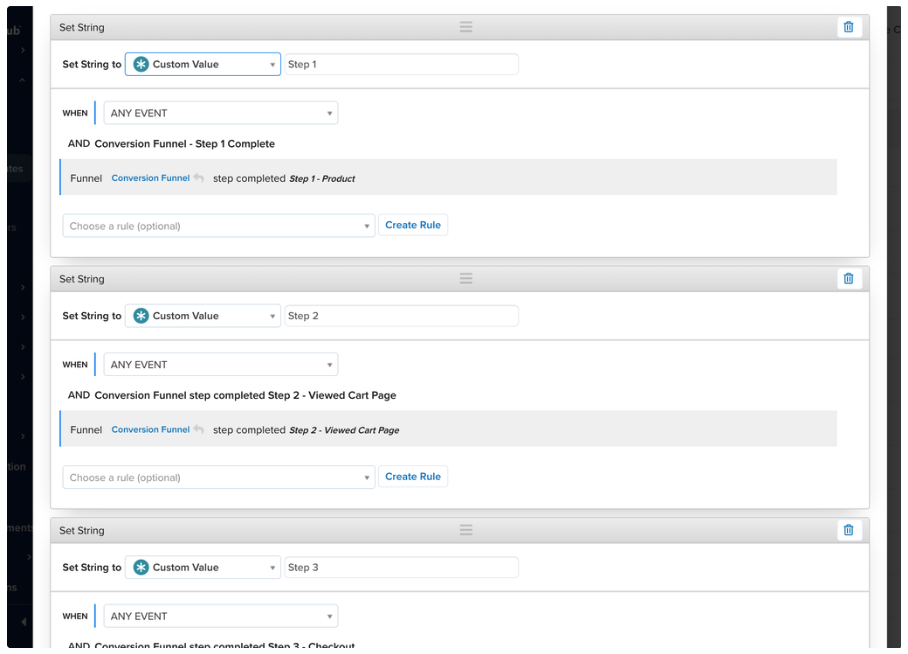
Then, create a string attribute named Conversion Funnel - Last Step Completed. This string attribute will have an enrichment for each step of the funnel and will check for each step of the funnel being completed using the rules above.
Abandonment
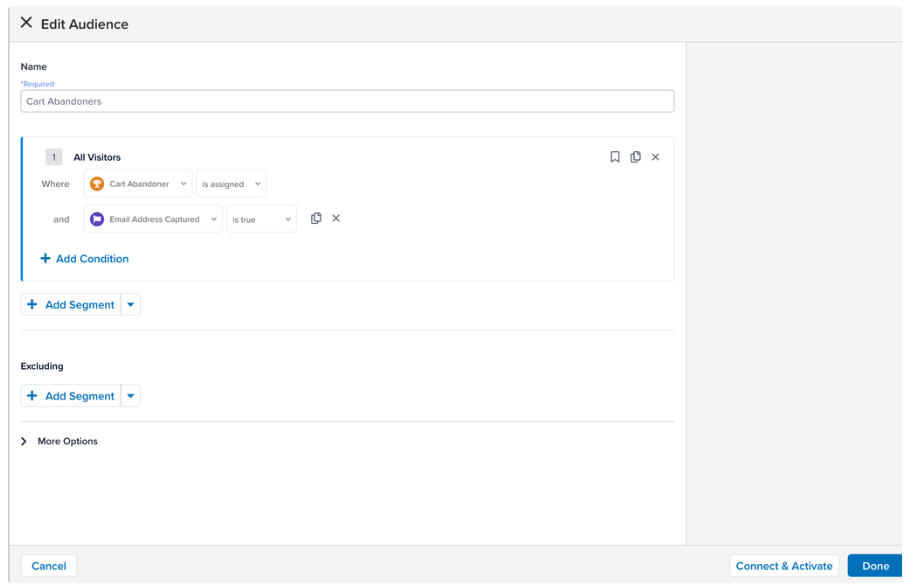
Abandonment must be determined at the end of the session to ensure that all page views have been accounted for. This can be done by creating a badge titled Cart Abandoner that looks at the conversion funnel at the end of the visit and checks to see if the funnel was started but not completed.
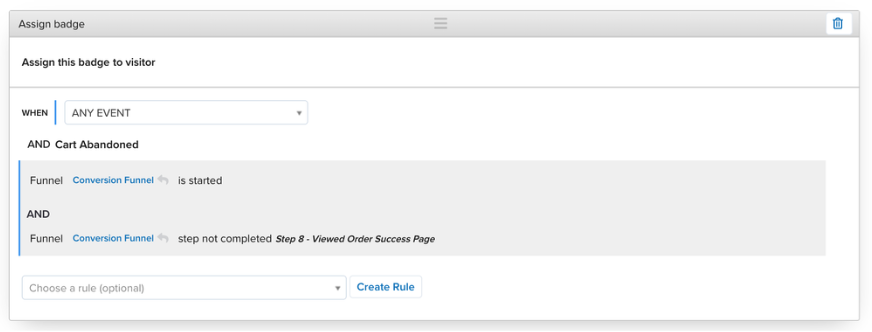
We also want to remove the badge upon the Page View event when the conversion funnel is completed.

Audience
We can then add an audience that makes use of the newly created badge. The audience condition validates that we have a user identifier, such as email address, so that they can be targeted.
Action
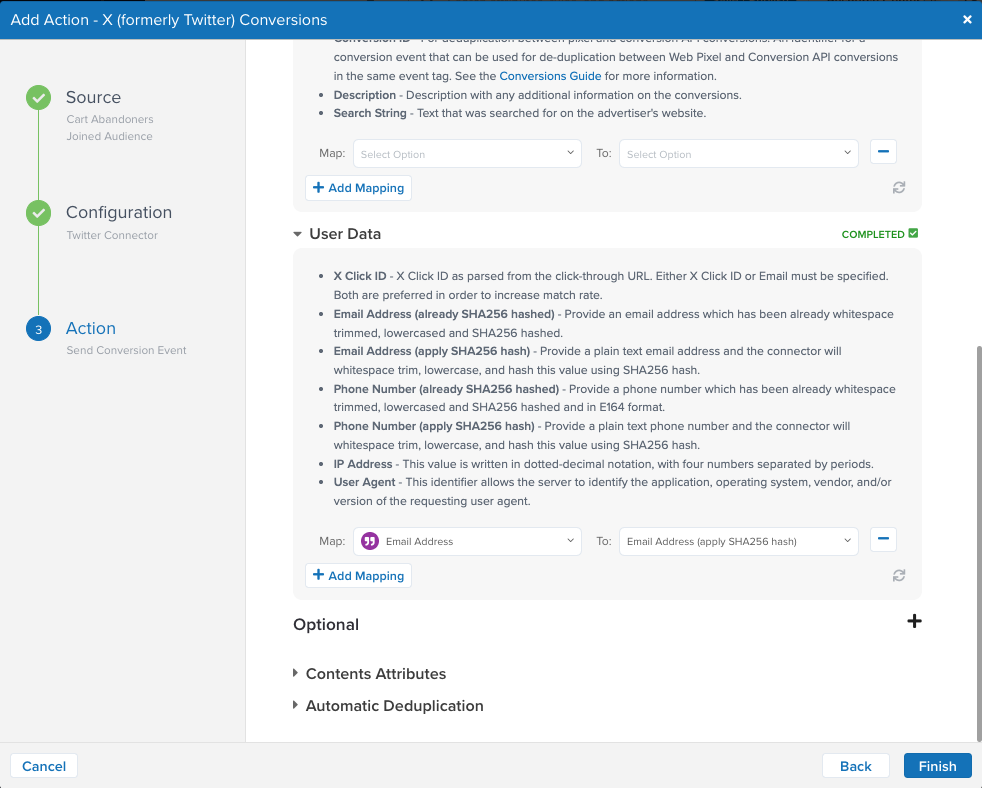
This audience can now be used to trigger any connector to help get the customer back to the website and convert.
The who: In our example, this customer email address is used to tell the vendor who is the user.
The what: We are telling the vendor the visitor abandoned the cart and at which step.
Trace
To see how this works, perform a trace and navigate through each step of the conversion funnel.
This page was last updated: December 18, 2025